 It might not be as exciting as poring over your road maps or travel journal, busily planning your next destination.
But having a thorough understanding of your RV’s electrical system is important. After all, your rig’s fancy wiring is what powers all the creature comforts that make traveling in this way so attractive, like your microwave or your air conditioning unit or your coffee maker. I don’t know about you, but in my RV, coffee is pretty darn important — so it’s worth learning a few electrical ins and outs to protect your system. (Knowing enough to not accidentally shock yourself to death is another great perk.)
So whether it’s your first time on the road or you’re an old hat who needs a refresher, and whether you’re an off-grid boondocking fiend or a “glamper” who wouldn’t dream of RV camping without hookups, here’s a quick guide to what you absolutely need to know about your RV’s electrical systems.
RV Basics
Don’t worry — high school physics was our last encounter with most of these concepts, too, so we won’t get too deep in the weeds with this stuff.
But there are a few things you should understand about the way your RV supports and powers up your installed electronics.
Let’s start with learning about your RV’s battery systems. Your RV actually has not one or two, but three separate batteries: the 12-volt DC automotive system (just like the one in your car), the 12-volt DC coach system (sometimes known as the “house batteries”), and a 120-volt AC coach system.
The 12-volt DC automotive battery is literally the same kind you’ll find under the hood of your day-to-day driving vehicle. So for the purposes of this post, we’ll just talk about the other two systems.
Your 12-volt coach battery system, or “house batteries,” powers certain smaller electronics in your RV’s interior: the water pump, lighting, and your carbon monoxide detector, among others. These batteries are sometimes, but not always, charged when your RV is running, but they will automatically charge whenever you hook up to power.
The more powerful 120-volt system is the one that runs your larger appliances (i.e., air conditioner and coffee maker), and it’s powered either by an external hookup or a generator. Now, let’s talk about the source of electric your RV uses to charge these batteries.
RV Power
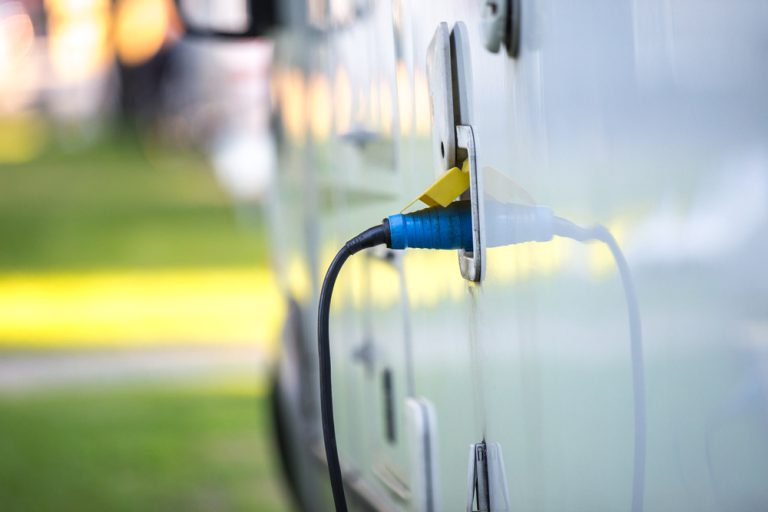
Depending on what type and size of RV you purchase, your rig will come with either a 30-amp or 50-amp plug so you can connect your RV to external power. Obviously, which size your RV supports will have an impact on how many electric devices you can use at one time.
You’ll notice that a 30-amp plug has three prongs while a 50-amp plug has four. In developed campgrounds with RV hookups, 50-amp power may not always be available, so it can be useful to invest in an RV power adapter or converter.

These adapters only cost about $20, and they’ll allow you to plug in even if the campground you’re at doesn’t offer 50-amp connections. Keep in mind, however, that this means you’ll be able to use fewer electronics at one time without tripping your RV’s breakers.
If you’re boondocking or off-grid camping without access to hookups, you’ll be able to use your RV’s on-board generator in order to create the power you need to use those electronic devices. However, generators must burn fuel to create energy, which means they need to be filled with gas or liquid propane.
Complete RV Electrical System
Now that you know a little bit more about what packs your RV’s power, let’s talk about keeping those systems safe next time you pull into a campground. Remember, our goal is an uninterrupted supply of freshly-brewed coffee!
The first thing you’ll want to do before plugging in is to ensure every electronic device in your RV is powered off, and ideally even unplugged. That way, if anything is funky with the connection, you won’t instantly fry all of your appliances.

If you really want to go the extra mile, you can invest in a polarity tester, which will allow you to test the campground’s power source before you plug your rig in to ensure the wiring is in good shape. It’ll run you about $40 on Amazon — but that’s a whole lot cheaper than replacing, say, your laptop!
Just as you would at home, it can also be prudent to route your electronics through a surge protector, just in case you do run into any electrical hiccups along the way. They’re widely available for purchase, of course, but you more than likely have a few extras lying around at home already!
RV Electrical System Upgrades
You may be wondering about how you can upgrade your electrical system for a greener, more efficient RV, including investing in solar panels or lithium batteries.
This is a great move for avid boondockers, since they find themselves so often without access to shore power. As most campers know, the initial cost of a solar panel setup is nothing to sneeze at, but it pays dividends in the long run — both in generator fuel cost savings and in quiet camping days free of stinky generator emissions.
However, it’s important to know that it’s not as simple as purchasing some solar panels and slapping them on top of your motorhome. Just like a generator, the power those solar panels generate needs to be converted into something that’s usable by your RV batteries, which involves purchasing a power inverter and a charge controller and setting everything up correctly.
Sounds confusing, right? And we won’t lie, it can be at first. But that’s OK! We covered everything you need to know about getting your solar electric system up and running right here on the blog — you can read it all in this post.
So there you have it — a basic rundown of your RV’s electrical system! Not too bad, right? Now, about that cup of coffee…
This post may contain affiliate links.
