
Your RV electrical system consists of two separate systems working together. There’s a 12-volt DC system powered by batteries that runs lights, water heater ignition, furnace startup, and refrigerator controls. There’s also a 120-volt AC system powered by shore power or generators that operates major appliances like microwaves, air conditioners, and TVs. RVs use either 30-amp service, with a three-prong plug and 3,600 watts maximum or 50-amp service, with a four-prong plug and 12,000 watts maximum.
Proper battery maintenance, surge protection, and knowing your circuit breaker locations can prevent costly damage and keep your camping trips running smoothly.
This post contains affiliate links. RVshare may receive compensation if you make a purchase after clicking on a product link.
RV Electrical Systems: Key Differences At a Glance
| Component | 12-Volt DC System | 120-Volt AC System | 30-Amp Service | 50-Amp Service |
| Power Source | Battery (or batteries) | Shore power/generator | Shore power/generator | Shore power/generator |
| Voltage | 12 volts | 120 volts | 120 volts | 240V (two 120V legs) |
| Maximum Watts | Battery capacity | Varies | 3,600 watts | 12,000 watts |
| Plug Type | N/A | N/A | 3 prongs (TT-30P) | 4 prongs (14-50P) |
| Powers | Lights, furnace, water heater ignition, refrigerator controls | Major appliances, AC, microwave, TV | Single AC unit, basic appliances | Dual AC units, multiple appliances |
| Typical RV Size | All RVs have this | All RVs have this | Small-medium RVs, travel trailers | Large fifth wheels, Class A motorhomes |
| Can Adapt Up? | N/A | N/A | Yes (with adapter to 50A) | No (cannot adapt 30A RV to 50A) |
| Can Adapt Down? | N/A | N/A | N/A | Yes (with adapter to 30A) |
Why Understanding RV Electrical Basics Matters in 2026
Modern RVs come equipped with more electrical devices than ever before, from residential refrigerators and induction cooktops to smart home systems and high-demand entertainment setups. Understanding your RV’s electrical system isn’t just about convenience; it’s about safety, preventing damage, and making informed decisions about your power usage.
- Safety and damage prevention: Electrical problems are among the leading causes of RV fires and equipment failures. A basic understanding of your system helps you spot warning signs before they become dangerous. Knowing the difference between 30-amp and 50-amp service helps prevent circuit overloads, which can damage appliances, melt wiring, or cause worse problems.
- Cost savings: Replacing a $300 converter because you didn’t use a surge protector, or damaging your $1,500 air conditioner by plugging into faulty shore power without testing it first, are completely avoidable expenses. A $40 polarity tester and a few hundred dollars for surge protection can save thousands in repairs.
- Better camping decisions: Understanding your power limits helps you choose appropriate campgrounds, decide whether you need a generator, and determine if solar panels would meet your needs. If you’re boondocking, knowing your battery capacity and discharge time prevents you from getting stranded without power.
- Troubleshooting ability: When something goes wrong — and it will — basic electrical knowledge helps you quickly identify whether the problem is a tripped breaker, a blown fuse, a faulty pedestal, or something requiring professional help. This saves time, money, and frustration on the road.
How Does RV Electricity Work?
Whether you’re in an RV or your sticks-and-bricks home, you will never have unlimited electrical power. Understanding a formula you probably learned in high school helps you manage your RV’s electricity: watts = amps x volts, written as W = A x V.
Watts (overall power) is a product of current (amps) and voltage. If you want to know how many different electrical devices you can have on at one time in your RV, this formula tells you. As long as you stay within the available wattage, your circuits run smoothly. Exceed your available wattage, and you’ll trip the circuit in your RV’s electrical system. You may know this firsthand if you’ve ever tried to run your microwave and hair dryer simultaneously.
We should also briefly cover the difference between AC and DC electrical systems since your RV has both. In a DC system, electricity only flows in one direction, which is why it’s called a Direct Current system. With AC electricity, the current changes directions periodically—which is why it’s called an Alternating Current.
Practical example: A 30-amp RV has 3,600 watts available (30 amps x 120 volts = 3,600 watts). If your air conditioner uses 1,500 watts, the microwave uses 1,000 watts, and the coffee maker uses 900 watts, running all three simultaneously requires 3,400 watts. That’s very close to your 3,600-watt limit, with no room for anything else. This is why 30-amp RV owners practice “power juggling” — turning off one appliance before starting another.
What Are the Two RV Electrical Systems?
Your RV has two separate electrical systems: a 12-volt DC electrical system and a 120-volt AC system. These work together but power different components.
The 12-volt DC system is powered by a battery (or in some cases, multiple batteries). It powers the start-up of your water heater, furnace, and refrigerator. It also powers most of the lights in your RV’s living space, interior fans, water pump, and several other things. This system allows your RV to function without being plugged into shore power.
The 120-volt AC system is powered by an RV electrical hookup plug (shore power) or a generator. It powers daily-use items like kitchen appliances, your TV, air conditioning, and other large electrical appliances. This is similar to the power in your home.
When you’re plugged into a campground RV electrical pedestal or other power source, your 12-volt battery or batteries automatically charge. If you’re boondocking or dry camping and not plugged in, you can use your batteries to power anything that runs off 12 volts. Adding an inverter to the mix converts the 12-volt battery’s direct current to 120-volt alternating current, so you can power appliances that require 120 volts. It’s good to know how much discharge time you have, since your RV’s 12-volt system, like all batteries, will eventually run out of juice and need to be recharged.
What’s the Difference Between 30-Amp and 50-Amp Service?
Almost all RVs come with a power cord to plug into the campground electrical pedestal with hookups, known as a “shore power” connection. These power cords come in two amperages: 30-amp and 50-amp, and understanding the difference is crucial for managing your RV’s electrical needs.
30-Amp Service:
- Three-prong plug (TT-30P): one 120-volt hot wire, one neutral, one ground
- Maximum power: 3,600 watts
- Typical RVs: Smaller travel trailers, Class C motorhomes under 30 feet, older RVs
- Can power: One air conditioner, basic appliances (not all at once)
- Requires power management: You’ll need to turn off some appliances before using others
50-Amp Service:
- Four-prong plug (14-50P): two 120-volt hot wires, one neutral, one ground
- Maximum power: 12,000 watts (two separate 50-amp legs at 120 volts each)
- Typical RVs: Large fifth wheels, Class A motorhomes, luxury travel trailers
- Can power: Dual air conditioners, multiple appliances simultaneously
- More flexibility: Far less power juggling required
Adapting between services: While many campgrounds have RV electrical hookups for both 50-amp and 30-amp cords, some have only 30-amp hookups. Therefore, it’s a good idea to invest $20 or so in a 50-amp-to-30-amp adapter, often called a “dogbone” adapter. Keep in mind that if you’re reducing your amperage to 30, you won’t be able to use as much electricity as you would if you were plugged in at 50.
Important note: A 50-amp RV can be adapted to use a 30-amp cord, but a 30-amp RV can never be adapted to safely use a 50-amp cord. The internal wiring in a 30-amp RV is only designed to handle 30 amps. Use the shortest adapter and extension cords possible to avoid voltage drop.
How Do RV Batteries Work and What Powers the 12-Volt System?
Your RV’s 12-volt system needs to have a grand total of 12 volts. This can be achieved with a single 12-volt battery or several batteries wired in parallel. However, using two 6-volt batteries wired in series (essentially creating a 12-volt battery) is typically better than using a single 12-volt battery.
Why two 6-volt batteries are better: This configuration usually gives you much longer battery life, or what’s called a deeper discharge time. The trade-off for using two 6-volt batteries is that they take up more space than a single battery. But that trade-off may be worth it if you want extended battery life, especially for boondocking or off-grid camping.
Battery types and maintenance:
- Lead-acid batteries: Require checking electrolyte levels and adding distilled water periodically; less expensive upfront
- AGM (Absorbed Glass Mat) batteries: Maintenance-free, better for vibration resistance, longer life, but higher cost
- Lithium batteries: Longest lifespan, lightest weight, fastest charging, most expensive, but becoming more popular in modern RVs
Regular battery maintenance and inspection is the easiest way to spot small problems before they become big issues. Look at your batteries and all their connections frequently. A good time might be just before you depart on a trip. Ensure that all connection points are secure, nothing looks damaged or frayed, and everything is clean with no signs of corrosion.
What Safety Precautions Should I Take Before Plugging Into Shore Power?
When you pull into your campsite, it’s tempting to plug right in and turn everything on. However, you want to keep safety in mind, especially when dealing with electricity.
- Test the hookup with a polarity tester
First, it’s a good idea to test the hookup with a polarity tester to make sure the campground’s wiring is in good shape. If it’s not, your polarity tester will tell you before you fry any or all of the components of your RV electrical system. This is a relatively common and affordable tool that can be purchased for $40 or less, and it’s a great insurance policy against inadvertent damage to your RV electrical wiring.
- Switch everything off
Before you plug in, take safety precautions and switch everything off—both your RV’s electrical system and the RV’s electrical pedestal. Make sure everything connected to any interior RV electrical outlet is powered off, too.
- Plug in firmly, then switch on
Once your power cord is firmly plugged in, then switch things back on at the pedestal first, then inside your RV. This prevents “arcing,” which can pit the metal on your prongs and lead to failure down the road.
- Consider surge protection
You might also consider installing a surge guard to protect your RV’s electrical system against potentially damaging surges. These cost a few hundred dollars, but again, it’s insurance against a bigger, more destructive problem. RV parks can have faulty wiring, voltage spikes, and power surges that damage expensive equipment.
What RV Appliances Use the Most Electricity?
Not everything you plug in draws the same amount of electricity. Some devices run quite well on very little power, while others are big draws on your available power. In general, anything that generates heat or gets cold will draw a lot of power, and you can’t run too many of these at once, especially if you’ve got a 30-amp power cord.
| Appliance | Typical Wattage | Power Level | Notes |
| Air conditioning unit | 1,200-1,800W | High | Largest single draw; can’t run with other high-draw items on 30A |
| Hair dryer | 1,200-1,800W | High | Often trips breakers on 30A systems |
| Space heater | 1,200-1,500W | High | Avoid running with AC or microwave |
| Electric water heater | 1,000-1,500W | High | Switch to propane mode when running other appliances |
| Microwave | 800-1,200W | High | Can’t run simultaneously with AC on 30A |
| Coffee maker | 800-1,200W | High | Turn off before using other heat appliances |
| Toaster | 800-1,200W | High | Use propane stove instead to save power |
| Curling iron | 800-1,500W | High | Unplug when done; easy to forget |
| TV | 100-400W | Low | Safe to run with most other appliances |
| Stereo system | 100-300W | Low | Minimal impact on power budget |
| Laptop computer | 50-100W | Low | Can run multiple laptops simultaneously |
| Phone charger | 5-20W | Low | Negligible power draw |
| LED lights | 10-20W each | Low | Run as many as needed |
| Refrigerator (propane) | Minimal | Low | Switch to propane to free up electric capacity |
Power management tip: On a 30-amp system, running your air conditioner (1,500W) plus microwave (1,000W) uses 2,500 watts, leaving only 1,100 watts for everything else. This is why you can’t blow-dry your hair while reheating leftovers if the AC is running.
What Are My Options for RV Generators?
If you don’t have the option to hook up to shore power as you would at a developed campground, you can still generate the power you need to enjoy your electrical appliances. Many large motorhomes come with a propane-operated generator pre-installed. With smaller motorhomes and travel trailers, you may need to purchase an aftermarket one.
The generator will create AC power, which runs your 120-volt system and allows you to use bigger appliances like your HVAC system and refrigerator. Generators typically range from 2,000 – 7,000 watts, depending on your RV’s needs.
Generator considerations:
- Noise level: Generators can be loud; many campgrounds have quiet hours restricting use
- Fuel cost: Propane or gasoline costs add up, especially during extended boondocking
- Exhaust fumes: Can be unpleasant for you and neighboring campers
- Maintenance: Requires regular oil changes, fuel stabilizer, and exercise runs
Many boondockers also prefer not to use a generator due to the cost of propane and the noise and smell of its exhaust, which leads us to another option: solar power.
Can I Use Solar Panels to Power My RV?
If you’re an RVer who likes camping off the grid, or you enjoy public campgrounds that may not offer power hookups, you might consider using solar panels to power your RV and charge your batteries. This is an especially great option for RVers who prefer boondocking, or dry camping, since there’s rarely any need to plug in.
RV solar panels come in a variety of sizes, and they’re all rated by the number of watts they produce. Bigger RVs need more panels, and they’ve got the roof space for them. Solar panels get wired directly to the battery and the inverter/charger unit. So while there’s some upfront work to get them up and running, the big benefit is that you can be almost totally self-reliant for your electrical needs.
Important limitations:
- You need an inverter: This transforms the power your solar panels generate into the electrical current your RV’s appliances need to run
- Air conditioning is difficult: Although solar power can help you generate enough electricity for most small appliances, it’s pretty tough to run your air conditioning on solar alone
- Weather dependent: Cloudy days and winter months significantly reduce solar output
- Upfront cost: Quality solar setups cost $1,000-$5,000+, depending on the size and components
Solar panels work best for maintaining batteries and running lights, fans, water pumps, and small electronics. They’re excellent for boondockers who don’t need air conditioning and are willing to manage power consumption carefully.
Here’s a video to help you learn more:
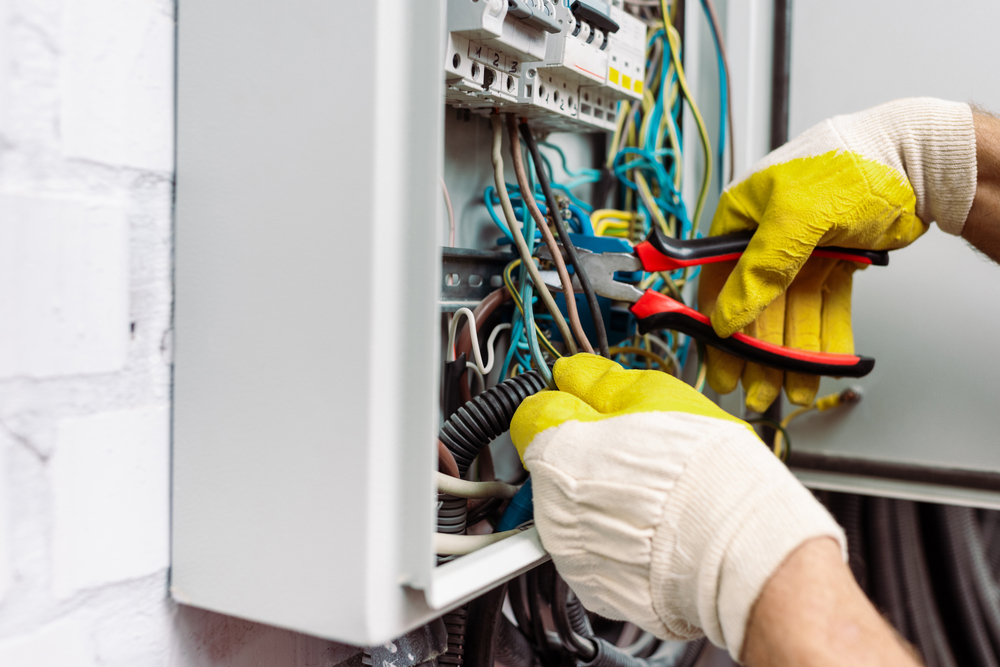
Where Is My RV Circuit Breaker and How Do I Reset It?
If you’re having electrical issues in your RV, one of the first things to check is the RV circuit breaker. If your main circuit breaker trips, it cuts off all electricity to your rig. It’s also possible to trip one of several other, smaller RV breakers, which would cause you to lose power in only part of your rig.
Finding your RV breaker panel:
To find your RV breaker, you need to locate your RV breaker panel. This will be covered by a piece of plastic, behind which you will find a series of breakers and fuses.
In many RVs, this will be found on a wall near the floor. Some RVs have breaker panels under the refrigerator, under the bed, or under a pantry or cabinet. Others hide the panel away inside a cabinet. Still other RVs — especially motorhomes — place the breaker panel inside one of the exterior storage bays, making it a bit trickier to find.
Resetting a tripped breaker:
Once you locate your RV breaker panel, you should be able to locate the flipped breaker by feeling for the loose one and flipping it back on. Depending on the switches used in your rig, you might have to flip the breaker all the way to the ‘off’ position before flipping it back.
Why Does My RV Circuit Breaker Keep Tripping?
If your RV circuit breaker keeps tripping no matter how many times you flip it back, there are several possible causes:
Overloaded circuit (most common)
Try using fewer appliances and lights to see if this solves the problem. If so, you’re just overloading the system. The air conditioner and microwave are good places to start, as they tend to use the most power. On a 30-amp system, you simply cannot run multiple high-draw appliances simultaneously.
Appliance short circuit
If you suspect this is the case, stop using all appliances and locate and fix the problem right away. A short circuit can cause fires and is a serious safety hazard. Unplug appliances one by one to identify which one is causing the problem.
Bad breaker
A bad breaker will trip repeatedly for no apparent reason. If this is the issue, you will need to replace the breaker with an identical one. Doing this can be dangerous, so be sure you are disconnected from shore power, not running a generator, and that any automatic inverters are shut off. If you feel unsure about this process, hire a professional to do the work.
Tripped breaker at the pedestal
Sometimes the breaker at the electric pole trips before the RV breaker does. Be sure to check this out if flipping your RV breaker doesn’t do the trick.
Power outage
Power outages happen everywhere. There’s a chance your campground is simply experiencing a power outage. This is especially likely if a storm is passing through your area when you lose electricity.
Problem with the power cord
Sometimes, wires inside an RV power cord will melt or break. If this happens to your cord, it will stop delivering power to your rig, causing a power outage. Inspect your cord regularly for damage, melted plugs, or loose connections.
What Regular Maintenance Does My RV Electrical System Need?
Regular maintenance and inspection are the easiest ways to spot a small problem before it becomes a big issue. Here’s what you should check regularly:
Battery maintenance:
- Look at your batteries and all their connections frequently (before each trip is best)
- Ensure all connection points are secure with no damage or fraying
- Clean terminals and check for corrosion, which looks like white or green buildup
- For lead-acid batteries, check electrolyte levels and add distilled water as needed
- Test battery voltage with a multimeter (12.6V = fully charged, below 12.0V = needs charging)
Connection inspection:
- Check shore power cord for damage, melting, or burn marks
- Inspect plug prongs for pitting or discoloration
- Ensure all electrical outlets inside RV are secure and functioning
- Look for any exposed or frayed wiring
Circuit breaker panel:
- Know where your circuit breakers are located
- Test breakers occasionally to ensure they trip properly
- Replace any breakers that feel loose or don’t stay in position
- Keep panel area clean and accessible
Annual professional inspection: Consider having an RV technician inspect your entire electrical system annually, especially if:
- Your RV is more than 10 years old
- You’ve experienced repeated electrical problems
- You’re planning extended boondocking or full-time RV living
- You’ve made modifications to the electrical system
RV Electrical Classes
If you want to learn more about RV electrical, NRVTA’s program is a great resource. Click here and use code RVSHARE for 5% off all courses.
The RV Owners home study course comes in two options.
Online & USB
- The USB version is $297. It includes booklets, a tweaker screwdriver, and a USB Drive with all of the HD videos. It also includes a copy of the online version. This is perfect for RVers who may not have access to good WiFi or who like to have a physical copy.
- The online version is $197 and includes all of the same videos laid out in chapters using the online portal. It’s good for RV owners who have good WiFi or who like to keep everything digital.
Key Takeaways
- The RV electrical system features two components: a 12-volt DC system for lights and ignition, and a 120-volt AC system for appliances.
- Understanding RV electrical basics helps prevent damage, ensures safety, and aids in efficient power management.
- Regular maintenance of RV batteries and connections is crucial for avoiding costly repairs and ensuring functionality.
- Consider surge protection to safeguard your RV’s electrical system against faulty shore power and power surges.
- Generators and solar panels offer alternative power sources for RVs, catering to different camping styles and needs.
RV Electrical Basics: Frequently Asked Questions
Most RV electrical systems have two main power sources: shore power (what you plug into at the campground) and house batteries. Shore power runs the bigger appliances while the house batteries power lights and controls, and converters and inverters can allow you to switch from AC (shore power) to DC (battery power) currents.
Your RV’s shore power system runs off 120-volt AC power, whereas the house batteries run on 12-volt DC power. The technical difference between these two types of currents comes down to the flow of electrons, but most owners just need to know that AC is shore power and DC is battery.
Common causes of tripped RV breakers include circuits overloaded by too many appliances at once, issues with the appliances themselves, or damage to the wiring behind the scenes. Loose connections and aging breakers can also be common culprits. An electrician can help you figure out exactly what’s going on.
Start with the basics: Checking your shore power connection/the connection of any appliances to their outlets, and then move on to the breakers. Keep an eye out for damaged wires and consider using a multimeter to confirm voltage on AC and DC circuits.
Yes. Whereas your home (likely) uses 120/240-volt AC power supplied by the utility grid, RVs have both shore power (which operates at 120 volts rather than 240) and house battery power (12-volt DC current). RV wires are built with these currents in mind. They’re also lighter gauge, flexible, and designed for vibration and movement.
Understanding your RV’s electrical system — from the difference between 12-volt DC and 120-volt AC power to managing your 30-amp or 50-amp service capacity — empowers you to camp safely, avoid costly repairs, and troubleshoot problems confidently on the road.
Ready to experience the RV lifestyle firsthand? Rent an RV with RVshare to test different models and electrical systems before you buy, or list your RV on RVshare to earn income when you’re not using it, turning your investment into a revenue source while helping other families discover the freedom of RV travel.

