Understanding your RV’s water system is one of the more practical skills to develop before hitting the road. The system itself isn’t complicated, but knowing how each tank works, how to maintain it, and what to do when something goes wrong will save time and prevent avoidable problems.
This guide covers everything a first-time renter or new RV owner needs to know about freshwater and wastewater tanks.
This post contains affiliate links. RVshare may receive compensation if you make a purchase after clicking on a product or service link.
Key Takeaways
- RVs have three tanks: a freshwater tank for clean water, a gray water tank for sink and shower drainage, and a black water tank for toilet waste.
- Always dump the black tank before the gray tank so the gray water can flush the sewer hose.
- Never leave the black tank valve open at a full hookup site. Wait until the tank is full before dumping, then close it immediately.
- Use only RV-specific toilet paper, which breaks down in the black tank more readily than standard household brands.
- Sanitize the fresh water tank at least once a year using a diluted bleach solution, and clean wastewater tanks regularly to prevent odors and buildup.
- Winterize all tanks before freezing temperatures arrive to avoid cracked tanks and damaged plumbing.
What Are the Three Types of RV Water Tanks?
Every plumbed RV has three tanks, each with a distinct function.
| Tank | What It Holds | Typical Capacity |
| Fresh water | Clean, potable water for drinking, cooking, and bathing | 20 to 100 gallons |
| Gray water | Wastewater from sinks and showers | 30 to 65 gallons |
| Black water | Waste from the toilet | 18 to 64 gallons |
Fresh Water Tank
The fresh water tank stores potable water that runs through the RV’s plumbing system whenever a tap is opened. This makes running water available even when no campground water connection is present, which is what makes dry camping practical. Tank capacity ranges from around 20 gallons in smaller rigs to 100 gallons in large Class A motorhomes. Water is heavy at just over 8 pounds per gallon, so a full fresh water tank adds significant weight. Boondockers often want as large a tank as possible, but it is worth checking the rig’s carrying capacity before filling to the top.
Gray Water Tank
The gray water tank collects drainage from sinks and showers. In most RVs, all drains except the toilet feed into this tank. It fills faster than many new RVers expect, particularly when cooking, doing dishes, or showering daily. Gray water should always be disposed of at a designated dump station or sewer hookup, never on the ground.
Black Water Tank
The black water tank is the tank the toilet drains into. It requires more deliberate maintenance than the other two tanks and has specific rules around how it is used and dumped. Capacity is usually between 18 and 64 gallons depending on the size and class of the RV.
How to Fill a Fresh Water Tank
To fill the fresh water tank, locate a potable water source. Campendium is a useful resource for finding verified water sources at campgrounds and along common RV routes.
- Pull up to the spigot
Get close enough for your fresh water hose to reach the RV’s fill port.
- Connect
Connect the hose to the spigot and insert the other end into the fresh water fill port on the side of the RV.
- Fill
Turn on the water and monitor the tank level sensors on the RV’s control panel.
- Stop
Turn off the water when the tank is full.
If the tank overflows before the sensors indicate it’s full, the water pressure is likely too high. Turn off the water, let the line settle, and restart at lower pressure. Also keep your fresh water hose separate from any hose used to rinse sewer equipment, and label them if there is any chance of confusion.
Use a dedicated white potable water hose rather than a standard garden hose. Standard garden hoses can leach chemicals into your water supply. White hoses specifically rated for drinking water are a better choice and are inexpensive to keep on hand.
How to Use Black and Gray Water Tanks
For the most part, using black and gray water tanks is pretty straightforward. Simply use the water in your rig, and it will automatically drain into the tanks. Once your tank sensors read full, you will need to dump your tanks.
How to Dump RV Holding Tanks
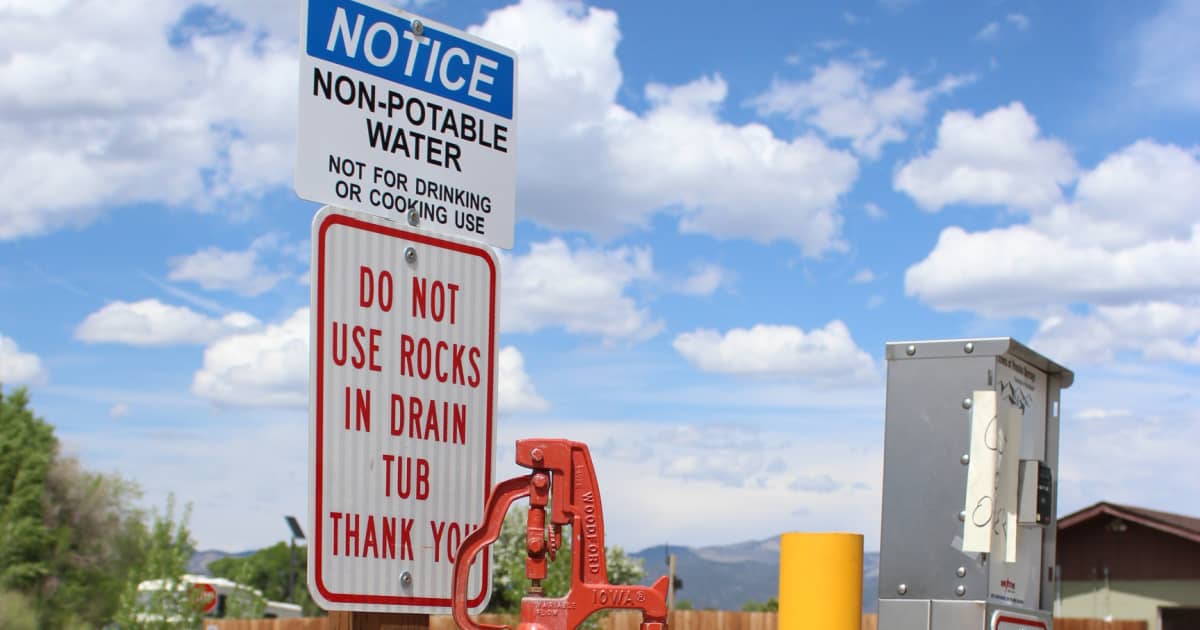
To dump, you need either a campsite with a sewer hookup or a dump station. RVshare has a list of dump stations that can be searched by location to help you find one.
- Pull up to the sewer connection and put on rubber gloves before handling any hoses.
- Remove the sewer hose and connect one end to the sewer hookup in the ground. If the connection has no threading, insert the hose end into the opening and secure it with a weight.
- Connect the other end of the hose to the dump port on the RV.
- Open the black water valve first and allow the tank to drain completely. Give it several minutes.
- Close the black water valve, then open the gray water valve. The gray water will flush out any residue remaining in the sewer hose. Allow it to drain fully.
- Close the gray water valve.
- Disconnect the sewer hose from the RV, replace the dump port cap, and rinse the hose using a designated non-potable rinse hose. Do not use your fresh water hose for this.
- Disconnect from the sewer hookup, replace any caps, and stow the hose.
- Wash hands thoroughly even if gloves were worn throughout.
- Add a small amount of water to each tank by running a tap briefly and flushing the toilet once or twice, then add tank treatment to both the sink drain and the toilet.
How to Maintain Gray and Black Water Tanks
Gray tank maintenance is fairly easy. Avoid putting food scraps, coffee grounds, or grease down RV drains, as these accelerate buildup and contribute to odors. Add a small amount of water and a tank treatment product after each dump to keep the tank fresh between cleanings. Periodically check the gray tank roof vent to confirm the cap is intact and free of debris.
Black tank maintenance is about the same, with a few additional rules. Use plenty of water with each flush. A common source of black tank problems is insufficient water, which allows solids to dry out and accumulate at the bottom of the tank. Use only RV-specific toilet paper, which is formulated to break down readily in the tank. Standard household toilet paper does not break down as efficiently and can contribute to clogs over time.
The most important habit with a full hookup sewer connection: do not leave the black tank valve open continuously. It may seem convenient, but an open valve lets liquid drain away while solids remain and dry out in the tank. Dump the black tank only when it is close to full, then close the valve immediately afterward.
How to Clean RV Water Tanks
You should clean your wastewater tanks regularly. Some RVers do this every time they dump; others do it monthly. The process involves dumping the tanks fully and then back-flushing with water until what comes out of the tank runs clear. Many RVs have a built-in black tank flush connection on the exterior for this purpose. If yours does not, a tank-flush wand inserted through the toilet can accomplish the same thing.
Following the steps above will keep your tanks clean enough for the most part. That said, you will definitely need to clean the tanks thoroughly every once in a while.
You should clean your freshwater tank at least once per year, ideally before the first trip of the season after winter storage. Use a diluted bleach solution to sanitize the tank and all connected lines.
The standard ratio is 1/4 cup of plain unscented household bleach per 15 to 16 gallons of tank capacity. Never pour undiluted bleach directly into the tank. Always mix it with at least a gallon of water first, then add the diluted solution through the fill port. Once added, fill the tank the rest of the way with fresh water, run each faucet until you detect a faint bleach smell, and let the solution sit for 4 to 8 hours. Then drain the system completely and flush with fresh water until no bleach odor remains. It may take more than one flush cycle to clear the smell entirely.
A few specifics to note: use only plain unscented bleach at 5 to 6 percent sodium hypochlorite. Avoid scented, splash-less, or ultra-concentrated formulas. More bleach is not more effective and can damage seals and leave a taste that is difficult to clear.
How to Get Rid of Tank Odors and Clogs
Even if you take perfect care of your RV water tanks, smells and clogs will happen from time to time. If this is something you’re dealing with, there are ways to get rid of the issue. Here are our suggestions:
- Start by dumping and cleaning the tank using the instructions above.
- If you are still having issues, check the tank vents on the roof. Stick a water hose into the vent pipe and run water through it to ensure the vents aren’t clogged.
- A worn toilet seal or ball can also cause issues. Make sure your toilet bowl is holding water. If it isn’t, it could be that the seal and/or ball needs to be replaced.
- Another problem that can cause smells and can even cause issues dumping? Solid waste buildup. Usually, this can be loosened up with back flushing. If you find this isn’t getting rid of the problem, you can try pouring boiling water into the tank or using a toilet snake to break up the buildup.
How to Winterize RV Water Tanks
Any water left in RV tanks or plumbing lines when temperatures drop below freezing can crack tanks, burst pipes, and cause significant damage.
To winterize your RV tanks:
- Remove the drain plug on your freshwater tank and open all low point drains to ensure all water is removed.
- Dumpe and clean your wastewater tanks thoroughly, leaving as little water as possible.
- Dump a couple of quarts of antifreeze down both the black and gray water tanks to ensure anything left behind doesn’t freeze.
Do not use standard automotive antifreeze in any part of the RV’s water system. Use only antifreeze formulated for RV and marine potable water systems. And be sure to winterize the rest of your RV as well!
Repairing and Replacing RV Water Tanks
Small cracks in plastic tanks can often be repaired with an RV tank repair kit, available at most RV supply retailers. These typically use a patch compound or epoxy formulated for plastic tanks. Larger cracks or structural damage may require professional assessment.
If a tank needs full replacement, it is possible to do as a DIY project on some RVs, but it is a significant undertaking that requires removing the underbelly or accessing tight spaces depending on the rig’s design. For anyone not comfortable with that level of work, an RV service center is the more practical option.
Frequently Asked Questions About RV Water Tanks
Dump the black tank when it reaches two-thirds to three-quarters full. Waiting until it is completely full makes dumping harder and risks overflow. The gray tank can typically go a bit longer, but monitor it regularly, particularly when cooking and showering daily.
No, you can’t dump gray water on the ground. It contains soap, food particles, and bacteria and should always be disposed of at a designated dump station or sewer connection. Regulations on gray water dumping vary by location, but dumping on the ground is prohibited in most campgrounds and public lands.
Use toilet paper specifically labeled as RV-safe or septic-safe. These break down more readily in the black tank than standard household brands. When in doubt, the dissolve test works: drop a few sheets in a jar of water, shake it, and see how quickly it breaks down.
An off smell or taste at the tap is the most common sign. Visible discoloration in the water, or a period of storage longer than a few months without use, are also reasons to sanitize the system before use.
It is safe to drink water from an RV fresh water tank if the tank is well-maintained, filled with potable water, and sanitized regularly. Many RVers add an inline water filter at the tap as an additional precaution, particularly when filling from sources they don’t know.
Ready to put this knowledge to use? Browse RV rentals on RVshare and find the right rig for your trip.