
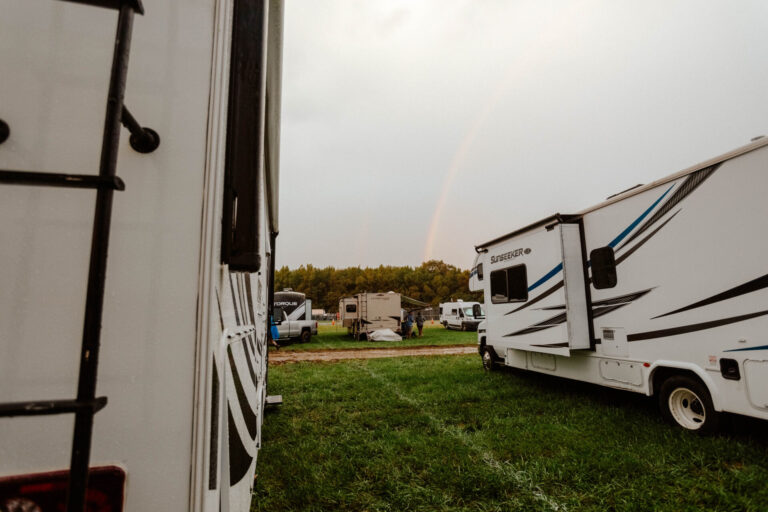
Spring is the perfect time for annual maintenance and systemized checks. A simple RV preparation checklist is a great way to stay organized and get your rig ready for its first road trip of the season. Plus, knowing what mistakes to avoid in the process will put your mind at ease, and make your upcoming adventures a whole lot more enjoyable!
Why spring?
In most cases, spring weather is the safest time to work on your RV without the fear of a deep freeze.
If you stored your RV throughout the winter, you probably took certain steps to winterize and prepare your rig for cold storage. If that was the case, the first step in the spring is to reverse this process and gear up for active use.
The Basic RV Preparation Checklist
- Check the RV Batteries and Make Sure they have a Full Charge
- Flush the RV Water System and Refill it with Potable Water
- Check for any Water Leaks
- Check RV Appliances
- Check RV Tires
- Check Fluids in Engine and Generator and Change As Needed
- Inspect The Seams & Seal
- Perform A Full Safety Check
- Avoid Common Mistakes — See the Top 10 Mistakes Below
1. Check the RV batteries
Batteries are a great place to start your spring spruce up. Batteries lose up to 10% of their energy per month when in storage and not in use. It’s important to make sure your batteries are fully charged and have the correct water levels (check your battery manual).
If the batteries were removed for storage, make sure they are reconnected correctly. Remember batteries can be dangerous! Take every precaution, and if you aren’t comfortable messing with them, have a service engineer do the process for you.
2. Flush The RV Water Tank, Check for Leaks, and Sanitize
- Connect one end of your drinking hose to city water and the other to the RV.
- Run the water continuously through the entire system. You want to remove every trace of the non-toxic RV antifreeze you used to winterize.
- If you have an outside shower hose, be sure to flush that as well.
- If your fresh water tank had antifreeze added to it, you will need to drain off any remaining water from the tank.
- Next, add fresh potable water and turn the water pump on. Open every faucet in your RV and keep the water running until the water runs clear.
- Once clear water appears, you can turn off the pump and close the faucets.
- Fill the water heater tank with potable water and flush that system out with fresh water. There should be no remnants of antifreeze in the system.
- Once the system is completely flushed, you can replace your water filter cartridge if you have one.
Now it’s time to check for leaks.
Grab a flashlight and turn on the water pump. Wait until the sound of the pump stops. Once the pump stops and the water is pressurized, you can turn the pump off and begin your search.
Look underneath your sink cabinets, around the toilet, and inside your basement compartments. Anywhere water might flow, you want to watch for potential leakage. Take your time with this process. If you locate a leak, be sure to have it repaired before you leave on your first trip of the season.
This is also a good time to sanitize the water system.
- Close all the drains and make sure drain plugs are in.
- Use a quarter cup of household bleach per 15 gallons of fresh water (if your water tank holds 30 gallons, you will need a half cup of bleach). Combine the bleach with fresh water in a gallon container and then pour it into your partially full fresh water tank. Fill the water tank completely.
- Turn the pump on and let the water run through the faucets.
- In a short time, you will begin to smell bleach. Close the faucets and let the tank sit overnight.
- In the morning, drain all the water from the tank and fill it with fresh water.
- Turn the pump back on and let the faucets run and run until you no longer smell bleach.
- If necessary, you may want to repeat this process over the next couple of days.
Completing this process will give you peace of mind knowing that your water is clean and fresh every time!
3. Check the RV Appliances
If your RV uses propane (Also called LP gas), you need to check the tanks, the connections, the valve, and the firing operation. Propane is often used to operate the hot water, the fridge, and the stove. If something isn’t working correctly, have your system checked by a professional. Make sure to have a leak test and a gas pressure test each year. You want to be sure that this highly important system is working safely.
If you have refillable propane tanks, check the dates on the tanks. Most people are unaware that their propane tanks expire and must be re-certified for safety. Check yours annually.
Once your propane appliances are in good working order, spend some time checking your microwave, air conditioner, fridge, and any other electric appliances in your rig. Make sure you plug into a solid source of 30 or 50-amp power. Many people choose to park their RV at an RV park while they test out their systems each spring.
4. Check the RV Tires
Tires are a hot topic in the RV industry! Some companies say RV tires should be fully replaced every 5 years, while others claim that if properly cared for, tires can last 10 years. Either way, check your tires to be sure they are ready for the season. Your entire home relies on the safety of these wheels, so give them the attention they deserve.
First, check the air pressure. While in storage, tires lose pressure. Check your manual and fill each tire according to the recommended PSI. Inspect each tire for tread wear and cracking, especially in the sidewalls. If you have any concerns, be sure to have a professional inspect the tires prior to leaving on a trip.
Don’t let a blowout ruin your fun!
5. Inspect the RV Engine and Generator
Now we are ready to tackle the engine! Yup, the all-important part that gets you where you want to go deserves some attention too.
Start by checking all of the fluid levels and make sure they are full and fresh. If you don’t know what your coach uses, look in your owner’s manual or contact your dealer. Here are the fluids you want to check:
- Transmission
- Power Steering
- Engine Coolant
- Engine Oil
- Windshield Washer
- Brake Fluid
- Generator Oil
If you have low fluids in one area, this may indicate a problem or a leak. Take some time to figure out what is happening to the fluid. You will want to service your engine and the fluids on a regular basis. If you have been doing that and you have an issue, be sure to take it in to be looked at before you hit the road.
Now check all of your gauges. Are they giving accurate readings?
Check all of your lights. Make sure the lights on your trailer and the connections between your RV and your trailer are working.
Check your registration, insurance, and vehicle emissions sticker. Is everything up to date? If not, stop what you are doing and go get it done!
Your generator has been off for a long time and will need to be serviced according to the manual. Make sure the oil level is correct before you attempt to start the generator. If you didn’t store it correctly, you may have trouble restarting it. Inspect the exhaust area before starting. Do you see any problems? If not, start the generator and plan to let it run for a couple of hours. It doesn’t have to be on full load, but it needs to run for a while to get the engine ready for the season. The last thing you want is to travel without a generator.
Take the time to make sure everything is working properly.
6. Check the RV Seams
Most people forget about their RV seams, and this is a mistake you don’t want to make. Each and every seam has leak potential. If you inspect and reseal the seams one or two times a year, you are less likely to have a leak.
Start by inspecting the roof and moving down over the body of the rig. Look for any openings, cracks, or forms of damage. Is there any separation? Is there a specific area that shows wear? Use RV-compatible sealants and research which type of sealant is best for the material you want to repair. If your roof shows wear, you may want to consider having it professionally resurfaced and sealed.
7. Explore Your Safety
With the outside complete, it’s time to move back inside the RV. You will want to check the following devices and update their batteries or have the items inspected and recharged.
- Smoke detector
- Carbon Monoxide Detector
- PL Gas Leak Detector
- Fire Extinguisher
These 7 steps are an essential part of preparing for a safe road trip. Don’t skimp. Take the time to inspect each part of your RV’s system. If you are unable to do the work yourself, book a spring session with a recommended RV technician.
If you’re feeling energetic, consider spring cleaning the inside of your coach as well. Here are a few things to freshen up:
- Bedding and towels
- Rugs
- Blinds or curtains
- Floors
- Inside the fridge and freezer
- Wipe the pantry and the drawers
- Wipe the shelves
- Wipe cabinets inside and out
- Blankets
- Lawn furniture
- Wash all pots, pans and dishes
- Clean under the sinks
- Wash the windows inside and outside
- Clean the mirrors
- Toss old toiletries and add new
You may not have time to do every step listed, but this list gives you an idea of what may be needed. Every RV will be different. The key is to set time aside to prepare for the RV season.
8. Avoid RV Mistakes
Everyone makes mistakes. Even the most seasoned RVers occasionally forget to bring in the awning or properly latch the pantry. Unfortunately, some RV mistakes are more costly and dangerous than others.
In an effort to help you prevent costly repairs or unpleasant experiences, we have compiled a list of 10 RV mistakes you should avoid.
1 – Going Too Far, Too Fast
Let’s face it – not everyone has the luxury of taking an extended RV trip. Most of us are simply trying to cram in as much as possible in our two-week vacation window. But there is nothing that brings on stress during an RV trip more than a fast pace.
At the time, it might have seemed like a good idea to drive from New York to the Grand Canyon and back again during your kid’s spring break, but at some point, that fast pace of travel will catch up with you. After all, if you drive for six hours every day, that doesn’t leave much time for fun. Slow down. Plan a less ambitious route. Take shorter trips. Enjoy your RV!
2 – Buying The Wrong RV
There’s an RV out there for everyone, from small tow-behind trailers to luxury coaches with all the bells and whistles. If you take your time and explore all the options, you can find the right RV for your needs. But if you rush into it and buy the first RV you come across, chances are good that it might not be a great fit.
Go to a few RV shows, poke around all the different kinds of RVs, and ask questions on online forums. Or maybe even rent an RV or two to get a feel for what you want and need. The right RV for you is out there, you just need to take the time to find it.
3 – Not Bringing in the Awning
You love your RV awning. It provides shade, protection from the rain, and privacy in cramped RV parks. But that same awning is also a notoriously fickle accessory. It only takes a few seconds of high wind and driving rain to turn a perfectly good awning into a heap of twisted metal and shredded fabric.
The solution is easy. Bring your awning in at the first sign of bad weather. Don’t leave it out when you’re not there, and don’t trust the automatic awning wind sensors. When it comes to expensive RV awnings, you’re always better safe than sorry. When it doubt…roll it up!
4. Forgetting to Disconnect
Oops…looks like they forgot something! Have you ever seen an RV driving down the road dragging behind an electrical cord or sewer hose? It happens more often than you might think. There’s a lot to remember when you pack up and leave a campground. One of the most important things is to disconnect all utilities.
5. Being a Bad Campground Neighbor
You might be a bad campground neighbor if…you blare your music late into the night, don’t pick up after your dog, or carelessly dump your tanks leaving behind a mess for the next camper. No one wants to be a bad neighbor, and no one wants to camp next to a bad neighbor. Campgrounds are like small communities. If we are considerate of one another, then it is much more enjoyable for everyone.
6. Not Leveling the RV
No one wants to sleep on an angle. No one wants to make an uphill climb every time they walk from one end of the RV to the other, and NO one wants to use the RV bathroom at a slant. Luckily this is an easy problem to solve.
Simply level your RV. The process varies from RV to RV, depending on what type you have, but the basic premise is the same. You can’t rely on campground sites to be level (even the paved ones in fancy RV parks), so let your RV do the work for you.
7. Packing Too Much
It can be tempting to cram as much into your RV as possible. After all, if you have the space, why not bring it? Here’s the thing, though. RVs have weight limits. Limits that, when exceeded, can make driving – and stopping – your RV dangerous for you and those around you on the road.
Chances are, if you stock your RV with a reasonable amount of provisions, you won’t be overweight. But if you start throwing in everything from those five extra chairs, your large toolbox, and the giant cast iron Dutch oven…you could be in trouble. Make a list, cross off things you don’t need, check it again, and cross off a few more things. After all, in the end, an RV trip is more about the experiences you have than the things you bring.
8. Forgetting to Check and Recheck
Before driving your RV anywhere, you should always check and recheck. Walk around the rig and check the lights, the outside compartment doors, and the trailer or tow vehicle connections. Make sure the T.V. antenna or satellite dish is in place, and all the windows and vents are closed.
Inside the RV, check that all cupboards and doors are latched, check to be sure items are properly stowed, and that the refrigerator is closed all the way. Make yourself a list and go through it one at a time before driving down the road. You can save yourself a lot of potential problems and money by thoroughly checking and rechecking every time.
9. Never Defrosting the Freezer
This might seem like a small thing. But when you go to pack your RV freezer full of homemade lasagna and fresh fruit only to discover it has filled with an icy mass, you’ll be glad you took the time to defrost. RV freezers are not the same as residential freezers. Over time, ice will build up in the back of the freezer, taking away precious storage space and causing the freezer to not work as well.
The process of defrosting the freezer is simple. Turn off the fridge, remove the food, and let the frost melt. To save time, you can use a hairdryer to speed up the melting process.
10. Not Learning How to Drive the RV
RVs are not cars. They are tall, long, and heavy. It’s important that you learn how to properly drive your RV. There are certain techniques, such as slowing down in high winds, learning how to turn, and properly backing up, that will probably take some time to learn.
Don’t rush into it. Take your RV to a large empty parking lot and practice, practice, practice. Consider taking an RV Driving Class, or maybe ask other RVers for advice and tips.
11. Judging an RV by Photos
If you’re going to rent an RV, a picture may say a thousand words, but they don’t always tell the whole story. Therefore, while we definitely do recommend checking out the photos in the listing you’re considering, we also recommend actually reading the description so you have a good understanding of exactly what you’re getting.
Surprisingly, skipping over the description is one of the most common mistakes to avoid.
12. Not Double Checking Amenities
This mistake goes hand-in-hand with the one mentioned above. Many people make the mistake of assuming an RV will have certain amenities based on similar listings, photos, or the price of the rental. If you want specific amenities, make sure you look at the list to ensure the RV includes everything you need to be comfortable.
13. Skipping Over Reviews
Another thing you should definitely read before renting an RV? The reviews, of course! Reviews give you a little peek into the experiences of other renters, so you have an idea of what to expect and can feel reasonably confident the rental is decent and that the owners are responsive and helpful.
14. Setting Expectations Too High
When renting an RV, it’s important to realize you won’t be staying at the Ritz. While it is perfectly reasonable to expect a clean RV with functioning appliances, you certainly won’t have turn-down service or a housekeeper knocking on your door each morning. Set your expectations where they ought to be, and you might just avoid a good amount of disappointment.
15. Lack of Renter-Host Communication
The thing about renting from an individual is that you are actually building a relationship. You have to trust the person you’re renting from with your vacation, and they have to trust you with their trailer or motorhome. Developing this trust and building your relationship requires good communication from both parties. Make sure you respond to questions promptly both before and during the rental and communicate any concerns or issues that may arise while using the RV.
16. Not Following Rules and Guidelines
When an RV owner lists their trailer or motorhome for rent, they tend to put a set of rules into place in order to protect their rig, themselves, and their renters. These rules are generally reasonable and easy to follow.
Failure to follow the rules an owner puts in place could result in damage to the RV, meaning loss of your deposit and dealing with insurance companies. Worse yet, breaking the rules could even mean you get injured on your trip, potentially landing you in the hospital and ruining your trip.
17. Skimming Over Cancellation Policies
Another thing owners must carefully consider when offering their RV for rent is their cancellation policy. Unfortunately, many renters don’t take the time to read these policies and they regret it later.
If you rent through a reputable peer-to-peer RV rental company, this policy should be pretty easy to find on each and every listing. Find it, read it, and keep it in mind when booking, knowing that if your plans change, you will need to abide by whatever cancellation rules the owner has put in place.
18. Forgetting to Follow Check-Out Procedures
When renting an RV, there are often a few things renters are asked to do before returning the rig. These might include stripping the beds, washing dishes, and dumping the tanks—all tasks that help the owner prepare the RV for the next renter.
That said, there are many renters who opt to skip these tasks at the end of their trip. Some owners will charge uncooperative renters an extra cleaning fee or dump fee if they don’t follow check-out procedures. For this reason, we highly recommend doing these simple tasks before dropping the trailer or motorhome off in order to ensure you end your trip on a good note.
Helpful Hacks for RV Newbies
Now that you know what mistakes can be made and what to avoid, let’s take a look at some helpful RVing hacks.
1. Make a budget.
Whether you’re going to be a full-time RVer or are just adopting it as your new favorite way to take a weekend vacation, know this: it’s not necessarily a cheap way to travel.
Many people mistakenly assume that RV camping is a dirt cheap way to see the country, or a great alternative to shelling out a monthly rent or mortgage payment. And it certainly can be a relatively affordable way to live… if you make it one.
But there are expenses that come along with RVing, many of which are unavoidable. For example, you’ll need to pay registration and insurance on your vehicle, not to mention monthly payments if you took out a loan to buy it. Then there’s fuel to think about, and RVs aren’t exactly known for being lean, green monsters when it comes to gas efficiency. You may also need to keep your propane tank filled and buy food to fuel yourself and your family.
Furthermore, many newbie RVers are surprised to learn that campgrounds are almost never free, even if you’re out in the wilderness. You can find free boondocking spots, sure, but you’ll be subject to certain restrictions, and you won’t have any hookups for water or electricity. You’ll still need to pay to dump and fill your tanks when you get back to town.
In short, you should know what you’re getting into financially before you set out on your grand adventure. Making a budget ahead of time will save you some teeth-gritting down the line. Oh, and don’t forget to include a nice, cushy emergency fund, because something will break down while you’re on the road. It’s nigh guaranteed.
2. It’s alright to be slow.
We mean this in two ways.
First of all, literally, physically, while you’re driving down the road, you’re going to want to take it easy. Your RV most likely weighs way more than anything else you’ve ever driven, and it’s big, which means it has a tendency to be blown around by ambient wind or large trucks driving by. Braking takes longer, and curves and grades offer a whole new level of white-knuckle nervousness. So go ahead and slow down — just stay in the right lane so those eager folks in their sedans and compact SUVs can zip by you!
The second way we mean this is on the larger scale: the familiar RV newbie trap of trying to see too much at once. We know that incredible feeling of liberation all too well; it’s so tempting to try and hit as many destinations as possible as soon as you can. But if you try to do too much, you’ll do nothing but wear yourself out… and the whole point is to enjoy your travels, right?
3. When you set up and break down camp, do a walkaround and keep a checklist.
It might seem like no big deal to set up camp — just put down the leveling jacks, plug into the electricity, and hook up the water, right?
Well, maybe not. Do yourself a favor, create a camping set-up and break-down checklist, and perform a thorough walkaround any time you’re getting ready to drive your rig.
Trust us — you *will* forget about your antenna or stairs at least once, and this may keep you from dragging your sewer cable down the street.
4. Don’t take off without a decent set of tools.
We mentioned it briefly above, and you’re more than likely about to find out for yourself: when it comes to RV camping, things will break. It’s just the nature of the beast.
Your RV is subject to constant temperature fluctuations, movement, and vibrations. It simply makes sense that things will occasionally fall apart.
Don’t sweat it — expect it. And bring tools.
And don’t worry: if you’re not “handy” yet, you will be soon.
5. Learn to conserve water, even when you don’t necessarily have to.
Even when you’re hooked up to city water and sewer, it’s a good exercise to get used to conserving water as much as possible so you’re ready for boondocking. Take your rig on a practice run while you’re still in range of a dump and fill station, relying on the tanks to get a feel for just how much potable water and wastewater your RV really holds. Figure out how to shower quickly and efficiently, turning off the tap while you soap up. Rely on low-cleanup meals to avoid excessive dirty dishes.
One good tip for extending the length of your water tank capacity: consider reusing your greywater, the relatively clean wastewater that’s drained from your sinks and shower, for flushing the toilet later on. And carry extra potable water so you don’t only have your clean water tank to rely on!
Final Thoughts
Don’t wait until the last minute and skimp on your safety. Take some time this spring to get your RV ready so that when that travel itch hits you, you can be on the road in no time.
If you’ve completed this simple RV preparation checklist, you know you have done everything necessary for a great trip. Ready to get rolling? Check out our Ultimate RV Essentials Guide to make sure you don’t forget the important stuff on your next adventure!
What about you? Do you have certain items that you think should be placed on the RV preparations checklist? Are there items that you check on your rig that are not listed above? Comment your best tips and tricks to help other fellow RVers.
Like this article? Please share it. Send it to your friends, family, or social groups. Tweet it, pin it, like it, and share it. Thanks so much!

