Photos can make the ordinary… magical. It can make people want to rent your RV or click NEXT. Here are the essentials I use to generate images that sell the RV experience and offer a competitive advantage. These methods are used to gather and process images that I post on the RVshare platform and on social media sites that link back to RVshare.
I’ll go over the equipment you’ll need (if you choose to invest more in this, but your iPhone works great too), how to capture the best images and locations, the simplest post processing techniques, and how to elicit emotions. You want your renters’ entire family to enjoy the experience you provide.
How To Optimize Your RV Listing
Upgrade Your Photography Equipment (Optional)
Today, a wealth of equipment and cameras are available to meet your photographic demands. The truth is that you can capture poor shots with a high-end camera or stunning photos with a low-end camera. I own a Sony mirrorless camera, but I typically shoot with my Samsung Ultra 21 camera phone, which I carry with me at all times. It all comes down to carefully composing the shot before taking it and then adding post-processing to your images. When I mention “post processing,” I do not mean entirely altering the image with filters to the point where it seems unreal.
Here is what you want in your bag of tricks.
- Wide angle lens
- Tripod
- Proper lighting
- Smartphone or DSL
- Photo Editing software like Adobe Lightroom or Photoshop
- A clean RV
I couldn’t leave out the clean RV. It doesn’t matter how good your photos or equipment are if your RV isn’t sparkling clean. Nothing can hide clutter and dirt.
Take more photos than you can ever use
I take a lot of photos, many of which I never use. You never know how many you’ll need, and it’s easier to take more the first time than to gather everything and re-create the scene. How am I aware of this? Because I had a prospective renter request videos while the RV was being used by another renter. Fortunately, the renter was returning the RV soon, but I still had to clean it and reset everything for the video shoot.
Choose an Inspiring Location
In order to elicit strong feelings, it is essential to photograph your RV in a picturesque setting, such as a campground. That’s more eye-catching than putting it out in the open in your driveway.
What if you don’t have any gorgeous scenic images or don’t travel often in your RV? When that happened, I simply asked renters if they would be willing to share images of their travels and allow me to feature them on social media and the RVshare platform. The notion of sharing their greatest images of Lake Powell, Sedona, and Monument Valley is a hit.
After some basic processing, I now have images of our RV with guests having fun in stunning locations. It also shows nearby attractions for interested renters searching for a new adventure.
Set the Scene
Setting the scene requires more than just finding the right site for outside photos; it also includes cleaning the RV, tidying it, and putting items away in their right locations. Trash cans, documents, and cleaning materials are all hidden from view. I experiment with lighting, camera positioning, and props. I can also shoot horizontal and vertical photographs.
I turn on the television and select a DVD that the whole family will like. The RV is accented with a turquoise color scheme. On the dining table, I arrange the cups, plates, and placemats, and hang kitchen towels over the oven handle. On either side of the arm rests are large fluffy gray pillows that make you want to curl up on the couch. Basically, I make it feel like home so that people want to book it.
Prioritize Lighting
Lighting can have a significant impact on the mood and quality of your photographs. Various types of lighting effects can be seen in photos including contrast, color temperature, shadows, reflected or diffused light and glare. Post-processing allows you to adjust many of these qualities to enhance your image.
When taking photos of the RV exterior, it’s best to consider early morning or evening photoshoots. Direct sunlight in mid day wreaks havoc on your own visibility and with shadows on your subject.
Taking photographs inside your RV may require some time and effort to determine what looks best. Typically I photograph with natural light first and the blinds open to avoid the room appearing to be a closed box. I then experiment with all the lights on throughout the RV.
Keep Your Camera Stable
Image stabilization is included in many phones. It eliminates camera shake and allows you to shoot at lower light levels and shorter shutter speeds. You can also use a tripod when taking photos. Any post-processing platforms will not be able to correct blurry photographs.
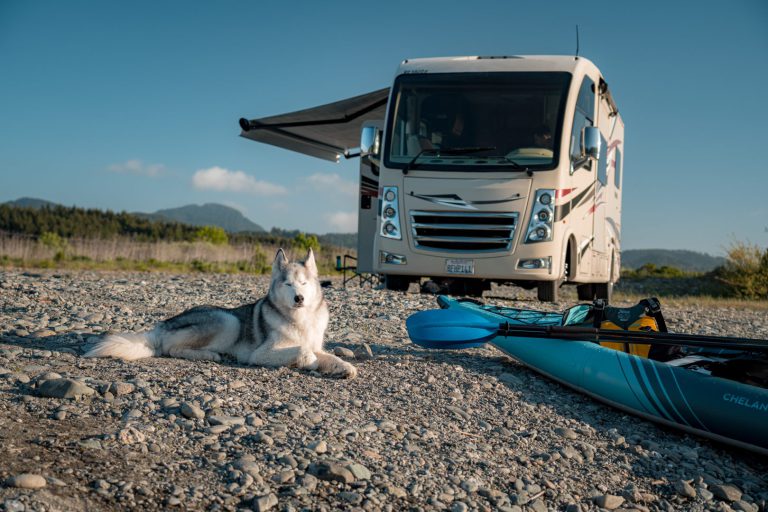
Include People and Pets
People enjoy seeing photographs of people having fun and pets. Human contact adds depth, warmth, and character to a situation. It has the ability to tap into people’s emotions. I was given a photo to use from a renter. He’s driving our Class A RV, with their dog Max peering out the front window. It’s the cover shot for RVshare, and it’s one of my favorites. Renters enjoy the photo because it exudes warmth and genuine happiness, as well as being uncommon and shows that we accept dogs.
You can include a human element in your images without having to feature a specific person. It’s not always necessary to photograph someone’s complete face or body. Cropping someone’s face out and including their backside could be the photo you need for your portfolio. If no one else is willing to share their images, I’ll put my phone on a tripod and take the picture myself.
Use a Wide Angle Lens with your Phone
The idea is to show renters how to enter and proceed through your RV. Many phones have a built-in wide-angle lens, ideal for photographing large RV spaces. I don’t need a wide angle lens though for photographing gauges and control panels up close. I provide up close photos in my resource book.
My photographs are taken at my height (5’3′′). I get down low to get a fresh perspective and try to get into the corners. I’ve been known to photograph through open windows from a ladder outdoors to get more of a wide shot.
Take Vertical and Horizontal Photos
Horizontal photographs are used to create the illusion of a huge space in the family room and kitchen area. When I want to highlight the bathrooms and showers, I switch to vertical photography.
Processing Your Photos
When I edit my photos, I utilize Lightroom to make the minor adjustments that can make a powerful difference. If you don’t have Lightroom, you can use other programs, but the goal is to find one that allows you to batch process photos without destroying the original. The colors inside the RV remain consistent thanks to batch processing. Originally I took shots and did some minimal color enhancement, and the cabinets appeared to be different from one photo to the next.
My 3-minute processing involves deleting blurry photos first and adjustments in this order:
- Proper exposure so it doesn’t look too gray or dark
- Crop elements out of the photo if it isn’t necessary
- Straighten horizons to keep the image straight
- Adjust the white balance
- Adjust the highlights and shadow tool for certain parts within the photo
- Vibrance and contrast for making your images pop without affecting saturation and skin tones
Finally, you want to be imaginative in order to catch people’s attention as they scroll through the list of available RVs for rent. Hopefully, some of these pointers can help you improve your photographs significantly.

