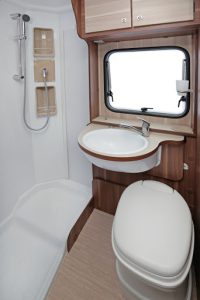
Nearly every RV out there has a shower of some sort. Whether your shower is a wet bath or a full-fledged tub and shower, you’re going to want to know how to properly care for it. Lucky for you, this article covers everything you should know about caring for your RV shower stall.
Repairing RV Shower Walls or Pan
While RV showers enclosures are made to withstand the constant movement of an RV, they do tend to weaken and crack over time. Unfortunately, when left unrepaired, a shower surround or shower pan with a crack can lead to some serious problems with mold and rot in the long term.
For this reason, it’s important that all cracks in your RV shower be repaired as soon as possible. Eternabond tape can provide great temporary repair that is surprisingly waterproof. If you have a fiberglass shower, a more permanent repair can be made using a fiberglass shower repair kit or by calling a fiberglass repair person. For those with plastic surrounds and pans, cracks can be repaired using a product called Plasti-Mend.
No matter how you repair the crack in your tub or shower, you may want to consider painting the shower area afterward in order to cover the repair and blend everything back together.
Replacing an RV Shower Enclosure or Stall
Sometimes cracks in RV shower surrounds or enclosures can’t be repaired. Other times, an RV owner may simply wish to update their bathroom. Either way, an enclosure or surround replacement may be in order.
Replacing RV shower walls or the shower enclosure is a huge job. However, it is well worth it in the end. To make your job easier, we’ve put together a series of tips for replacing these crucial parts of your home-on-wheels.
Measure carefully — Ensuring that the surround, walls, or enclosure you choose will fit into your space is of the utmost importance.
Have braces ready — Installing a shower surround often requires the use of glue. Be sure you have some sort of brace ready to hold the wall in place while the glue is drying.
Watch out for plumbing — RV plumbing is plastic, making it very easy to break. Watch out for water lines when installing your new shower parts.
Follow instructions — It might be tempting to install your new surround or enclosure the same way the old one was installed. However, it’s important that you follow the manufacturer’s instructions carefully.
Choose wisely — Be sure to choose your new surround or enclosure carefully. In the case of a surround, look for one with as few seams as possible in order to reduce the risk of water damage to the walls. Both enclosures and surrounds should match the room decor and be easy to keep clean.
Remove the toilet — If you have a very small bathroom, you may find it easier to work if you remove the toilet temporarily. This will give you more space to work with.
Maintaining RV Shower Stalls
As is the case with most things, maintenance is important for extending the life of your RV shower stall.
Make sure to keep the stall, door, and all seals clean and free from mold and mildew. Keeping a squeegee handy to quickly dry the shower after use is extremely helpful in preventing mold and mildew. Sealant should be replaced at least once a year, and you’ll want to avoid using harsh chemicals on plastic shower surrounds and pans.
This post may contain affiliate links.


