Installing RV hookups on your property costs $200-$300 for a DIY installation or $3,000-$5,000 for a professional full hookup system, including water, electric, and sewer connections. A basic water hookup costs around $30-$700, an electric hookup runs approximately $1,200 for professional installation, and a sewer hookup ranges from free (using existing cleanout) to $2,000-$12,000 for a new septic system. For most homeowners with existing utilities, the most cost-effective approach is DIY water and sewer hookups, along with professional electrical installation. This usually totals around $1,400-$1,500. Always check local building codes and obtain permits before starting, as requirements vary by municipality.
| Hookup Type | DIY Cost | Professional Cost | Difficulty | Time Required | Permits Needed? |
| Water | $30-$100 | $500-$700 | Easy | 4-6 hours | Sometimes |
| Electric (30 amp) | Not recommended | $800-$1,200 | Dangerous | 2-4 hours | Yes |
| Electric (50 amp) | Not recommended | $1,200-$2,000 | Dangerous | 3-5 hours | Yes |
| Sewer (existing cleanout) | Free-$50 | $200-$500 | Easy | 1-2 hours | Rarely |
| Sewer (new septic tank) | Not recommended | $2,000-$12,000 | Very diffiicult | Days-weeks | Yes |
| Full hookup (DIY water/sewer + pro electric) | $1,400-$1,500 | $3,000-$5,000 | Mixed | 1-2 days | Yes |
Why Installing RV Hookups at Home Matters
Installing RV hookups on your property offers significant financial and practical benefits, especially if you store your RV at home or use it frequently for weekend trips. Professional RV storage facilities charge $50-300 per month. Home hookups can pay for themselves within 6-18 months, and you get the convenience of immediate access.
Installing home RV hookups matters for:
- Cost savings: You can eliminate monthly RV storage fees, saving hundreds or thousands of dollars each year
- Convenience: Pre-trip prep is easier with access to water and power for cleaning and loading
- Guest accommodations: You can provide comfortable, private lodging for visitors without crowding your house
- Property value: Hookups can increase home resale value in RV-friendly markets
- Rental income potential: List your hookups on platforms to earn $20-50 per night from traveling RVers
The biggest misconception is that installing hookups requires professional contractors for everything. In reality, water and sewer hookups are straightforward DIY projects for somewhat handy homeowners—only electrical work requires professional installation for safety and code compliance.
How Much Does It Cost to Install RV Hookups?
The cost to install RV hookups can vary quite a bit. In the end, the total will depend on how much work you’re able and willing to do on your own, how many amps your RV requires, the type of sewer system you’re working with, how far from your house you’d like your hookups to be, and where you live.
- Cost to Install an RV Water Hookup: Around $30 if DIY; around $700 if not.
- Cost to Install an RV Electric Hookup: Around $1,200 for a professional install.
- Cost to Install an RV Sewer Hookup: Free (or extremely cheap) for use of current sewage disposal system; $2,000–$3,000 for RV-specific septic tank.
So, how much does it cost to install RV hookups? The true answer is that the cost can vary wildly, but you’ll be looking at an investment of anywhere from $200–$300 for a DIY job, to a few thousand dollars for a professional to do the work.
How to Install RV Hookups at Home (Step-by-Step)
Want to save a few bucks on RV hookup installation cost by doing the work yourself? Good plan! Most of this project is pretty straightforward and can be done by any moderately handy individual with a good bag of tools.
Here’s how to install RV hookups on your property.
- Create a parking pad
The first step is to create a parking pad for your RV. The goal is to have a level surface that can support the weight of your RV should the ground become very wet. Gravel and cement both work well.
Your pad should be at least 4 feet wide and long enough to comfortably accommodate your rig and then some. Make sure there are no low-hanging branches or power lines over your pad, and consider the distance to your house and how that will affect your water and electric hookup installation. - Install a post
Once your pad is in place, a hole should be dug to hold a post securely in place. The hole should be about 8 inches wide and 30 inches deep. Place a 4’x4’ post into the hole and pour concrete around it to hold it in place. This pole will hold your electric and water hookups, so it should be placed on the driver’s side of the RV.
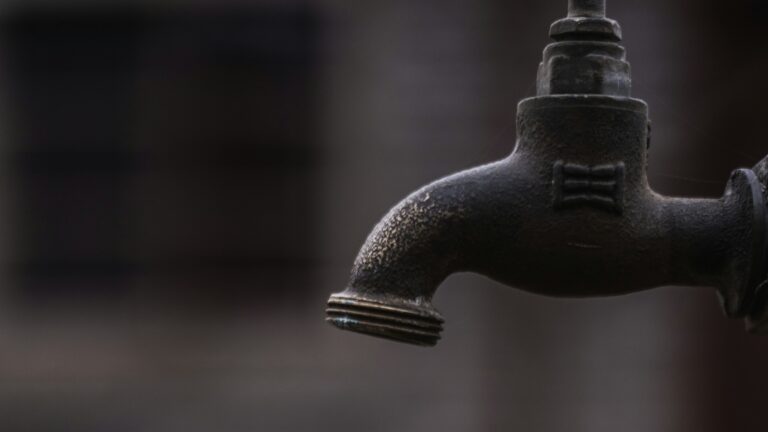
Note: It’s important to contact utility companies before digging in your yard. This will ensure you avoid existing gas, water, and power lines, saving you money and possibly your life. - Put in your water hookup
Putting in a water hookup is a relatively straightforward process. Dig a trench below the frost line from your water source to your post, then run a high-rated CPVC pipe through the trench, connecting it to the water supply and securing it well.
Wrap the exposed waterline with heat tape to prevent freezing, secure the water line to your post using pipe clamps, fill the trench with cement, and cover the trench with dirt. Add your faucet to your water line, and now you have a water hookup! - Turn to the electricity
Next, you’ll need to consider the electric hookup. While this can be done by a very knowledgeable person who has experience working with electricity, this isn’t a job for most people. We recommend calling an electrician if you don’t have the experience to get this step done.
Whoever installs this hookup will need to be aware of what type of plug your rig uses: 30-amp or 50-amp. The ‘heads’ of these cables have different and specific prong layouts, so you’ll want to make sure a compatible one is put in place. - Finish with sewer
Last but not least, you will need a sewer hookup. In some cases you may not need to install anything at all.
How do I hook up my RV to my house sewer?
If your home is connected to a public sewer system, you likely have a cleanout in your yard. As long as it’s legal in your area, you can pop the cap off this cleanout and hook your RV up to that—though if you’re far away from it, you might need a really long hose and a macerator pump to move the sewage along.
How do I hook up my RV sewer to my septic tank?
If you have a septic tank, the process could be just the same. However, you may find that there isn’t a cleanout to dump into. In this case, you may need to install a 4-inch pipe upward and out from the septic tank in order to give yourself something to dump into.
If you can’t do any of the options above, the final option is to add an RV-specific in-ground septic tank. This is both expensive and much more difficult. Therefore, we only recommend it as a last resort. If this is what you need to do, you will likely want to bring in a contractor to bury the tank, and you will definitely need to bring someone in to pump the tank from time to time.
Don’t love any of these sewer options? You might consider switching to a composting toilet.
Can You Hook an RV Up to a House?
Now you know how to install RV hookups on property, but let’s say you don’t have the time, money, or skills to install RV hookups in your yard. Could you just hook your RV up to a house? Well yes, but there are some things you should know first.
Electricity
If you have an outlet on the outside of your house, you absolutely can plug your RV into it. The thing is, it is likely only a 15- or 20-amp outlet. Since all RVs are made to plug into either a 30-amp or 50-amp outlet, and since the plugs for these types of outlets are different from one another, you will need to invest in an adapter in order to plug your RV into a regular house outlet.
Additionally, because the house outlet will only put out 15 or 20 amps, you will not be able to run everything in the RV. In many cases, you won’t be able to run the air conditioner at all without tripping a breaker, and even the microwave is questionable. But yes, as long as you’re able and willing to limit what you run, you can hook an RV up to a house outlet.
Water
You can connect a fresh water hose to your house water spigot and hook that up to your city water inlet. You could alternatively use that outside water source to fill your fresh tank and simply use that water while parked in your yard. Either way, getting fresh water into your RV when parked next to your house is fairly simple.
The last hookup is sewer, and we discussed how to connect your sewer hose to the city sewer system or a home septic tank already. That said, you do really want to make sure it is legal to dump into the city sewer if that is the route you plan to take.
Key Takeaways
- Installing RV hookups costs between $200-$300 for DIY and $3,000-$5,000 for professional setups.
- Water and sewer hookups can often be DIY projects, while electrical work requires professional help for safety.
- Home RV hookups save money on storage fees and provide convenience and guest accommodations.
- Cost to install RV hookups varies widely based on DIY effort and local factors, influencing final investment.
- Permits for sewer connections are typically required, and understanding local codes is essential before starting any installations.
RV Hookups FAQ
It really depends on what your home setup already includes and how much work needs to be done. Conservatively, you may be able to install full RV hookups at home for a few hundred dollars, but at the higher end, you may be looking at up to $1,000 to $3,000 for professional electrical hookup installation, and as much as $2,000 to $12,000 for sewer hookup installation.
Factors that determine the cost of installing a residential RV hookup include whether or not you need to trench or level your land, the cost of setting up a parking pad (and whether you want it to be paved), your distance from the main electrical panel and existing sewer connection of your home, how much amperage your rig draws, local labor rates, how much you’re comfortable DIYing, and more.
It really depends on what kind of RV you drive. If you’re in a larger, Class A motorhome, it may need 50 amps to run its electrical system properly, whereas smaller motorcoaches and travel trailers can draw just 30 amps. Want to have the flexibility to upgrade? A 50-amp connection is best. If you’re still using a 30-amp RV, you can always use an adaptor.
Yes, in the vast majority of states and local jurisdictions, you’ll need a permit in order to install an RV sewer connection on your property. That’s because this is a major project that involves modifying plumbing and potentially digging in public rights-of-way. You may also be required to get your plan pre-approved, undergo professional inspections, and pay connection fees to the local sewer utility company.
It depends on the homeowner! While it is technically possible to set up these utilities yourself if you’re very handy and skilled at DIY, working with electrical connections and plumbing is complex and sometimes downright dangerous work. Most homeowners will likely want to contract professional help with the labor. And in some states and municipalities, local laws may prevent you from DIYing these jobs.
Want to offset your RV hookup installation costs? List your RV on RVshare and earn rental income when you’re not using it!

