RVing is, without a doubt, one of the very best ways to get away if you’re hoping for pretty views, some time outdoors, and a space of your own. For many, it’s also the most relaxing way to get away. That said, for a first timer, RVing can be a little bit overwhelming.
No, it’s not sleeping in a comfy bed in the middle of the wilderness that’s overwhelming, nor is it cooking in your own tiny kitchen, nor the ability to use the restroom wherever you roam.
The thing that does tend to overwhelm RV newbies? Campsite setup and teardown.
This is understandable. There is a lot to remember when going through these processes. However, by understanding what steps you need to take, you can reduce your stress levels, remove some of that overwhelm, and ensure you have a nice, relaxing getaway.
That’s what this article is for. Below we’ve included the steps you’ll want to take for a successful campsite setup and teardown. Read it, memorize it, or write down a checklist and take a photo of it so you can follow along during your getaway, and you’ll be sure to get it done right the first time.
Let’s dive in!

Finding a Spot
The first thing you’ll need to do to have a successful camping trip is find the right spot for you and your rig. This involves locating a good campground and then finding a suitable campsite within that campground.
Here are our tips for each.
Finding the Perfect Campground
Finding a campground is as easy as running a Google search for “campgrounds near me” or “campgrounds near {insert the location you’ll be visiting}”. Another option is to check out websites like Campground Reviews or freecampsites.net. We also love apps such as RV Life and Allstays, which make finding a campground in a specific area a cinch.
Once you have a list of potential options pulled up, start reading reviews in order to narrow those options down. You might also check out the amenities offered at each place, and consider whether you need a pet-friendly or kid-friendly spot. Of course, location is also important, so you’ll want to decide how far you’re willing to drive to see whatever sights you’re planning on checking out during your getaway.
Want more tips on finding the perfect campground? Check out this article on the subject.
Picking Out a Good Site
With a campground chosen, the next step is to choose a site. Some campgrounds will do this for you, assigning a site based on rig length and any other criteria you provide. Some will allow you to request sites before arrival; others will not.
If the campground you’re visiting doesn’t assign sites, it’s up to you to find the perfect one. We wrote a whole article on how to do this, but some basic things to look for include:
- Size of site
- How level the site is
- Proximity to bathrooms and entrance/exit
- Shade

Setting Up Camp
Once you locate the ideal campsite, the next step is campsite setup. This might seem easier said than done, but once you jump in you’ll realize it’s simply a matter of breaking the process down into steps.
Backing Your RV In
The first thing you’ll need to do when getting your campsite setup is get into the site. This can be a little bit scary at first, but it’s totally doable, and most camp hosts are happy to help if you’re not confident you can do it on your own.
Below are some tips to make this process easier:
- Take it slow. There is no rush.
- Get a backup camera so you can see everything behind you.
- Have someone spot you. Roll your windows down or use two-way radios to communicate.
- If you’re backing a trailer, remember that you will need to turn your wheel left to go right and vice versa. (Some people think of it as steering from the bottom of the wheel rather than the top. Use whatever mental trick works for you.)
Making Things Steady and Level
Once you’re in your site, use a bubble level to determine if your RV is level (front-to-back AND side-to-side). If not, you may want to pull one side of the trailer or motorhome onto leveling blocks to make things nice and even.
After that, those pulling a trailer will want to unhitch—in the case of a bumper-pull, using the tongue jack to finish leveling the trailer. Use wheel chocks to ensure the RV stays in place during your stay. Finally, if you have them, put the RV jacks down to keep everything nice and solid throughout your trip.
Getting Hooked Up
The next thing you’ll need to do is hook your RV up to the campsite amenities. In the case of a full-hookup site, this will include water, electric, and sewer. However, many sites include only one or two of these amenities.
If water is not included, we recommend filling your fresh tank with potable water at the inlet marked “fresh water” before you park. If sewer isn’t included, you’ll want to dump your waste tanks beforehand.
To hook up to electricity, find your RV’s electric cable. This is usually tucked behind a small labeled door, but might also be completely detached, meaning you’ll have to plug it into the receptacle on the side of the RV. This cable then plugs into the electric post at the side of your campsite. If you don’t see an electrical receptacle that matches your plug on the post, you may need to get a 30-amp to 50-amp or 50-amp to 30-amp adapter, depending. It’s also recommended that you use a surge protector when hooking up to campground electricity.
As far as water goes, you simply need a white or blue freshwater hose. One end of this hose connects to the RV city water connection (this is usually labeled) and the other connects to the campground water spigot. We do recommend using a water pressure regulator between the hose and the spigot, and many campers like to use an in-line filter as well.
Finally, to hook up to the sewer, you will need a sewer hose. This twists onto the wastewater outlet, which is usually found down low toward the backside of travel trailers, but might be in a storage bay if you have a motorhome. The other side of the hose will twist into the sewer dump* with an adapter that is usually included with the sewer hose kit.
(*Note: Some sewer dumps don’t have a threaded opening, so you’ll sometimes need to get creative about holding the end of the hose in place. You might keep some heavy planks of wood or large rocks on hand for this purpose.)
We don’t recommend leaving your tanks open all the time. Instead, when the tanks are nearly full, open the valve for the black tank (toilet sewage), letting it empty completely before closing it and doing the same with the gray water (sink/shower drainage) valve. That way, nothing solid should be able to collect and dry out at the bottom of your tanks, and in a sense, you’ll be rinsing your sewer hose of the worst stuff (although gray water can certainly be gross too, in its own way).
Finishing Touches
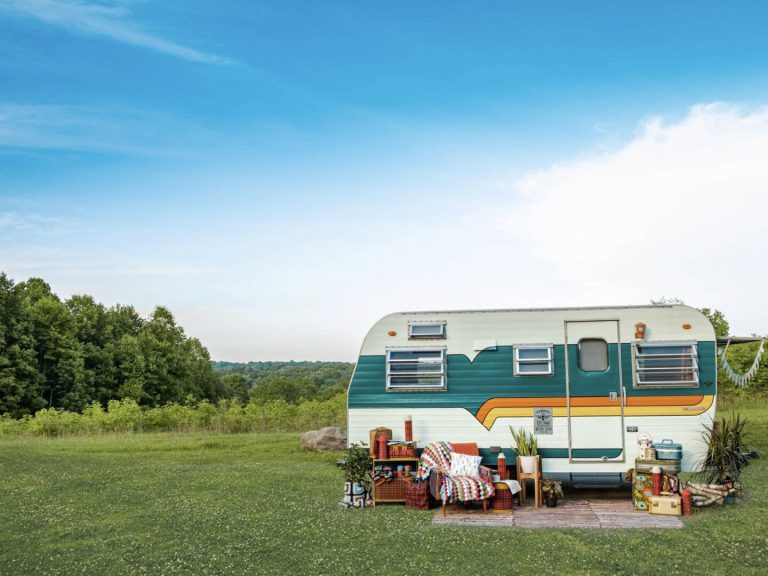
With everything level, steady, and hooked up, the final step in the campsite setup process is add the finishing touches to your campsite. This might include putting out an outdoor rug, setting up a grill, putting out chairs, or even setting up a hammock. Really, this all depends on what kind of camping experience you’re looking to have.
Many people also like to put out the awning, but it is important to note that heavy winds and rain can and will damage your awning, so you’ll want to pull it in any time there is a storm in the forecast, especially if you’ll be leaving the camper for any length of time.

Tearing Things Down
Finally, when it’s time for your trip to come to a close, you will need to tear down your campsite. Honestly, this is just the reverse of what you did before, but we will go over things step-by-step in order to make the process as easy to follow as possible.
Pack Up
Obviously, the first thing you’ll need to do is pack everything back up, putting outside items into storage bays and cleaning the interior of the RV and putting things back where they belong. This can be done the night before if you feel like you might be in a hurry the next morning.
Get Hitched Up
If you’re pulling a trailer, you will need to go through the hitch-up process before you can pull out. Likewise, those who are driving motorhomes with tow cars will need to get hitched up. Obviously, trailers will need to be hitched up in the same site, but many who pull a tow car choose to do so in a parking lot after leaving the site in order to have more space and a more level surface to work with.
For instructions on hitching a bumper-pull trailer, check out this video. Those looking to pull a fifth wheel can find instructions on hitching up here. Meanwhile, those with tow cars should consult the manufacturer’s instructions for their tow dolly or flat-tow setup in order to ensure they do everything correctly.
Consult the Checklist
We recommend creating a packing-up checklist before you leave home. This will ensure you remember everything before leaving home and before pulling out of your site. Your list should include all of the following steps, but you might choose to add even more steps, depending on your personal situation and the type of rig you have:
- Close Cabinets and Drawers
- Clear the Counters and Tables
- Lock the Fridge
- Pull Down the Antenna
- Close the Awning
- Pull in the Slides
- Pull Jacks Up
- Pull in Stairs
- Remove Wheel Chocks
Do all of these things, checking them off the list as you go, and finish the process with a walk around to ensure each step was done properly.
Pull Up Directions
Before you start driving, be sure you know where you’re going. While still sitting in your campsite, pull up directions on your GPS and download them in case of poor service. You might also use this opportunity to ensure you have a current road atlas on hand for emergency situations.
Leave Slowly and with Care
Just as there is no rush to back into a site, there’s also no rush to pull out of it. Far too many people make the mistake of leaving a campsite in a rush, only to run the side of their RV into a pole or tree. This is not a good way to end a camping trip.
Avoid this mistake by taking it slow and steady, checking for obstacles before getting into the rig, using your mirrors to check continuously, and if you can, sending someone outside to be your spotter.
Double Check
After you pull out of your site, ask your spotter to do a quick double-check and make sure you got everything out of the site. Sometimes things roll under the RV and we never even notice until the next trip when they’re missing.
This is also a good opportunity for this person to walk around the rig one more time to ensure everything is as it should be before you hit the road.
As you can see, campsite setup and teardown does not have to be a stressful or overwhelming process. Just take things slow and steady, going step by step. After doing this a few times, you’ll be a campsite setup and teardown pro, able to do the whole thing efficiently and without any stress at all.
Ready to try these steps for yourself? Rent an RV today so you can try your hand at campsite setup and teardown!
May contain affiliate links.


