Your RV roof is the most common part of your RV to forget about, as it’s not always easy to see up there. Therefore, it often becomes the most neglected area of your RV, potentially causing some serious consequences down the track.
Did you know that even the tiniest scrape on a tree branch could cause roof damage that requires immediate attention? Whether it’s piercing the rubber roof membrane, damaging the corking, or causing a hole in the fiberglass, you’ll need to be aware of these issues in order to stay on top of them.
Thankfully, our ultimate guide to RV roof repair covers everything you need to know about this topic, including how you can quickly and easily fix any leak that arises.
RV Roof Repair Products
There are plenty of RV roof repair products on the market to help you quickly and easily fix any problems which arise. The most common of these include:
- RV Roof Repair Tape (such as Eternabond RV Roof Repair)
- Roof Coating Sealer Paint
- RV Rubber Roof Repair
- Roof Caulk
You can purchase these products at great prices from Amazon. Your local hardware store or RV specialist may also stock them – just be sure to shop around for the best deal!
RV Roof Leaks: Signs to Look Out for
It’s recommended that you perform a thorough inspection of your RV a few times a year to ensure there are no signs of water leakage or wear and tear that could lead to leaks down the track. Here are some vital signs to look out for:
- cracked or damaged caulk
- gaps in sealed areas
- ripples or irregularities in the shape of the fiberglass
- soft spots
- discoloration
- unexplained dampness inside your RV
- mold
- wrinkles on the walls (particularly around doors, windows, slide-outs, and vents)
How to Fix Leaks
If you’ve discovered signs of an RV roof leak, then you’ve come to the right place. Here’s a simple step-by-step guide to repairing RV roof leaks.
Step 1: Locate the source of the leak. If this isn’t easy to spot, then you can enlist the help of a professional to perform a smoke test, or you can conduct a DIY air pressure test.
Step 2: Examine the damage and determine the cause. Is the leak caused by a crack in your RV roof’s caulking or a tear in your waterproof membrane?
Step 3: If damaged caulking is to blame, then simply purchase a tube of RV compatible caulking and repair. Alternatively, if your waterproof membrane has been damaged, then we recommend you follow the steps in the next section.
How to Repair Rubber Roofs on RVs
Your RV roof’s waterproof membrane (also known as rubber roof) can sometimes tear if it comes into contact with a sharp tree branch, among other things. Thankfully, if caught early, it isn’t too difficult or expensive to repair the rubber roof on your RV. Keep reading for our RV rubber roof repair instructions!
Repairing a tear or hole
Start by using a spray cleaner to remove any dirt or oil from the area. Once dry, apply an appropriately-sized patch of RV roof repair tape to the damaged area. Keep in mind that this stuff is incredibly strong, so once it’s stuck in place, you cannot peel it off again. Finally, use a solid rubber roller to apply moderate pressure for a permanent seal.
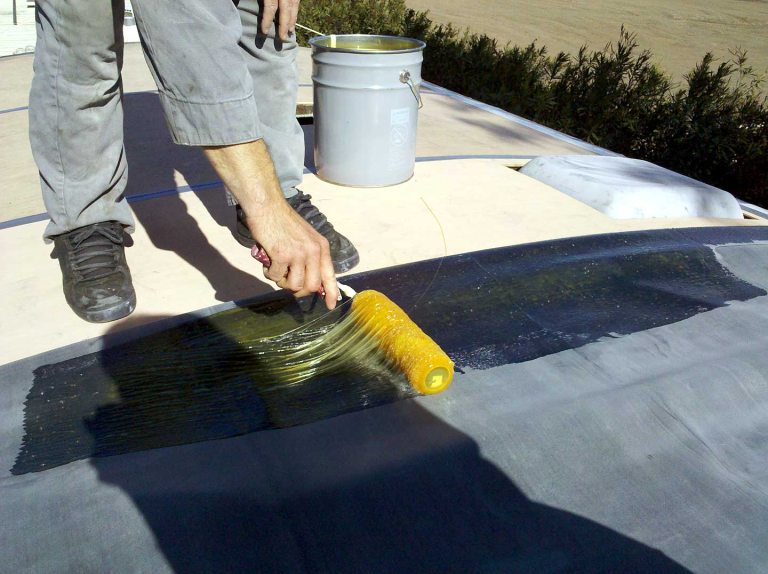
Re-applying rubber roof to the entire area
Rubber roof – or EPDM – can be used for patching or to apply a new surface to the entire roof. Before beginning, first, make sure that your product is compatible with your roof material and thoroughly go over any instructions included.
The basic 4-step method includes:
- Repair the existing water leaks using the method above
- Clean the entire roof surface using an RV roof cleaning product and a stiff broom. Then, power-wash the roof and let it dry thoroughly.
- Prime the roof using an EPDM roofing primer, paying close attention to the manufacturer’s instructions.
- Apply the first coat of rubber roof and let it cure as required. This could take anywhere from 1 to 3 days, depending on the weather. Then, apply a second coat in the same manner, except this time roll in the opposite direction. Be sure to thoroughly stir the mixture before you apply it also.
Armed with our ultimate guide to RV roof repair, you’re now ready to take on any roof leak or rubber roof damage that comes your way! Remember, prevention is better than cure, so aim to thoroughly check your RV roof multiple times each year to prevent complex water damage.

