
 If you’re an owner who lists your rig for rent on RVshare, you know how powerful the platform can be when it comes to putting extra money into your pocket.
But in order for your RV to meet its full earning potential, it’s critical that you take high-quality photos of your travel trailer or motorhome so your renters know what they’re getting before they click the “book” button.
Some renters even go so far as to hire professional photographers to come out and take their RV pictures. After all, marketing is everything when it comes to business, no matter what your business may be — and rental RV marketing is all about showing renters exactly how much luxury and comfort they can expect from their rental experience.
But if you don’t have the cash to shell out on professional photog (or just don’t want to wait around for the pristine, edited results), take heart: you, too, can learn how to take good photos, even with minimal equipment.
In this post, we’ll cover our five best tips for taking A+ RV photos — the kind that’ll get your RV rented weekend after weekend.
Photography Basics
Learning how to take good pictures starts with the bare basics, whether your subject is an RV or a rhinoceros. Here are a couple 101-level lessons from photography that can help you make your pictures the very best they can be.
1. Get focused.

Ever seen a photo advertising something for sale on Craigslist or in the local paper — only to pause and turn your head, wondering what on earth that blurred-out object even is?
Photos that lack focus don’t do your listing any favors. Not only will your renter be unable to parse out what they’re looking at, but they’ll also make you look unprofessional and lazy… which doesn’t necessarily say great things about your rental rig.
Fortunately, today’s technology makes it pretty darn easy to take high-quality, focused photos; you won’t need to fiddle around with manual lenses on a clunky SLR. (Don’t worry if you don’t know what any of those words mean; your smartphone likely has a powerful enough camera to tackle the project of photographing your RV. It just takes time, patience, and a little bit of attention to some other photography basics… which we’re about to get into!)
2. Consider composition.
There’s a big difference between a quick snapshot and a well-composed photograph — which is what elevates photography from a simple, mechanical skill to an art. And since photographers aren’t creating images with paints or charcoals, the tool that sets apart their work is all about eye and composition.
Take, for example, the rule of threes, one of the most frequently-remarked-on photography rules of thumb. Basically, imagine your image frame cut into nine spaces by two horizontal and two vertical lines, creating even thirds along both axes of the picture.
It might be a little hard to visualize, so for context, check out the photo below:

It’s easy to see that this is a pleasing photograph, invoking a sense of serenity while also capturing the countryside well. But if you take a closer look, you’ll see the photographer didn’t just snap the shot at random.
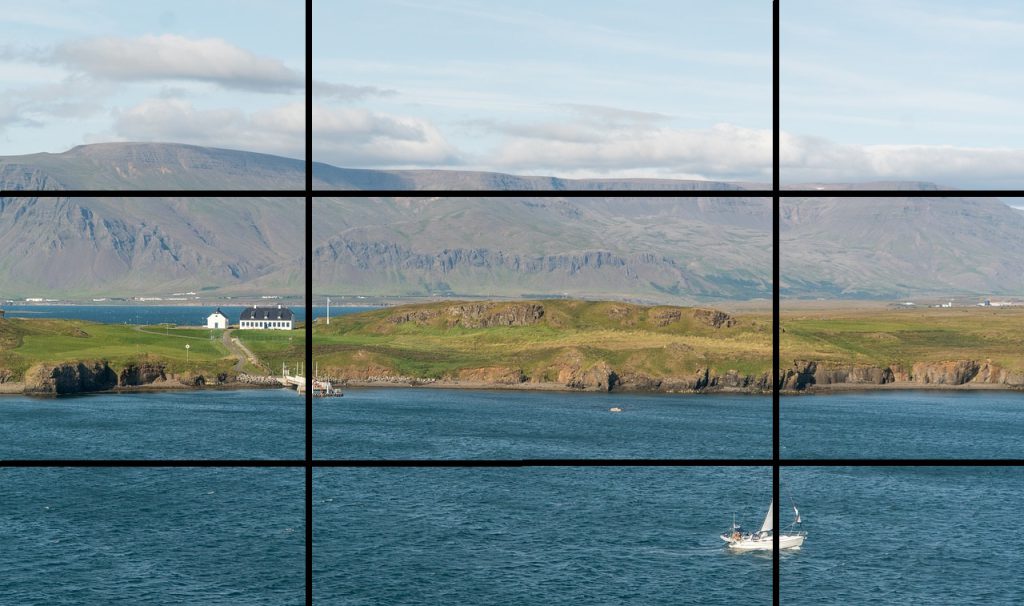
Rather, they created an image where the most interesting elements — the sailboat in the lower right hand corner, the building along the island — are close to the lines created by these thirds.
Although most amateur photographers think the best course of action is to place the object of focus smack in the center of the frame, if you start surfing the images available on free image websites like Pixabay or Pexels, you’ll see how much more common it is to utilize this rule of thirds. It can really lend a lot of strength to your photos. Of course, when it comes to marketing photography, making sure you’re capturing your subject entirely and faithfully takes precedence… but try to think about how you might employ the rule of thirds by, for example, ensuring an interior prop like a throw pillow shows up along these lines.
Photography Lighting
Even the most advanced photographer can’t do good work without proper lighting. Here’s what you need to know to take well-lit RV images.
3. Lighting is everything.

Cameras literally can’t work without light. That’s why most come with an installed camera flash to make up for too-dark environments.
But for best results, you want your photo light to be more powerful than a cell phone flashbulb. Ideally, you can utilize natural sunlight to make your photos shine; you’ll probably want to take your interior photos during the brightest part of the day with all the window shades open, and exterior photos in the hours just after dawn and before dusk, when the golden light makes everything look dramatic and attractive. (Psst: this works for people, too; take note next time you’re looking for new headshots.)
If you live in a place that’s frequently overcast or otherwise are unable to harness the natural power of the sun, consider bringing in exterior lighting in order to facilitate the high-quality photos you need to market your rig. You can invest in photographer-specific tools like umbrella lights, of course, but it can also be a simpler affair using a white sheet, a friend, and a flashlight. Just make sure it’s lit!
How to Take Great RV Photos
Your crash course in RV photography is almost complete — but there’s a little bit left to learn!
4. Be inclusive.
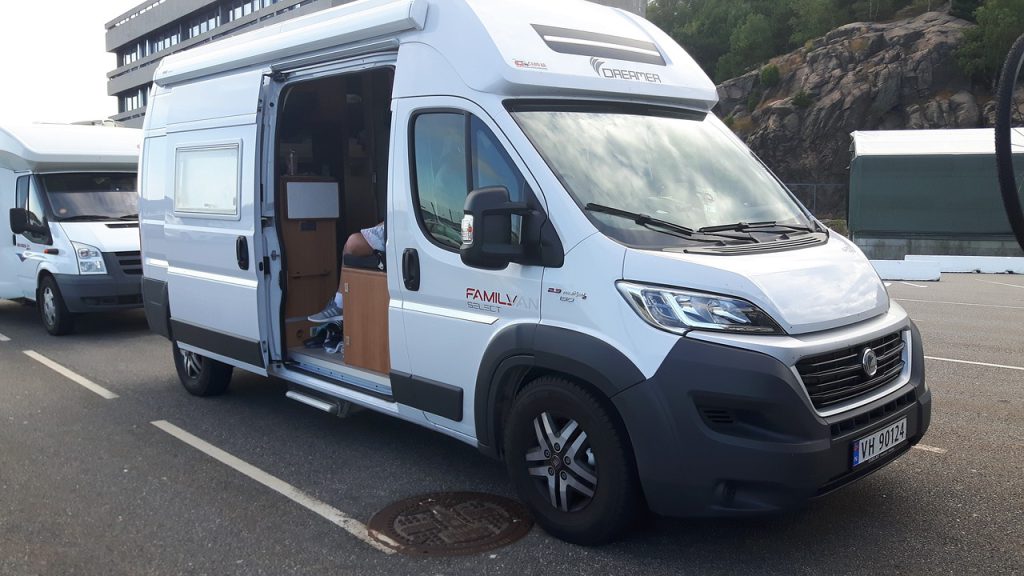
When it comes to creating a great RV rental listing, it’s all about making sure you give your potential customers a complete view of the goods before they agree to sign over their rental fee. That means photographing not just the RV exterior, but also the interior, the cockpit, the kitchen, the bathroom… you get the picture.
The best-performing listings often have lots of photos, while those that only have one or two quickly-snapped shots might not do as well against their better-photographed competitors. Be especially careful to include anything that makes your RV stand out, whether it’s a unique feature (say, a bathtub or a washing machine), or a fun extra you include as a renter, like a welcome basket or a borrowable kayak.
Staging Your RV Interior
There’s one last very important trip to making sure your RV pics are convincing and attractive for your renters. But this one is less about what you do behind the camera… and more about what you do in front of it.
5. Set it up right!
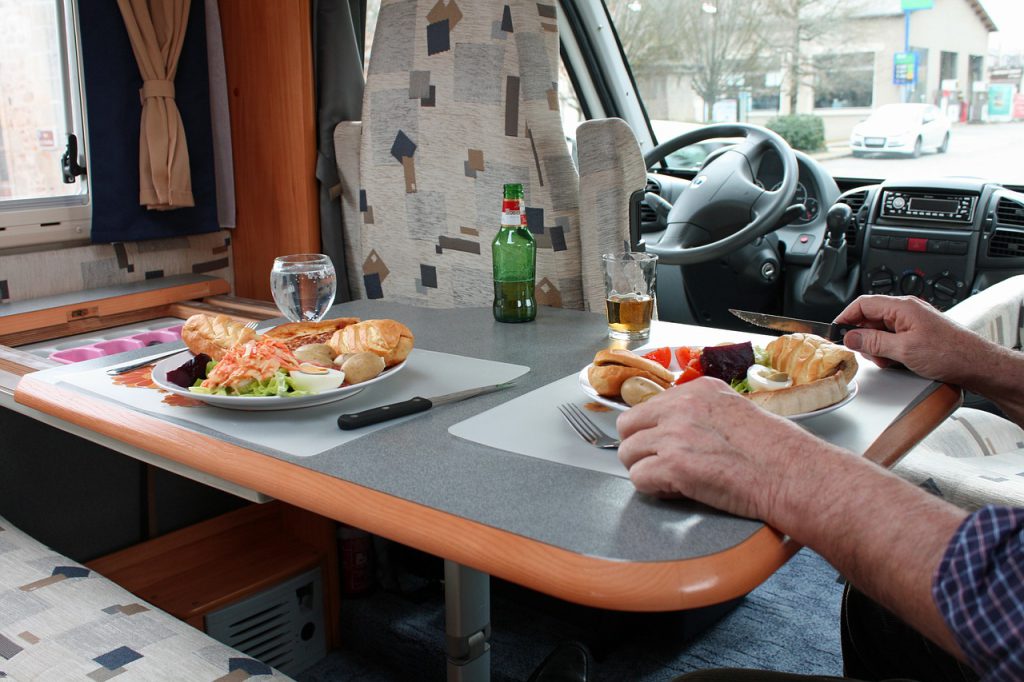
An RV rental business is actually about selling an experience, not a piece of equipment. The purpose of your photos is to show your would-be renters exactly what that experience might look like.
And while your RV should be sparkling clean and you definitely want that pristine bright lighting, it’s highly likely that your listing will perform better if you do a little bit of extra work to set up your rig like it would look while it was actually lived in.
This doesn’t have to be a big deal: including some throw pillows and maybe a candle or a vase full of flowers can turn your living room from drab to fab in an instant, and besides, these touches will make renters feel more at home when they’re on the road, too. If you really want to go the extra mile, set out a bowl of fruit or maybe a muffin on a plate at the dinette set… just be sure you eat it (or otherwise dispose of it) before you lock up the rig after the day of the photo shoot. The last thing you want in your rental rig is ants!
Taking the best photographs possible is a huge step toward making sure your RV rental business enjoys peak performance… but there’s more to it than that! Once you have those beautiful photos, you need to upload them into a strong, descriptive listing, and also consider adding attractive options for your renters like Instant Book, pet-friendliness, or, in the case of travel trailers and other towable RVs, delivery and setup.
We’ve written lots of contents for our valued network of RV owners. After all, your success is ours, too! Check out the following RVshare blog posts to ensure you get the most out of your business.
- Attention Owners! Our Tips for Boosting Rentals
- Attention Travel Trailer Owners: You CAN Tow your Vehicle for Renters!
- Tips for Getting Your RV Listing in Tip Top Shape Before Summer Kicks Off!
- How to Ensure Renters Wind up Happy Campers in your RV
This post may contain affiliate links.
