An RV battery and battery box are two of the most important parts of your rig. None of the appliances or features of your RV will work without a battery. So while they may not be much fun to play around with, it’s essential to understand your RV batteries if you want to have a pleasant trip. Knowing how to protect your batteries is equally as important to keep them safe from the elements and avoid unsafe situations.
We’ll start by covering the most important things you should know about your RV batteries:
RV Battery Basics
Simply put, your RV battery is an electrical power storage device — it stores power in the form of chemicals so that it can be used later. Everything in your RV runs on at least one 12V battery to function. RV batteries are a special type of battery that stores electricity instead of producing it.
Types of Batteries
RV house batteries are deep-cycle batteries, which means they are fully discharged before they are recharged again. They are designed to store large amounts of power, so they can work over long periods of time. Deep cycle batteries can last at least 5 years if you maintain them properly. The standard types of RV house batteries are flooded lead-acid, absorbed glass mat (AGM), and lithium-ion.
Flooded lead-acid RV batteries are the most common RV batteries. They are called lead-acid batteries because they’re made up of lead plates and lead oxide that are kept in a mixture of sulfuric acid and water called an electrolyte. The more electrolyte and larger the lead plates, the more charge the battery can hold. The batteries lose some of this electrolyte each time they’re used, so you’ll have to refill them with distilled water every so often. You should avoid using tap water, as the minerals can react with the electrolytes and affect the performance of your battery.
Absorbed glass mat (AGM) batteries are maintenance-free, sealed lead-acid batteries. They immobilize the electrolyte with fiberglass mats to prevent spillage, making them a safer option. They have several advantages over flooded lead-acid batteries, such as resistance to vibration, low self-discharge rate, and better ability to handle deep discharges. Although more expensive, they are a good investment for RVs that require reliable power.
Lithium-ion batteries are the newest and most efficient type of battery in the RV world, and are a game-changer for many. Lithium-ion RV batteries are lighter and more energy-dense than other batteries, with a longer lifespan and ability to be charged and discharged repeatedly. They offer several advantages including weight reduction, more usable energy, quick charging, and maintenance-free operation.
Motorhomes employ two kinds of batteries — one to start the engine, and another for “deep cycle” applications, like running the water and lights while the vehicle is turned off. Starting batteries are generally 12 volts, but should never be used for deep cycle applications. These are housed in the engine bay.
AC vs. DC
When it comes to RV power systems, there are two main types: AC and DC.
AC (alternating current) power is the same type of power that you get from a standard electrical outlet in your home. It is used to power larger appliances such as air conditioners, microwaves, and refrigerators. AC power is generated from an external power source (AKA shore power) and distributed to your RV through power pedestals at RV parks, or by using a generator or inverter while boondocking.
DC (direct current) power, on the other hand, is used to power smaller items like lights, water pumps, fans, and TVs. It is generated by the RV’s battery, which stores energy from sources like solar panels or the RV’s engine alternator. The DC system relies on one or more RV-installed batteries to function.
To connect these two systems, RVs are typically equipped with a converter, which charges the DC batteries when the RV is connected to an AC power source. Some rigs also have an inverter, which is a device that converts DC power into AC power. These RVs will have specific wall outlets that provide AC power but run on the DC battery system.
When your RV is connected to shore power, everything in the rig can typically be powered and you don’t have to be as conscious of your power usage. But if you’re boondocking or don’t have access to shore power, you’ll be relying on the DC system to power essentials like lights and water pumps for a few days. In this case, you’ll definitely want to be more frugal with your power usage!
Power Sources
When it comes to keeping your RV battery charged and ready to go, there are several different power sources that you can use.
#1 Shore power: This is a reliable and convenient source of power for RVs, and it involves plugging your RV into an external power source using a power cord. This can be done at a campsite or RV park with hookups, or any location with an electrical outlet.
An RV converter/charger that converts the power from the grid into a 12v DC and channels that to the adapter should already be fitted on your RV. If you don’t have one, consider a three-stage converter for your RV. (The three-stage converter is much more effective than the inbuilt converter too).
The three stages of the charger are:
- The bulk charge – the charger delivers the maximum amount of current to the battery, charging it quickly and efficiently.
- The absorption charge (sometimes known as the “cool down cycle”) — the charger reduces the current to prevent the battery from overheating and continues to charge it until it reaches its maximum voltage.
- The final “trickle” or “float” stage (AKA the “maintenance stage”) — the charger feeds a steady current to the batteries until they’re fully charged. This prevents overcharging and can help maintain the battery’s health over time.
Power for house batteries is measured in amp-hours (AH) or reserve capacity (RC). AH refers to how many amps the battery puts out over a 20-hour period, and RC refers to how many minutes the battery can support a 20-amp output. The larger either of these numbers is, the more power your battery is going to have.
#2 Generators: If you’re out on the road and don’t have access to shore power, a generator can be a great alternative. These devices use fuel to generate electricity, which can be used to charge your RV battery and power your appliances.
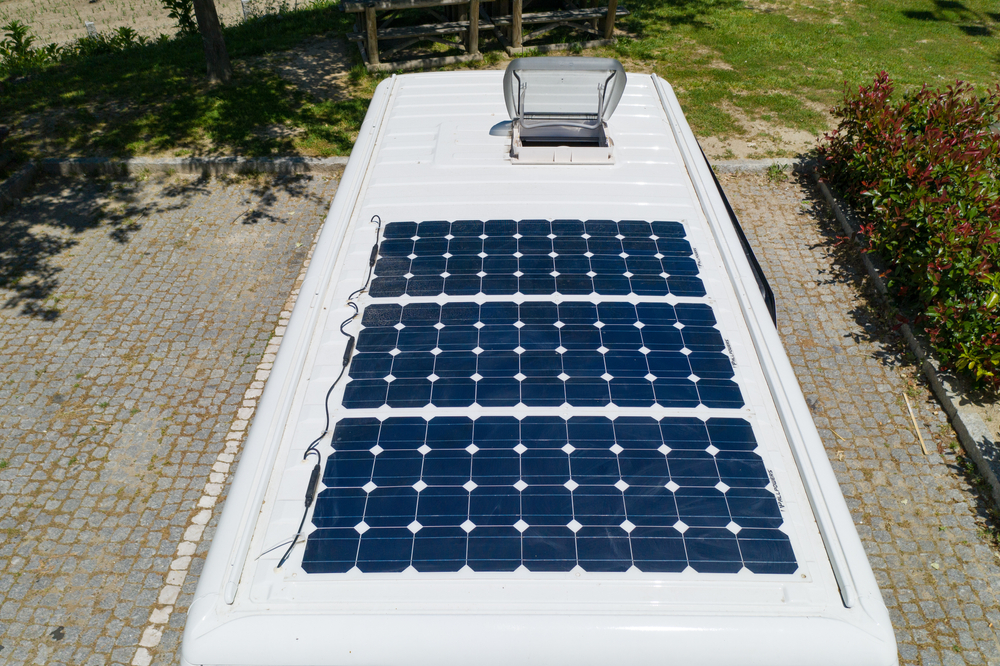
#3 Solar and wind power: For those who want to go off the grid and rely on renewable energy sources, solar panels, and wind turbines can be a great option. These devices use the power of the sun or wind to generate electricity, which can be stored in your RV battery.
#4 Propane: If your RV has propane appliances such as a stove or furnace, you’ll need to keep your propane tank filled in order to ensure that these appliances work properly. Your RV battery plays an important role in powering the electronic components of your propane appliances. For example, your propane refrigerator may have an electronic control panel that requires a constant source of power to operate.
How to Know if Your RV Battery is Properly Charged
Batteries should always be above a 50% charge. If they drop below that, recharge them! If they go below a 20% charge, that can affect their RV battery life – they may be permanently damaged and won’t function at 100% again. Also, 12v RV batteries give off slightly more voltage when they’re fully charged.
You can see the state of your charge by using an RV battery monitor or digital voltmeter. Keep in mind that it always takes less time to drain your batteries than it does to recharge them again.
Charging & Discharging RV Batteries
The life of an RV battery can be increased by following a few simple tips when it comes to charging and discharging.
- Never let a battery charge drop below 10.5 volts.
- Never let your battery charge drop below 50%.
- Hot temperatures and overcharging can kill RV batteries. During hot weather or high usage check the batteries frequently and add distilled water as needed.
Safety Devices
No matter which power source you use, it’s important to make sure that you’re using it safely and effectively in order to maintain the longevity of your RV battery.
- Fuses: Fuses are important safety devices that protect your RV’s electrical system from overloads and short circuits. Some RVs have fuses that can be reset just like a house, but RVs with replaceable fuses should always keep a few replacements on hand in case you lose power and one blows.
- Surge protectors: Using a surge protector is crucial for protecting your RV’s electrical system from power surges and fluctuations that can damage your appliances and electronics. It acts as a safeguard between the power source and your RV’s electrical system, ensuring that the power supply is stable before the electricity reaches your RV. Although not essential, surge protectors can save you a lot of money and frustration in the long run.
Making Sure You Have Enough Battery Power
To get more power in your RV, you can combine multiple RV batteries in a series to create a bank, which would increase the voltage and amps. You can also have RV batteries in parallel, which increases the current while keeping the voltage the same. To do this, you connect two positive terminals with two negative terminals, creating a negative/negative and a positive/positive. The batteries then drain equally.
It’s important to note, NEVER connect different battery sizes together in the same bank series, as there will likely be charging and voltage discrepancies between them.
Check your batteries to see what you have, and consider your needs before purchasing any new ones. If you spend most of your time in RV parks, upgrading may not be necessary. However, those who do a lot of boondocking might want a way to store more power for off-grid use.
Winter Storage for RV Batteries

If you store your RV for the winter, there are a few things to do to make sure your RV batteries stay in good condition. Leaving the batteries as they are all winter will cause them to discharge little by little, leaving you with a flat battery in the spring. This is bad for the life of the battery. Also, a partially-discharged battery can freeze whereas a charged battery won’t freeze. To avoid these problems, consider removing your batteries from your rig and storing them at home. Check the voltage once a month while your vehicle is in storage to be sure they’re functioning properly, and charge them if they dip below 80%.
If you can’t take your batteries out, disconnect the house batteries to avoid “vampire devices.” Appliances like smoke detectors, fridges, and propane detectors can all slowly drain the battery, even when they’re off.
Caring for your RV battery
To make sure you get the most use out of your house batteries, make sure to cycle the battery down to 50% discharge before recharging, instead of waiting until it’s down to 20%. In general, the sooner you can recharge your battery, the better.
You also want to be careful of undercharging the battery. Make sure it charges to the full 100% before unplugging and using it. Undercharging can age your battery and cause sulfation, where sulfate material crystalizes on the discharged portions of the battery plates, making them useless.
Keep the Connections Tight
Keeping the connection tight is another important part of maintaining RV batteries. Periodically check the battery connections, and if you see any loose connections, simply re-tighten them. When disconnecting the battery, remove the negative charge first. When reconnecting it again, connect the positive terminal first.
How to Prevent & Remove Corrosion
Even when the batteries are AGM or gel-based, the area where they are housed still needs to be regularly checked as the metal parts close to the batteries may suffer corrosion. Keep the area clean and corrosion free with the same solution of baking soda and water that you use to maintain the terminals. Rust and corrosion can be easily wiped off with the help of this solution, and any flakiness can easily be removed with a wire brush. If you have a lot of rust and corrosion, try a product such as Ospho and once the area is clear of all the rust, apply a coat of pick-up truck bed liner to prevent any further corrosion or rusting.
To clean batteries, dissolve one teaspoon of baking soda in one cup of water and spray it on the battery. The build-up will bubble away, then spray off any residue.
Signs of Corrosion
Battery corrosion is identified by a greenish-blue or white powder accumulated around the wire connections.
Cell batteries with water in them will out-gas when they are charged and when the gasses containing sulfuric acid touch anything that comes in contact, it can lead to corrosion. When out-gassing happens, it causes bubbles to rise through the water acid solution in the battery cells and explode by spreading acid through the cell openings. This causes the battery to have a wet film.
If the batteries are the sealed type, such as gel, AGM, or any other maintenance-free battery, they won’t out-gassing, however, there could still be corrosion from other sources and should still inspect for corrosion.
What is an RV battery box?
Now that you hopefully have a rudimentary understanding of what an RV battery is and does, you may want to understand why you even need a battery box.
Essentially, a battery box is a lightweight carrying case to protect the battery from water, gasoline, and whatever else might leak onto or around the battery. It also provides protection to other parts of your RV should the battery itself leak. Though the cases are typically lightweight, they are usually made from heavy-duty polypropylene material that can keep unwanted liquids out. You do, in fact, need one, unless you want to put one of the most vital parts of your vehicle in consistent danger.
Some people choose to buy an RV battery tray instead of a box. As the name suggests, these are trays that are used to strap batteries into place. They may seem a valid alternative, but they don’t protect against battery acid leaks and water damage to the batteries the way the boxes do. In general, battery boxes are reasonably priced and preserve batteries for longer, making them a better option.
Battery Box Features
The first and most obvious feature of any RV battery box is what batteries it can accommodate. Many batteries come with their own box, and others are made to fit into most 12-volt battery boxes, so this won’t often be a major concern. It’s always worth double-checking before purchasing, however.
If you have a dual-purpose battery, you will need to purchase an RV dual battery box to accommodate the unique design.
The best way to grasp the features of any RV battery box is simply to compare descriptions. Many of these boxes boast patented designs with locking tabs that secure the top to the rest of the box. This ensures it stays fastened to keep outside elements out, but the box has holes to allow the cables in. This should be standard, as should resistance to acidity, oil, UV exposure, and cold and hot weather conditions.
Additionally, while the battery’s design should protect against water entering or battery acid escaping, it should also be designed to allow adequate ventilation. Most battery boxes are made with this in mind, but it’s worth checking the specifications or asking a retailer to be sure.
One of the best ways to determine the quality of a battery box is to look at the specs to see how temperature-resistant it is. Some will withstand temperatures as high as 120 degrees and as low as -20 degrees Fahrenheit, and others may go as low as -40 or more. Hopefully, you’ll never need to test these boundaries, but this can be a good indicator of how hearty it is.
Vented Battery Boxes
A vented RV battery box is unique for its system of ventilation, as well as its ability to be installed in an indoor environment. Given the proper installation, you can have access to the deep cycle battery of your RV inside the cabin.
PPL Motor Homes describes how it works on a basic level:
“Battery boxes that are vented include a kit (wall connector, outside vent, and 9″ hose) for inside installations. This vented battery box also has a hole at the bottom to help with air circulation. This product meets the RVIA Code. NOTE: Since the top and bottom sections of this box are identical, the hole in the bottom section also has a protruding flange so that it will not sit flat on a solid platform.”
This kind of battery box can be useful for some but is more expensive and complicated than standard battery boxes. If you want a battery inside your cabin, or want to protect it against extreme heat with added ventilation, speak to a representative at a local retailer to see what it will cost.
Battery Box Prices
Battery boxes themselves are generally quite cheap. The well-rated NOCO snap-top battery box costs about $18 on Amazon, while the standard Attwood battery box costs about $11. A vented battery box will cost you considerably more. For instance, an Atlantis Plastic vented box is over costs over $50 on Amazon. We’ve listed a few of our favorite battery boxes at the end of this article.
Purchasing RV Batteries & Battery Boxes
Rv batteries come in a variety of options and price ranges. You’ll want to think about how much power you will need, how much room you have to store it, and how much weight you can spare to carry it, among other things as you choose your RV house batteries. You can purchase RV batteries & storage boxes from many places including auto parts stores, RV stores, camping stores, and through online retailers like Amazon.
Here are some of the best RV batteries we’ve come across:
- Renogy AGM Deep Cycle Battery (Best overall)
- Optima AGM Batteries
- LiTime Lithium LiFePO4 (Best for solar panels & dry camping)
- Battle Born LiFePO4 Deep Cycle Battery
- WEIZE 100Ah LiFePO4 Lithium Battery
- Universal Sealed AGM Battery
Best battery boxes:
- NOCO Snap-Top HM327BKS
- Attwood PowerGuard Battery Boxes
- Camco Heavy Duty Battery Boxes (available in regular, large, and double)
With a little research, you can be sure of finding the best RV battery for your rig. Hopefully, this helped you better understand your RV batteries and why protecting them is crucial to have power for years to come!
This post contains affiliate links. RVshare may receive compensation if you make a purchase after clicking on a product or service link.


