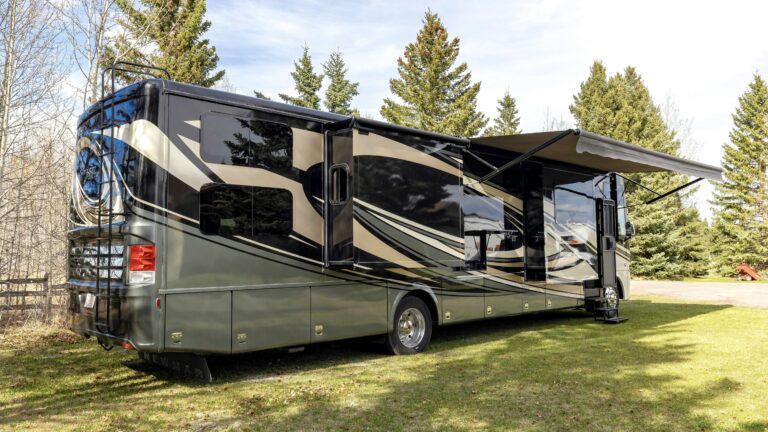
Everyone wants good weather when they go camping. Blue skies and bright sunshine make an RV trip much more enjoyable than clouds and rain. But that sun can be HOT, and on a summer day, you may find yourself searching for shade to keep cool. This is where an RV awning comes in, providing shade no matter where you’re parked.
Since we all love our RV awnings, it’s important to keep them in good shape. While awnings don’t require a ton of maintenance, there are some things you can do to prolong their life. Here are some tips to keep that RV awning in top shape!
This post contains affiliate links. RVshare may receive compensation if you make a purchase after clicking on a product link.
RV Awning Types
It’s important to know what type of RV awning you have. The info below will help you figure that out, so you can take proper care of your awning.
Manual Awnings
Manual awnings generally pull out from the top of the RV with two arms at the front and back of your camper. To ensure the awning stays taut, be sure to lock the arms into position.
The Pros of a Manual Awning
- Manual awnings are typically less expensive than electric models.
- Fewer electronic components mean fewer parts that can fail or need repair.
- Since they aren’t dependent on power or electronics, manual awnings are more reliable in remote areas or during power outages.
- Manual systems are often lighter, which can help reduce the overall weight on your RV.
The Cons of a Manual Awning
- Because they require manual operation, these awnings take more physical effort to set up and retract.
- Setting up or packing away the awning may take longer than with electric models.
- Manual awnings may not have automatic retract features, so they need to be closely monitored in strong winds or storms.
Power Awnings
Power awnings, on the other hand, typically deploy with some sort of button or switch inside your RV. Some are equipped with sensors that automatically retract or lower depending on the level of wind or rain, but check your manual if you’re unsure.
The Pros of an Electric RV Awning
- An electric awning is nice to have when it comes to ease of use.
- Additionally, many electric awnings offer a weather sensor feature, which will pull the awning in if it senses high winds and won’t allow rain to collect on the top of the awning.
Cons of an Electric RV Awning
- The motor can go out, making it difficult to use the awning.
- The weather sensor is often over-sensitive, pulling the awning in when you’d like it to stay out.
- Many users find it difficult to adjust electric awnings to suit them.
Bag Awning
Another type of awning is the pop-up camper awning (or bag awning). These awnings are almost always found on pop-up campers and are almost always added as an aftermarket feature. Unlike the awnings mentioned above, these canopies have legs that hold them up and are set up a bit differently.
The Pros of a Bag Awning
- Bag awnings are easy to store and don’t add significant weight to your RV, making them ideal for smaller vehicles or limited space.
- Typically one of the most budget-friendly awning options available.
- Most bag awnings are easy to install and don’t require professional help.
- Like other manual awnings, bag awnings don’t rely on electricity, making them versatile for any location.
The Cons of a Bag Awning
- Setting up and taking down a bag awning requires manual effort, which can be cumbersome, especially in bad weather.
- The lightweight material and poles can be more vulnerable to wear and tear, particularly in high winds or heavy rain.
- Bag awnings generally provide less coverage than larger, more expensive awning options.
- They lack the convenience of motorized or automatic retracting mechanisms found in other awning types.
Vinyl Awning Fabric
Vinyl RV awning fabric is a common choice for RV owners, known for its waterproof capabilities and ease of cleaning. It’s often preferred in wetter climates because it offers a solid barrier against rain. Vinyl is generally heavier than acrylic, which makes it more stable in certain conditions, though it may not be as breathable.
The Pros of Vinyl Awning Fabric
- Vinyl fabric is completely waterproof, providing excellent protection during rainstorms.
- The smooth surface of vinyl makes it simple to wipe down and maintain, even after exposure to dirt or grime.
- Typically more cost-effective than acrylic, making it a budget-friendly option.
- The heavier material offers better stability and is less prone to flapping in the wind.
The Cons of Vinyl Awning Fabric
- Vinyl doesn’t allow airflow, which can make the space underneath hotter in direct sunlight.
- If not properly dried, vinyl can develop mold or mildew, especially in humid conditions.
- Vinyl fabric can fade and crack with prolonged UV exposure.
Acrylic Awning Fabric
Acrylic RV awning fabric is also a popular choice for RV owners. This is due to its durability and ability to provide shade while allowing breathability. While this fabric is not entirely waterproof, it does allow air to circulate, making it great for areas where airflow is needed. This fabric also tends to last longer than vinyl, especially in sunny, dry climates.
The Pros of Acrylic Awning Fabric
- Allows air to circulate, reducing heat build-up under the awning.
- Acrylic fabric resists UV damage better than some other materials, making it great for extended outdoor exposure.
- The color of acrylic fabric holds up well over time, even in harsh sunlight.
- Acrylic fabric dries quickly, which helps prevent mold and mildew buildup.
The Cons of Acrylic Awning Fabric
- While it resists water, acrylic fabric is not entirely waterproof, which can be a drawback in heavy rain.
- Acrylic tends to be more expensive than vinyl options.
- The lightweight nature of acrylic fabric can make it more susceptible to flapping and tearing in high winds.
Popular RV Awning Brands
Carefree of Colorado
Known for a wide range of RV awnings. These include both manual and electric models, Carefree emphasizes durability and cool features.
Dometic
A well-known name in the RV world, Dometic offers high-quality awnings, including some with automated options.
Lippert Components
Lippert is another well-known brand. They offer sturdy and reliable RV awnings, with options ranging from manual to fully automatic.
Thule
Modern-looking RV awnings can be purchased from Thule. The focus here tends to be on lightweight designs and ease-of-use.
ShadePro
ShadePro specializes in replacement RV awnings and fabrics. They offer customizable options.
How to Use an RV Awning
RV awnings are easily damaged, meaning proper usage is key. Read your owner’s manual to ensure you know how your awning is meant to be set-up and taken down. While most power awnings can be set-up with the push of a button, a manual awning or bag awning will take a bit more know-how.
The videos below will help you understand how to set-up these types of awnings, but you’ll want to make sure you find detailed instructions for setting up your awning model before you dive in.
Bag Awning Set Up
Manual Awning Set Up
Proper RV Awning Maintenance
Of course, learning to properly maintain your RV awning is also super important. Here are some tips for keeping your awning in tip top shape.
How to Protect RV Awning from Sun
This may seem counterintuitive — isn’t it the awning’s job to protect you from UV rays? But a lot of sun exposure can weaken the fabric and shorten the life of your awning. If you’re away from your RV for the day, keep your awning rolled up to reduce the amount of sunlight it sees. Additionally, you might consider investing in an aluminum awning cover to protect it when it’s all rolled up.
How to Clean a Camper Awning
There are a number of options out there when it comes to awning cleaning solutions. For many RVers, something as simple as warm water with a few squirts of dish soap does the trick. However, some people prefer pre-bottled solutions such as B.E.S.T Awning Cleaner. No matter what solution you decide on, make sure it does not contain bleach and isn’t abrasive. Bleach and abrasive cleaners can be damaging to some trailer and motorhome awnings.
You’ll also need a long-handled brush for scrubbing. The stiffness of your brush should depend on your RV awning material. Those with acrylic awnings should use a fairly stiff brush. Meanwhile, those with vinyl awnings will want to stick with a softer brush to avoid damaging the fabric.
Once you find the right cleaner, the next step is to get out there and clean your awning.
- The first thing you’ll want to do is pull the awning out and set it up with a nice downward slope in order to avoid water gathering in the fabric and causing issues.
- Using a water hose, spray both the underside and top of the awning, making an effort to remove any dirt, mold, or mildew in the process. This initial rinse should get rid of any loose debris, leaving you to scrub at the tougher spots.
- Begin the scrubbing process on the underside of the awning. Spray cleaning solution on one area of the awning you’d like to clean, then scrub gently until all stains have been removed and you feel good about the cleanliness of the area. Repeat this process until the entire awning has been cleaned on both the bottom and the top.
- Rinse the awning well on both sides using a water hose, making sure no cleaning solution remains, and finish by letting the awning dry completely before retracting it.
Awning cleaning should be an important part of your regular RV detailing routine. In fact, we recommend doing this at least once every 3 months, and more often if you spend a lot of time in humid climates or in areas with a lot of dirt or debris.
Inspecting Your Awning
You never know when you will encounter awning problems. A thorough inspection is necessary to discover tears or excessive wear.
- Look at the lag screws in the awning brackets, and the end caps to ensure a secure mount. Don’t try to remove the end caps!
- Enlarged holes or broken rivets can cause a lot of trouble, so be sure to check the arm pivot holes.
- Make sure the awning rail is securely mounted to the side of the RV.
- Check the fabric for holes and tears and repair these ASAP to ensure they don’t get bigger.
If you find a problem beyond a small hole or tear, you might be looking at doing an awning replacement. Fortunately, this is doable with the help of a friend.
Avoiding Awning Damage
You’ll want to do everything you can to protect your RV awning. Wind, rain, and falling debris can cause extreme damage that is both expensive and difficult to repair. For this reason, it’s important to do all of the following:
- Put the awning out at a slight angle to allow rain water to run off easily.
- Always bring your awning in when leaving the camper, and whenever it’s windy or stormy.
- Try an awning tie-down kit for added strength during unexpected winds.
An RV awning is a great thing to have, but in order to ensure it lasts a long time, you will need to use it properly and take good care of it. Fortunately, the information in this article will help you do just that, so your awning will be able to serve you well for years to come.

