
Before you can take those hot showers, you must learn how to properly use your RV water heater. Fortunately, this isn’t too difficult to do! As long as you keep up with simple maintenance, your RV water heater should serve you well for years.
RV Water Heaters: 10 Things to Know
As with just about every other component of your RV, it’s good to have some knowledge of what’s going on inside your RV’s sidewall. Whether you’re in the market for a new one or are just brushing up on your RV knowledge, here are ten things to know about your RV water heater.
- There are three main ways to heat the water in a hot water tank for an RV: propane, electricity, or heat from the engine. Electricity (or fuel with an electric ignition) is usually the most convenient because you don’t have to worry about a pilot light going out. Just switch on the heater from inside your RV, and in a short time, you’ll have hot water. However, using the heat from your engine for hot water is most economical. The engine’s going to get hot anyway when you’re driving, so it’s nice to be able to put that energy to good use. The downside is that if the engine is off for a while, you may find yourself with a tank of tepid water.
- RV water heater tanks vary in size. Most common are 6-gallon or 10-gallon RV water heaters, though you’ll find small 4-gallon ones as well as much larger 16-gallon versions. Generally, the more people who are camping, the bigger the tank you’ll need. Otherwise, you run the risk of depleting your supply before everyone’s had a chance to shower.
- The main manufacturers of tank-based RV water heaters are Atwood and Suburban.
- The tanks of RV water heaters are much smaller than those of home water heaters. A small home heater is 40 or 50 gallons, but an RV water heater is maybe just six or 10. This means that you need to be more conservation-minded when using hot water in an RV. You really can’t linger in the shower! You’ll either need to turn off the hot water while you’re soaping and shampooing, or you’ll need to move quickly. Take too long, and that last rinse will be a chilly one.
- Unless you go tankless! On-demand RV water heaters use a heat exchanger rather than a storage tank. One great manufacturer is Girard. They cost a bit more than a tank-based heater, but the huge benefit is that you’ll never run out of hot water.
- If you’re going to replace the water heater in your RV, remember not all systems are the same size. Before you start shopping, you’ll need to check the size of the opening in the sidewall: the height, the width, and the depth. You may want to replace what you’ve got with a bigger tank, but if there isn’t room for one in your RV, that’s something you should know before buying a new one. After all, you can’t put a square peg in a round hole!
- If you’ll be storing your RV for a while, you’ll want to drain the water tank before closing it up. If you’re storing it during cold months, it’s a good idea to winterize the pipes so they don’t freeze, crack, and cause problems when you head out in the spring. Similarly, water left in your RV’s hot water tank can freeze, causing irreparable damage to the unit. If your water heater has a bypass valve, use it during winter storage. Details on how to do this should be in your RV owner’s manual.
- Don’t forget to turn off the bypass valve when you get back in your RV, once the winter’s over. You want to make sure the tank fills back up before you head out. Heating up the tank without water in it could mean serious damage.
- To avoid hard-water corrosion inside the tank, install an anode rod. This way, the corrosion will eat away at the rod instead of your tank. They’re easy to install, and you’ll want to check them from time to time. When the rod looks really corroded, remove it and install a new one. Anode rods are relatively inexpensive — generally under 20 bucks — but using one could significantly extend the life of your hot water tank. RV hot water heaters, on the other hand, are not so affordable to replace — which we’ll get to in a moment!
- If your RV water heater is hooked up and working, but you can’t get more than lukewarm water to come out of your faucets, check to make sure that the hot and cold faucets to your outside shower or water line are off. Leaving them on can cause the hot and cold water to mingle and can prevent truly hot water from running inside the RV.
Using a Traditional RV Hot Water Heater
Now let’s take a look at how to start hot water in an RV. Let’s say you’re in your RV and you’re ready to use the water heater. If you’re working with a traditional water heater—the kind with a tank—there are some things you’ll want to note.
First, you’ll need to make sure your hot water tank has water in it. To do this, make sure any bypass valves that could cut off the water supply to your tank are open instead of closed. Next, fill your fresh water tank or hook your RV up to a city water connection. Open a hot tap and let the water run for a few seconds. Doing this will ensure you have water in your tank to heat.
Next, you’ll want to switch the water heater on. As mentioned before, you can choose to use both the propane and electric options together if you have a heater with both. Doing so will cut down a bit on the time it takes to warm your water. That said, even with both types of heat going, you will need to wait at least 20 minutes for a full tank of hot water. This wait time could increase should you happen to be in cold weather.
You can choose to leave your water heater on or switch it off between uses. However, it is important to note that leaving a propane heater running will empty your fuel tank pretty quickly. Additionally, leaving an electric heater on runs the risk of burning or frying an element if your water tank is empty.
Caring for an RV Hot Water Tank
Of course you’ll want to make sure you take good care of your RV water heater tank. Maintenance on an RV water heater should be done every 6 to 12 months. Luckily, this is easy enough to do.
Begin by turning the heater off and giving the water inside plenty of time to cool off. When you’re certain it’s cool, remove the drain plug or anode rod and let the tank drain completely, allowing sediment and debris to drain out. If your tank has an anode rod rather than a simple plastic plug, take this opportunity to replace the rod. This helps prevent buildup in your tank. New anode rods can be found on Amazon, at Camping World, and anywhere RV hot water heater parts can be found.
You should also take care of your water heater tank by winterizing your RV each year before the weather turns freezing. This will keep your tank from cracking due to frozen water. Instructions on how to winterize can be found here.
Choosing an RV Tankless Water Heater
Don’t like the idea of waiting for water to heat up every time you want to shower or wash dishes? Prefer a constant stream of hot water? An RV tankless water heater might be the thing for you. This RV upgrade is becoming more and more popular. Once you experience the luxury of on-demand hot water, you’ll understand why!
Wondering what the best RV tankless water heater is? Well, the Camplux 5L Portable Propane Tankless Water Heater is well-loved by many RV owners. Others would argue that the Girard 1GWHAF Tankless Water Heater is one of the best tankless water heaters for an RV. Do your own research and decide which one will best suit your needs.
Tips and Accessories for Hot Water Management in Your RV
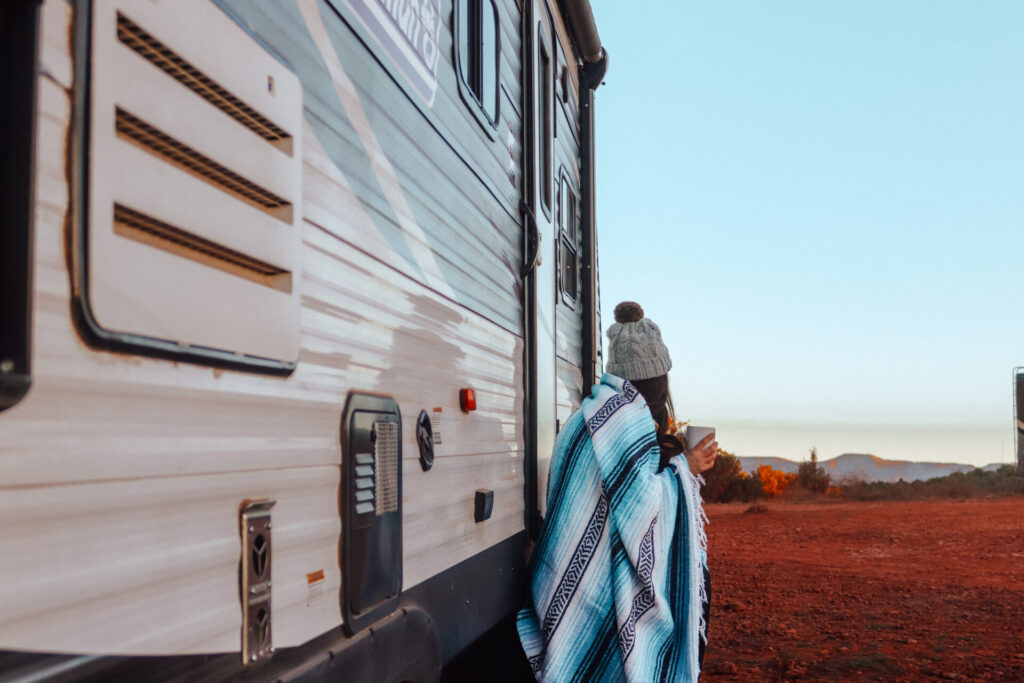
From getting ready in the morning to washing dishes after your evening meal, having access to hot water is a big deal. It can mean the difference between a miserable, chilly shower and a relaxing cleansing ritual. It also makes washing your hands and dishes more pleasant and effective, too.
The good news is, if your RV has a plumbing system, it likely already has a camper hot water heater installed. But understanding and maintaining this equipment is important — as anyone who’s ever run out of hot water halfway through washing their hair can tell you.
In this post, we’ll walk you through what you need to know to keep your RV’s hot water flowing, including how your camper hot water heater works, where it gets its energy from, and how to keep yours working well for many camping trips to come.
RV Hot Water Heaters: The Basics
Before we dive into how your camper hot water heater heats your water, let’s take a step back and consider the water system as a whole.
Just like your sticks-and-bricks home, you’ve probably noticed that your RV has kitchen taps, bathroom taps, a showerhead and a toilet — all of which pump fresh, clean water through (at least, in the best-case scenario!). That water comes either from a city water hookup or out of your freshwater holding tank, which is accompanied by two other holding tanks below your coach: the grey water tank (which holds wastewater from the sinks and shower), and the black water tank (which holds… well, you know.)
Your RV water heater is situated along your fresh water line to heat the water that comes out of the appropriate “hot” taps. You’ll be quite thankful for those when you’re taking a shower or hoping to heat up your hands after a long day out in the cold. Your water heater may run off of propane or electric, and in some cases may even heat up through the running of your engine, which is super nifty if you’re in a big Class A motorhome and a passenger wants to wash their hands after a pit stop.
Some of the most common RV water heater brands are Atwood and Suburban, though Girard also makes tankless water heaters for RVs as well — which we’ll get into in more detail in just a little bit. As far as hot water heater tank accessories, you’ll likely want a blow out plug to make winterizing your RV easier, and you’ll occasionally need an anode rod replacement, which helps protect your RV’s water heater from rusting. That’s important for extending the life of your heater. Given how expensive they can be to replace, extending its life is pretty important!
Hot Water Heater for Camper
What else do you need to know about your RV hot water heater?
Well, for one thing, the tank size is likely considerably smaller than the one you’re familiar with at home. That’s really important if you’re traveling with a big family or you like to take long showers. You might need to recalibrate your schedules (or shorten those leisurely bathtimes) unless you want to find yourself standing under cold water!
While the tank sizes vary, they tend to be between 6 and 10 gallons, though some are as small as 4 (in a small travel trailer) or as large as 16 (in a tricked-out, sizable Class A). A small home heater might be between 40 and 50 gallons… so as you can see, it’s a considerable difference!
Either way, if you do replace the hot water heater for your camper, you’ll want to make sure the new unit is the same size as the last — otherwise, it might not fit. That is, of course, unless you’re upgrading to tankless, in which case you won’t have to worry about tank size (or running out of hot water!)
RV Tankless Water Heater
A tankless hot water heater means you don’t have to worry about the tank size not matching your rig. You also won’t run out of hot water while you’re showering, as long as you’re hooked up to a city water source. That can be a really big deal, especially for full-timers or those who are traveling with multiple children! It can be really difficult to eke out enough hot water for everyone with a traditional RV hot water tank. Usually it involves turning off the shower while you soap up, and other water-saving measures. This might be fun while you’re camping… but isn’t so fun when your RV is your full-time home!
Along with endless hot water, tankless RV water heaters also allow you to custom set your water heater temperature, which can be really nice if your electric water heater leaves you with showers that are either boiling lava hot or freezing cold. Of course, all that luxury isn’t cheap — they run around $1,000. That said, a traditional 10-gallon hot water heater could cost as much as $800, so it might be worth the upgrade! (Keep in mind that they may use more propane than a traditional water heater, however.)
Good Options For Tankless Water Heaters For RV
The following RV tankless hot water heaters are all very popular, with great reviews:
- The Bosch 7 Gallon Electric Point-of-Use Water Heater
- Rheem Performance 24 kw Self-Modulating 4.6 GPM Electric Tankless Water Heater
- Marey 2.0 GPM Liquid Propane Gas Portable Tankless Water Heater
- Girard Tankless RV Water Heater-GSWH-2
- Eccotemp i12-Liquid Propane Indoor Tankless Water Heater
There are several places you can purchase a tankless water heater for your RV. Your RV dealer may have them and be able to install them for you. Also, big stores like Home Depot carry some models as well. Finally, you can find on-demand RV hot water heaters online. Look on the website of the manufacturer, as well as on Amazon and eBay for possibilities.
Know The Size You Need For Your Tankless RV Water Heater
Not all tankless hot water heaters are the same size. Measure the space for your device to be sure it will fit. You may need to adjust the opening in the sidewall or order a different tankless water heater, so be sure you know the space that’s available for your device before you buy one.
RV Propane and Electric Water Heater: Maintenance
So if you’ve got an RV electric water heater on board, what are the steps you need to take to ensure it stays running strong for many years to come?
For one thing, your RV water heater needs to be cleaned, just like all the other parts of your system. If you’re not comfortable flushing and cleaning it yourself (there are a variety of instructional videos on YouTube), you can also add it to the to-do list next time you take your rig to the repair shop for routine maintenance.
As mentioned above, your RV hot water heater, as with standard home heaters, has an anode rod that helps cut down on the corrosion caused by the heating processes. Making sure to replace this rod regularly is an important part of maintaining an RV hot water tank.
Finally, what’s to be done when Jack Frost comes calling? Although you want to get RV antifreeze into your tubes, tanks, and pipes, you don’t want it going into your RV’s hot water heater tank! That’s why it’s important to flush the tank and blow it out before winterizing your RV. All the critical details on how to winterize your rig should be in your owner’s manual.
Having hot water available for showers, dishwashing, hand washing, and more is just one of the many attractive aspects of RV camping. And if you’re new to the world of motorhome and travel trailer camping, renting a rig on the peer-to-peer market at RVshare is a great way to experience the lifestyle affordably, without a big commitment.
RV Hot Water Heater Bypass and Drain Valves
RV water heaters have a water line at the bottom where the cold water goes in. On top of that line, there is a hot water line that feeds the pipes. The middle pipe that connects these two lines is the RV’s bypass valve. A bypass prevents antifreeze from going into the heater. If, for some reason, antifreeze does enter the heater, you will need to flush it out completely before you can store more water for showering. Most RVs have this bypass installed. Some RVs have one, two, or three bypass valves.
- Three-valve system: Ensure that the valves on the cold and hot water lines are turned perpendicular to the line. Turn the bypass valve in such a way that it is parallel to the line. The antifreeze will now pass straight through the line, bypassing the tanks.
- Two-valve system: Turn both valves so that they lie parallel to the line. This will allow the water to bypass the heater.
- One-valve system: Simply turn the valve perpendicular to the line on a one-valve system to bypass the hot water tank.
You should also bypass your filter or remove it before you pour antifreeze into the system.
Winterizing can be baffling for new RV owners. It varies slightly depending on the model of RV, but certain aspects are standard in all RVs, including the water heater bypass.
RV Hot Water Heater Bypass Valve
Some water heaters come with a bypass valve installed, which makes things super easy. If your RV does not have one, have it installed.
- Find your heater. It is located on the outside of your van and is most likely located behind a large cover, with a screen on the upper right-hand side.
- Open the screen. Behind it, you will find an anode that is usually removed when draining the tank for winterization. The anode gets loose with age, so replace it when it starts to look old. You will need a 1- 1/16 socket for the anode rod.
- Now go into your RV and find the heater from the inside. You may need to remove a cover to access it.
- Cold water comes in at the bottom, and hot water comes out of the top of the heater. If your RV has a bypass valve, these two pipes will be connected directly to each other using a third pipe.
- The lever of the valve should point in the direction that you want the water to flow. If it is turned 90 degrees towards the bypass line, it will flow into the bypass line and not enter the tank.
- Both valves on the hot and cold water line should be turned to prevent antifreeze from entering the hot water tank.
- Remove the fuse of your heater to prevent it from going on while no water is in it.
RV Hot Water Heater Check Valve
The check valve line is where the RV and the city water meet. This needs some antifreeze too. Your water pump should be off before adding the antifreeze.
• Remove the screen that’s attached to the water hook-up. The check valve is inside this.
• Push the valve in until all the water in it comes out and antifreeze starts to dribble out.
• Reconnect your water pump.
RV Water Drain Valve
Now let’s talk about the drain valve we mentioned earlier. This RV water valve add-on is great for those who hate the task of removing the plug to empty their heater tank. It simply screws into the hole that usually holds your water heater drain plug and allows you to drain your tank with one quick turn.
How to Winterize
After emptying your tanks at a dump station, disconnect from the city water and empty your entire water system by opening the water heater drain valve, RV black water valve, gray tank valve, and RV fresh water drain valve. Once the system is completely empty, turn the knobs to bypass your water heater.
Blow Out Method
If you choose to blow out your lines, you’ll connect a blow-out plug to your city water inlet, open the tap nearest the inlet and close all others, then blow air through the system using an air compressor and a tire pump tip. When the open tap squeals, stop the compressor, close the tap, and repeat the process with the next tap. Continue this until all taps (including the toilet) have been opened.
It’s important to note here that you will want to ensure the RV water pump check valve is in working condition before starting, to avoid pump damage.
Antifreeze Method
Those who prefer to use antifreeze will put the winterizing hose of their onboard water pump into a jug of RV antifreeze. After switching the pump to pull from the jug and not the fresh water tank, open the tap nearest your pump and run the pump until you see antifreeze running from the tap.
Once you reach this point, close that tap and move to the next closest, repeating these steps until every tap runs pink. Be sure to run the toilet as well, and make sure to replace the antifreeze jug as needed.
Finally, turn off your pump, open one tap, and head outside and give your RV water inlet check valve a quick press. The RV water check valve tends to hold onto water, and pushing it will ensure antifreeze makes its way into the valve.
Remember, if anything sounds too complicated to do, take your RV to a service department.
RV Water Heater FAQs
Here are some frequently asked questions about RV hot water heaters.
Can I leave my RV water heater on?
Chances are you don’t constantly turn your water heater at home on and off. Similarly, you can leave your RV hot water heater on for the duration of your camping trip — though you might save a little energy if you turn it off between uses. Just make sure you give it ample time to heat up the water before you step into the shower in that case!
On the other hand, you’ll want to make sure you do not power your RV hot water heater with the bypass valve still toggled. When the unit heats without water, it can become damaged very quickly!
How much is a hot water heater for an RV?
While the price of water heaters for RVs does vary (based on their size, brand, and also whether or not you’re going tankless), they’re not exactly cheap! For example, Suburban’s 6-gallon tank starts at over $400, and prices go up from there for larger units.
Tankless water heaters for RVs start closer to the $500 level but could be worth the investment if you spend a lot of time on the road or traveling with big families. Once again, always be sure you’re purchasing the correct-sized hot water heater for your motorhome or travel trailer, as a bigger one might not fit.
How long do RV water heaters last?
If you care for your RV water heater properly, it may last as long as a decade. Using an anode rod and draining the tank when winterizing will help to preserve your RV water heater and extend its lifespan.
How do I start my RV water heater?
Wondering how to start the hot water in your RV? In most cases, turning it on is easy: simply locate your RV electric water heater switch and toggle it on. If your camper water heater is in gas mode, the igniter will have to click on the pilot light — or the pilot light may even need to be lit manually. Refer to your RV owner’s manual for full details.
You don’t have to be your own mechanic, but there’s a lot to be said for knowing about the inner workings of your RV. Your RV’s water heater is an important appliance; it makes your camping experience more comfortable, and it makes your camper feel more like a home.
RV Hot Water Heater Troubleshooting And Parts
RV hot water problems are an inconvenience, so check out these RV hot water heater troubleshooting tips to help you figure out what’s going on.
No Hot Water
If you have no hot water, check to see if the bypass valve used to winterize an RV is in the correct position. Perhaps you forgot to switch the bypass valve back?
Check for open faucets. If you have more than one faucet open at the same time, cold water will flow from one and hot from the other. RV hot water heaters are small and cannot allow for hot water to flow to two faucets at once.
Noisy Propane Burner
Does your propane burner make loud noises? An improperly tuned propane burner will make a “roaring” sound. This comes from too much air mixing with the propane.
An insufficient flame will also cause soot around the exhaust area. If you have a weak yellow flame, your burner isn’t getting enough air. An ideal flame is one that has a blue flame with yellow tips.
Propane Won’t Light
Check to see if the burner nozzle is clogged. Spiders and other insects like the smell of propane, and they will get inside the gas supply tube, which will cause the burner not to light. Check to be sure the exhaust area is clear too.
If your RV has been in storage, you may need to bleed air out of the line. This takes time, so be patient.
If you have an electronic ignition for your hot water heater, and it’s clicking, you should check for corrosion or to see if it’s loose or has loose wires.
Hot Water Odor
Does your hot water have a rotten egg smell? Bacteria in your tank will cause the smell, especially if the water is stale from sitting too long. Yes, water can go stale, but it’s easy to remedy.
Turn off the hot water heater and let it cool. Drain and flush the tank, which will get rid of any loose sediment. Use household bleach to sanitize the tank – 5-6 ounces of bleach for every 10 gallons of water. This should sit for a bit while it’s cleaning. Flush out the bleach until the smell is gone. This will likely need to be repeated a few times. Close up the tank and fill up the hot water tank again.
Slow Hot Water Flow
Mineral deposits can build up on the little screen that is inside of the faucets, which will cause slow water flow. Heat some vinegar in the microwave so it’s warm but not boiling, and soak the faucets to dissolve the calcium deposits. Repeat if necessary.
Sooting
Check the exhaust area on the outside of the RV for sooting. LP gas pressure, a dirty orifice, a dirty burner, a misaligned burner, or a blocked exhaust grill can all cause soot issues. You may need an expert to check into these to make sure they’re repaired properly.
Temperature and Pressure Relief Valve
The temperature and pressure valve is a safety feature that releases pressure when it reaches 210 degrees or when the pressure inside the tank reaches 124 to 150 PSI. You may see dripping from the valve. With age, the air is absorbed inside of the top of the tank, and you will need to replace that air to prevent the valve from dripping. However, if the valve drips while the tank is being heated, it does not necessarily mean the valve is defective.
To replace the air, do the following:
Turn off the water heater and let the water cool down. Check to see if the tank and system are full. Turn off the water supply. Open a faucet to release the pressure that is inside. Open the handle of the temperature and pressure valve until the water stops. Close the valve, then close the faucet, and finally, turn the water back on.
Maintenance
Draining the tanks on a regular basis will alleviate some of the above-mentioned problems. RVers should drain their tank every 6 months if they use their rig constantly. It can be drained annually if it’s only used on occasional outings. Also, drain the tank if you are storing your RV for long periods and winterize it before the first freeze.

