Practical checklists, real-world examples, and clear routines to prevent RV breakdowns and keep your fleet guest-ready year-round.
Keeping an RV in rental-ready condition is not complicated, but it does require consistency. Whether you manage a single RV or a full fleet, a simple upkeep schedule can prevent more than 80 percent of mechanical issues rental owners face. I learned this the hard way during my first season running a small rental operation. After one preventable breakdown on a hot holiday weekend, I created structured daily, weekly, and seasonal RV maintenance checklists for my entire team. They have saved us thousands of dollars and countless hours of stress.
If you want to streamline operations or step into a more passive model, services like RV Management USA help RV owners earn passive income while handling operations, upkeep, and maintenance scheduling. But whether you manage it yourself or partner with a management service, the right system makes everything easier.
This guide provides the exact checklists, step-by-step processes, inspection intervals, and templates you can use to keep your RV healthy and guest-ready all year.
Why an RV Maintenance Schedule Matters
A clear maintenance structure reduces breakdowns, extends the life of the RV, improves renter reviews, and protects your insurance coverage.
Most rental issues come from preventable problems: low tire pressure, clogged AC filters, dirty connections, or overlooked slide lubrication. A simple checklist prevents 95 percent of guest complaints.
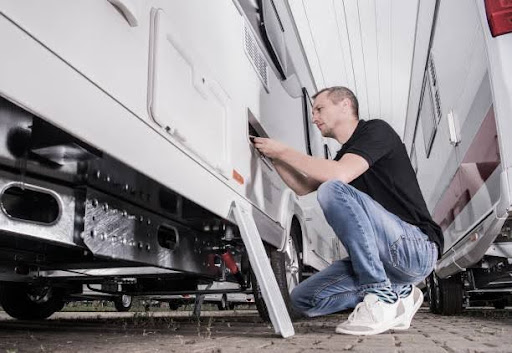
Daily RV Maintenance Checklist

Quick 5-minute routine to keep your rig rental-ready and prevent small issues from becoming expensive repairs.
Daily Summary
These checks focus on safety, cleanliness, and anything impacted by frequent usage. Perfect for when an RV is actively rented or being turned around for the next guest.
Daily Checklist
Exterior
- Inspect tire pressure visually (use a gauge every 3 days).
- Check for leaks around water lines, hoses, and the undercarriage.
- Make sure steps extend and retract smoothly.
- Confirm awning is not damaged or overstressed from wind.
Interior
- Wipe down counters and moisture-prone areas.
- Check smoke and CO detector lights.
- Run water briefly to ensure the pump is operating normally.
- Verify fridge temp is cooling properly after renter turnover.
- Reset the thermostat to neutral (68–72 degrees).
Road Readiness
- Ensure jack stands are secure.
- Confirm all slide seals look clean and intact.
- Quick look at the hitch area for rust or looseness.
Helpful Tip
When renters check out, take 10 photos of the exterior and interior. This becomes your “daily condition log” and protects you in case a renter reports an old issue as new.
Weekly RV Maintenance Checklist
This routine is ideal for active rental seasons where RVs turn over often.
Weekly Summary
Once a week, perform deeper checks that ensure your RV functions safely during long drives and busy rental weekends.
Weekly Checklist
Mechanical & Safety
- Check all tire pressure with a digital gauge.
- Test brake lights, turn signals, and hazard lights.
- Lubricate slideouts lightly.
- Check propane levels and inspect hose condition.
Interior Upkeep
- Clean AC intake filter.
- Inspect for moisture buildup in bathroom and kitchen.
- Flush toilet and check seals for cracking.
- Run generator for 10–20 minutes under load.
Water System
- Sanitize freshwater fill point.
- Check hot water heater panel for soot or blockage.
- Drain gray tank fully and inspect for any slow flow.
Electrical & Tech
- Test all outlets and USB ports.
- Inspect the converter fan for dust.
- Verify the battery disconnect switch is functioning.
Helpful Tip:
Create a 1-page “Weekly RV Health Log” renters can’t see, but your team can use to track patterns (slow drains, weird noises, recurring AC resets).
Monthly RV Maintenance Checklist
Deep cleaning + system checks that significantly extend the life of rental RVs.
Monthly Summary
Monthly upkeep prevents long-term wear and protects major components like the water heater, suspension, brakes, and roof seals.
Monthly Checklist
Every 30 Days
- Inspect and clean roof seals.
- Test GFCI outlets.
- Deep clean AC filters and roof vents.
- Clean water heater burner tube.
- Check battery water levels (if not AGM or lithium).
- Inspect tires for sidewall cracking.
- Flush fresh tank with a sanitizing solution.
- Test emergency brake breakaway cable.
Mileage-Based Checks
(Whichever comes first: time or miles.)
- Engine oil: Every 3,000–4,000 miles
- Generator oil: Every 75–100 hours
- Transmission fluid inspection: Every 5,000–7,500 miles
- Brake inspection: Every 5,000 miles
Helpful Tip:
For rental fleets, I recommend tracking all mileage-based intervals in a Google Sheet or maintenance app. You can even tie reminders to each RV’s name or VIN.
Seasonal (Quarterly) RV Maintenance Checklist
Preparing for hot summers, cold winters, and storm seasons keeps your RV running smoothly and prevents major system failures.
Quarterly Summary
Seasonal RV maintenance focuses on protecting your RV from temperature swings, storms, and long storage periods.
Spring RV Seasonal Maintenance
- Inspect roof membrane thoroughly after winter.
- Deep clean slide seals and apply conditioner.
- Check RV batteries for sulfation from cold storage.
- Test furnace and AC before peak season.
- Inspect wheel bearings and repack if needed.
- Sanitize water system completely.
Summer RV Seasonal Maintenance
- Inspect awning for sun damage.
- Clean AC evaporator coil to prevent overheating.
- Check tire PSI every 2–3 days during heat waves.
- Test fridge ventilation fan.
- Inspect water lines for heat-related swelling.
Fall RV Seasonal Maintenance
- Check roof for tree debris and sap.
- Inspect furnace burner assembly.
- Replace weather stripping around doors.
- Test water heater performance.
- Inspect tanks and valves before colder weather begins.
Winter RV Seasonal Maintenance
- Winterize the water system properly if storing.
- Add fuel stabilizer if RV will sit idle.
- Insulate low-point drains.
- Verify tire PSI stays at manufacturer recommendations.
- Disconnect batteries and keep on a tender.
Comparison Table: Daily vs Weekly vs Monthly RV Maintenance
| Task Type | Daily | Weekly | Monthly |
| Tire check | Visual | Gauge | Sidewall inspection |
| AC filter | Quick check | Clean | Deep clean |
| Water system | Basic function | Flush & inspect | Sanitize |
| Electrical | Detector lights | Outlet test | GFCI test |
| Roof | None | Visual check | Seal inspection |
How-To: The 7-Step RV Inspection Before Every Rental
- Check tire pressure and tread depth.
- Inspect propane system for leaks.
- Test all lights and appliances.
- Run the generator for five minutes.
- Verify slides operate smoothly.
- Walk the roof perimeter for cracks or tears.
- Document condition with photos.
This simple pattern prevents RV breakdowns and improves guest satisfaction dramatically.
Frequently Asked Questions (FAQ)
Keeping tire pressure correct is the number one way to prevent RV breakdowns on the road.
At least once a month and after every major storm.
Every 3,000–4,000 miles or according to your engine manual.
Yes. High guest turnover increases wear, so weekly checklists are essential.
A well-maintained RV is a more profitable RV. By following a simple daily, weekly, and seasonal RV maintenance checklist, you can prevent expensive repairs, protect your investment, and offer a smooth experience to every renter. Whether you manage a single RV or a growing fleet, consistency is the key to long-term success.

