If you’ve ever parked your RV on uneven ground and opened your refrigerator, only to have everything fall out, then you know the importance of RV leveling blocks! They’re a useful tool for every RVer! We’ll teach you everything you need to know and give you tips for leveling your rig!
What Are Trailer Leveling Blocks?
While some RVs have electric or hydraulic levelers, many do not. Thankfully, manually leveling your RV is a solution to this problem. Leveling blocks work by ‘propping’ up your camper to ensure it’s in an even position. After all, who wants to fall out of bed due to their RV leaning to one side?
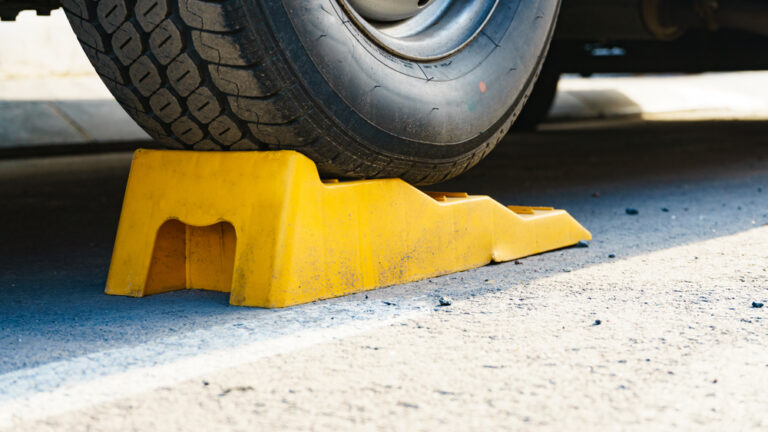
RV leveling blocks can often be stacked to the perfect height. They sit underneath your tires to adjust your trailer’s position. Having an RV leveling system in place is particularly helpful when staying at national parks or older campgrounds that haven’t been pre-leveled.
Even if your rig is equipped with an automatic leveling system, you may want a block or two on occasion. Many campers carry a variety of shapes and sizes of blocks, just in case they need them.
How to Manually Level Your RV
So your RV doesn’t have electric or hydraulic levelers? That’s ok! We’ll go over how to use leveling blocks, and help you pick the perfect RV leveling blocks for your rig. There is a lot of confusion online about which RV leveling blocks are best. Together, we will look at your best options.
First, let’s discover a simple way to manually level your RV.
The goal is to lift a few of your tires up on RV leveling blocks. As you level, keep in mind that you want to keep at least one tire on the ground.
The other tires will be adjusted to level your overall unit. If you plan to camp in modern RV parks, most spaces have been pre-leveled, and you won’t have to do much. State and national parks are a different story! These spaces can be uneven, and you will want to have RV leveling blocks with you.

Steps:
Step #1 Turn the engine off and set your parking brake. You don’t want to roll around during this process! Make sure you are about 2 or 3 feet from where you want to end up parked for the night.
Step #2 Step outside and examine the ground. How many blocks do you think you will need? Which side needs to be lifted? It might take a few tries to get it right, so take time to think through the entire process.
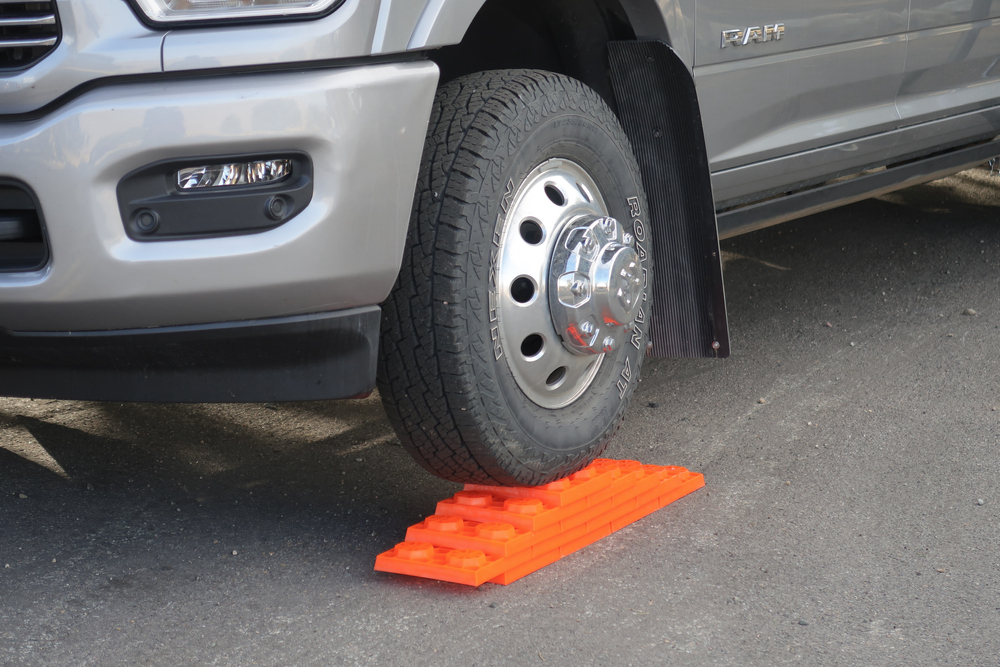
Step #3 Put your RV leveling blocks up against the tires you intend to raise. If you are stacking blocks, make sure to put them together like stepping LEGO bricks. You want to be able to drive up them, ramp style.
Step #4 Start your engine and release the brake. Slowly accelerate up the blocks. You may want to keep a foot on the brake to stop when you reach the center of the RV leveling blocks. If you have someone to guide you, the process will be a whole lot easier.
Step #5 Evaluate your situation. Are you level? Does something need to go up or down? You may need to back down, adjust, and try again.
Step #6 Once settled, you can set your parking brake with your transmission in park. Turn off the engine. You are set!
Now that you know how to level, it’s time to choose the right RV levelers for you.
Types of RV Levelers
If you’re thinking of purchasing some RV levelers, there are plenty of popular styles on the market, including the following:
RV leveling blocks: There’s no doubt you’ve seen these blocks sitting under RV tires throughout most campgrounds. Leveling blocks are easy to use, light, stackable, and very affordable (under $20 dollars for a 4-pack). Although it can take a few tries to get your desired height just right, they’re a great option for many types of RVs. Just be sure to check your product’s maximum load capacity. Keep in mind that over time, they can become fragile and crack, but replacement is simple.
RV leveling ramps: In terms of convenience, you just can’t beat an RV leveling ramp. With leveling blocks, you have to go through a range of motions if you didn’t get the level right the first time. You’ll need to get back in your RV, reverse off the blocks, remove a block, and try all over again. With leveling ramps, however, simply put the wedge in front of or behind your wheel. Hop in, and move until your partner tells you you’re level. There’s a wide range of RV leveling ramps available on Amazon for great prices too.
RV leveling tire lock: Although less common than blocks or ramps, this RV leveling tire lock is still a great option, but only for light trailers. It’s easy to set up and eliminates the trial and error involved in using RV leveling blocks. Keep in mind that this option is more expensive than blocks and ramps, and it has a tendency to sink into the soil underneath your RV tire.
Homemade RV Leveling Blocks:
Some RVers will make their own ‘DIY’ leveling blocks instead of buying some. This requires a shovel and a lot of hard work. You’ll be manually digging holes for the tires to sit in. There a lot of trial and error involved, and it isn’t always possible, especially with a cement RV spot.
If you’re on the thrifty side, you can also create your own handmade RV leveling blocks using easy-to-find materials. There are plenty of tutorials on YouTube to get you started.
Wooden Blocks- Grab a few wooden blocks out of your garage and toss them in your rig. Presto, you have a leveling system! Many campers skip RV leveling blocks and just use wood. While this is a simple answer, it’s not ideal. Wooden blocks are water-sensitive, prone to splitting, and heavy. They’re also bulky and difficult to pack away. Most full-timers avoid wood blocks, but in a pinch, these blocks can provide an easy leveling tool. Remember: wooden blocks should be long and wide enough for the tire to easily stand on. Pressure-treated wood is best since it will hold up over time.
Why You Can’t Just Use Your Trailer Stabilizer Jacks
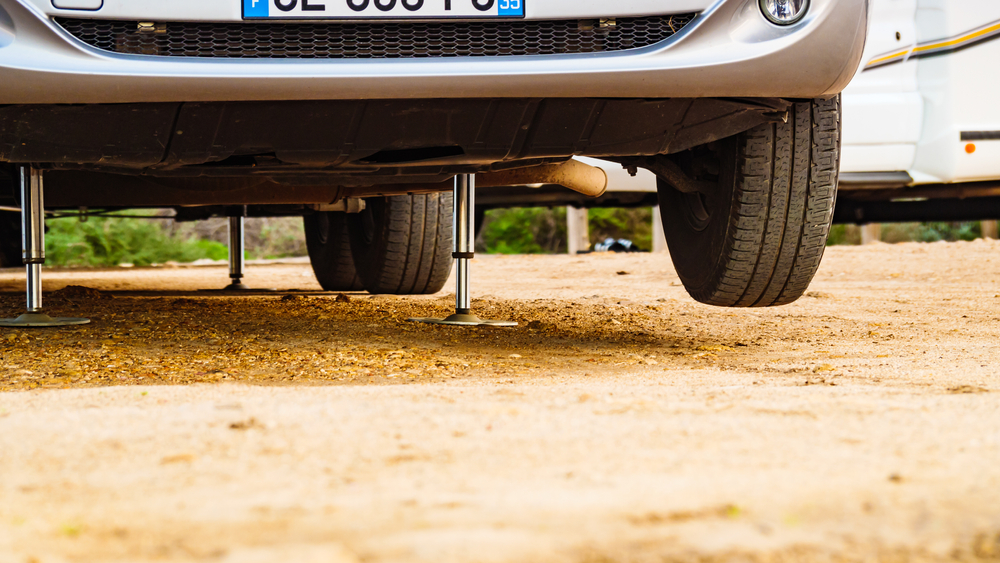
Some RV owners make this mistake, only to find out the hard way that stabilizer jacks are not meant to be used for leveling your RV on uneven ground. Their purpose is to stabilize an RV that is already level. Using RV leveling blocks or ramps under the wheels to level before lowering the stabilizer jacks provides maximum stability and avoids damaging your vehicle.
Where to Buy RV Stabilizer Jacks
Many RVs will come with a stabilizer jack in place, but if you find yourself without one, there are plenty of places you can purchase one. Our favorite site for trailer stabilizer jacks is Amazon, as there’s a wide variety available for great prices. Make sure you check the product’s maximum load capacity to ensure it’s the right one for your model.
Now that you know everything about RV leveling blocks, you’ll hopefully never suffer from an uneven RV again!
Super-Easy Tips and Tricks for Leveling your RV or Travel Trailer
Leveling your RV is imperative to keeping important systems working properly, including your RV refrigerator.
Leveling a Travel Trailer
If you’ve only camped in industrialized campsites so far, complete with concrete pads, chances are you’ve never had to worry about leveling your camper. But as soon as you venture off the beaten path, you’ll get to put your rig’s leveling systems to the test.
Depending on your individual motorhome or travel trailer, your rig likely comes with a set of onboard RV leveling jacks, especially if it’s a modern model. These jacks extend down from beneath the vehicle and are usually used in conjunction with other leveling aids like blocks to even out your RV.
Some large, high-tech rigs come with automatic leveling systems, a set of hydraulic RV levelers that do most of the work for you just at the press of a button. These motorized systems are also available as aftermarket add-ons, but they can easily run you thousands of dollars. Unless you’re willing to foot that bill or you’re already driving a souped-up, Class A diesel pusher, chances are you’re going to have to do some of the work of leveling your RV yourself.
But don’t worry, it’s not all that difficult — and once you do it a few times, you’ll get the hang of it and become a pro.

RV Levelers
Whether you’re driving a travel trailer or a motorhome, RV leveling blocks can provide an extra boost of stability if your jacks aren’t quite making it. And that’s important, because when you’re out on BLM lands in the rolling West, sometimes, the best campsites are sloped!
Using RV leveler pads or blocks is simple. Just place them on the ground and drive your rig over them, or put them under your RV’s extendable leveling jacks. In a travel trailer, you may also have to use blocks under the tongue jack or even your tow vehicle’s rear tires, especially if you’re camping somewhere for just a single night and don’t want to disconnect.
If you have electric levelers for your RV, it’s even easier. Just send them down, and your rig’s sensitive equipment should handle the rest. In the case of an extreme slope, your jacks likely won’t be able to compensate for the grade, in which case you’ll need to use leveling blocks to help. Don’t forget you can also rethink your campsite arrangement — for instance, point your RV in a different direction to make it as even as possible.
You can also do the reverse: instead of using levelers to bump up your RV’s height, get out a shovel and dig a hole or two. Then, simply back your trailer’s tires into the ditch, and voila, you’ll be level. It’s a lot of work by trial-and-error, but it’s an even more stable arrangement than using blocks and the rig won’t bounce around while you’re walking inside it. Just be sure you have those blocks around when it’s time to get back out again, and avoid using this technique if you’re camping in a wet area. I can say from experience: getting stuck in the mud is even less fun in an RV than it is in a regular vehicle, and a whole lot more difficult to get out!
How to Level an RV Travel Trailer
One of our favorite tips on leveling a travel trailer is to add another piece of affordable equipment to your lineup: RV tire chocks. They’ll run you about $100 for a pair, but once you camp with them, you’ll see exactly why they’re worth it.
Even the most level RV in the universe can run into some shakin’ and rockin’ when you’re walking around inside. And unless your idea of a fun camping trip is a whole weekend of trying to get your sea legs (or RV legs?), you’ll quickly tire of doing the shimmy.
RV tire chocks take out the shake and make your RV much more stable, so it basically feels like you’re walking around inside a sticks-and-bricks house. This is even more noticeable if you’re camping with a family of young children, who don’t tend to keep still for very long!
RV Stabilizer
Keeping your RV even will help make your home away from home feel much more comfy and cozy — and ensure that you don’t run into an expensive RV refrigerator mess. Losing a whole fridge full of food is already a hassle, and that’s before you even start thinking about actually fixing the appliance.
Whether you use physical blocks alone, a combination of blocks and chocks, or go all-out and install a fully motorized RV leveling system, leveling your RV makes it possible to camp on some of the wildest, most beautiful lands our nation has to offer.
Here’s to seeing it all and enjoying it on an even kilter!
This post contains affiliate links. RVshare may receive compensation if you make a purchase after clicking on a product link.

