When you pull into a campground, especially as a new RVer, you may not be certain of how to set up your RV.
It can be easier to have a checklist with you. This will enable you to keep track of what you have and haven’t done. If you split the chores between people, have one person in charge of the checklist while others set up your RV so things stay organized.
Finding the Perfect Campground
Of course, before setting up, you’ll want to find a great campground. You can run a Google search for “campgrounds near me” or “campgrounds near {insert the location you’ll be visiting}”. Another option is to check out websites like Campground Reviews or freecampsites.net. We also love apps such as RV Life and Allstays, which make finding a campground in a specific area easy.
Once you have a list of potential options pulled up, start reading reviews in order to narrow those options down. Also, check out the amenities offered at each place, and consider whether you need a pet-friendly or kid-friendly spot. Location is also important, so you’ll want to decide how far you’re willing to drive to the sights you’re planning on checking out.
Picking Out a Good Site
With a campground chosen, the next step is to choose a site. Some campgrounds will do this for you, assigning a site based on rig length and any other criteria you provide. Some will allow you to request sites before arrival; others will not.
If the campground you’re visiting doesn’t assign sites, you’ll want to consider a few basic things when picking one:
- Size of site
- How level the site is
- Proximity to bathrooms and entrance/exit
- Shade
Setting Up Camp
Once you locate the ideal campsite, the next step is campsite setup. Once you jump in you’ll realize it’s simply a matter of breaking the process of how to set up your RV down into steps.
Backing Your RV In
The first thing you’ll need to do when getting your campsite set up is get into the site. This can be scary at first, but it’s totally doable! Most camp hosts are happy to help if you’re not confident you can do it on your own.
Below are some tips to make this process easier:
- Take it slow. There is no rush.
- Get a backup camera so you can see everything behind you.
- Have someone spot you. Roll your windows down or use two-way radios to communicate.
- If you’re backing a trailer, remember that you will need to turn your wheel left to go right and vice versa. (Some people think of it as steering from the bottom of the wheel rather than the top. Use whatever mental trick works for you.)
Making Things Steady and Level
Once you’re in your site, use a bubble level to determine if your RV is level (front-to-back AND side-to-side). If not, you’ll want to pull one side of the trailer or motorhome onto leveling blocks to make things nice and even.
After that, if you’re pulling a trailer, you’ll want to unhitch. In the case of a bumper-pull, use the tongue jack to finish leveling the trailer. Use wheel chocks to ensure the RV stays in place during your stay. Finally, if you have them, put the RV jacks down to keep everything nice and solid throughout your trip.
Getting Hooked Up
The next thing you’ll need to do is hook your RV up to the campsite amenities. In the case of a full-hookup site, this will include water, electric, and sewer. However, many sites include only one or two of these amenities.
If water is not included, we recommend filling your fresh tank with potable water at the inlet marked “fresh water” before you park. If sewer isn’t included, you’ll want to dump your waste tanks beforehand.
Hooking Up Electric
To hook up to electricity, find your RV’s electric cable. This is usually tucked behind a small labeled door, but might also be completely detached, meaning you’ll have to plug it into the receptacle on the side of the RV. This cable then plugs into the electric post at the side of your campsite. If you don’t see an electrical receptacle that matches your plug on the post, you may need a 30-amp to 50-amp or 50-amp to 30-amp. You’ll also want to use a surge protector when hooking up to campground electricity.
Hooking Up Water
As far as water goes, you simply need a white or blue freshwater hose. One end of this hose connects to the RV city water connection (this is usually labeled) and the other connects to the campground water spigot. We recommend using a water pressure regulator between the hose and the spigot, and many campers like to use an in-line filter as well.
Hooking Up Sewer
Finally, to hook up to the sewer, you will need a sewer hose. This twists onto the wastewater outlet, which is usually found down low toward the backside of travel trailers but might be in a storage bay if you have a motorhome. The other side of the hose will twist into the sewer dump with an adapter that is usually included with the sewer hose kit. Some sewer dumps don’t have a threaded opening, so you’ll sometimes need to get creative about holding the end of the hose in place. You might keep some heavy planks of wood or large rocks on hand for this purpose.
We don’t recommend leaving your tanks open all the time. Instead, when the tanks are nearly full, open the valve for the black tank (toilet sewage), letting it empty completely before closing it and doing the same with the gray water (sink/shower drainage) valve. That way, nothing should be able to collect and dry out at the bottom of your tanks, and you’ll be rinsing your sewer hose of the worst stuff (although gray water can certainly be gross too, in its own way).
Arrival at RV Campground
- Disconnect any towed cars after arriving at the campground registration parking lot. Check in and ask if any discounts are available.
- Get a map of the campground and locate your campsite.
- Survey the site assigned to you. If you have a large vehicle, it is best to do this using an alternative vehicle or walk to the site. Does it have sufficient space for your rig? Do you know where all the connections are? Is there room for your awning? Figure out whether you will drive through or have to back up into your site.
How To Set Up Your RV for The First Time
- Don’t forget to set the parking brake if you are driving a motor home and chock the wheels.
- Disconnect the tow vehicle and put down the stabilizer jacks.
- If the battery for your chassis has a disconnect switch, disconnect it.
- Test the voltage of the electricity with a voltmeter before hooking up your rig
- Plug in your RV to the receptacle that matches your amperage requirements. Anything below 105 volts and above 135 can damage your appliances.
- Some campgrounds may require the use of an electrical adapter while others have a circuit breaker that you will need to turn on for electricity to flow into your RV.
- Check to ensure your electricity is working.
- Turn on your fridge
- Hook up your water regulator to the water supply. Use a water filter at the inlet of your freshwater tank. Now you can attach your white water hose to the camp supply and your RV. Check to ensure water is flowing into your RV. Do not use the water pump. The pump is only used to draw water from the freshwater tank when no other water source is available.
- Wear gloves and attach the sewer hose to the drain outlet. Ensure the locking tabs are secured by turning them. Most campgrounds now require a sewer donut or seal on the sewer connection. Ensure your connection is sealed securely.
- If you have a sewer support system, set it up now allowing a slight slope from the RV to the sewer connection.
- Turn the supply of LPG on at the valve of the tank or bottle.
- Ensure that your water heater bypass is not on bypass mode and that the heater tank is full of water. Your heater probably has an electric mode which helps you save LPG.
- If your campground and RV have cable TV, hook it up using the TV coax cable. If no cable connection is available, raise your antennae
- Put out the RV mat
- Set up your chairs
- Fire up the BBQ
Dumping black and grey water in an RV Campground
If you intend to stay at the campground for a few days, you can open the gray water tank valve slightly. This will allow water to drain directly into the sewer. If you are only staying a night, leave it closed. Never leave the valve on your black tank open and do not dump your black water until the tank is almost full.
You will need gray water to dump your black water tank, so close the valve the day or night before you intend to dump black water to allow it to accumulate.
- To drain the black water tank, open the valve completely and let it drain. Close the valve when this is done.
- Open the gray water tank valve and dump it. This will flush the sewer hose of whatever gunk is left after dumping the black water tank.
- Treat your black water tank after every dump.
There are several things an RVer needs to do before they hit the road. If you are preoccupied you will inevitably overlook a step.
Take the time to learn how your RV works. You should be able to fix any minor problems and know how many amps your breaker can handle. Do a practice run if you are a beginner, and bring tools and spare parts in case something happens.
RVers are usually very friendly so if you get stuck, ask your neighbor for help. Remember to keep it fun and enjoy the road.
Tips for Setting up the Perfect Campsite
RV camping means that home sweet home is anywhere you park it. But no matter where that might be, it takes a little bit of planning and preparation to make sure of the “sweet” part!
Just a few items — like cozy outdoor camp chairs or a quality ground cover — and savvy organizational tips can take your campsite from so-so to snug. And whether you’re just about to head out on your first-ever trip or are simply looking for a new approach to your traditional camping setup, we’ve got the tips and tricks to help you feel right at home on the road.
Here are some of our best camping ideas and hacks to make your best campsite the best one ever.
Campsite Setup Ideas
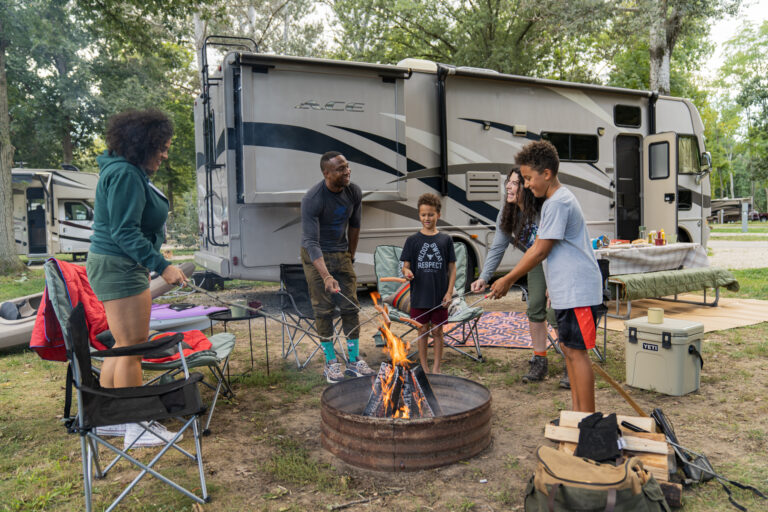
When you’re traveling in an RV, it’s all about getting outside. Sure, it’s nice to have a cozy bed and couch to retire to after a long day of hiking and exploring… but wouldn’t you rather enjoy the fresh air and cool breeze?
That’s why one of our top tips for creating an extra-special campsite is to take advantage of your outdoor space by providing comfortable camping furniture and amenities.
The family will be a lot more likely to peel themselves off their laptops and head out into the open air if there’s cozy seating available, and cold drinks don’t hurt, either. Check out these comfortable folding camp chairs, which are easy to store and come in a broad range of colors, and don’t forget to pack a decently-sized cooler. Who wants to have to go inside every time you need a new can of Coke?
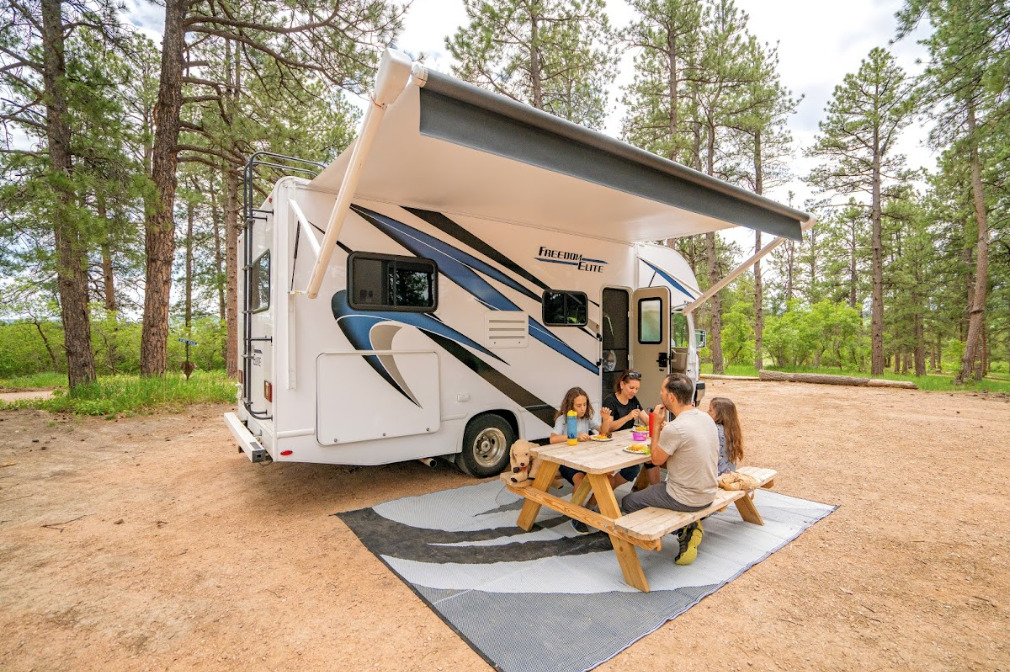
An outdoor ground cover or mat can also be a huge upgrade if you’re spending lots of time under your awning since it’ll help keep your family members from tracking dirt inside the rig. Although your RV might not have a lot of floor space, you probably don’t want to spend any of your precious vacation time vacuuming or mopping!
Camping Ideas for Families
If you’ve got kids along for the ride, sleeping arrangements can get crowded! It’s hard to ensure everyone has their own space even in the largest campers out there.
But depending on your kids’ personalities, tent camping might actually be a perfect solution. Many young campers think it’s way more fun to sleep under the stars than inside your rig’s four walls, anyway — and it greatly increases how much space everybody has to spread out!
Obviously, sleeping on the ground isn’t quite as luxurious as cozying up on a couch or bunk bed. But if you’re wondering how to make tent camping more comfortable, it’s not too hard. Along with a quality tent, you’ll also want to ensure that everyone has a sleeping bag rated for the weather at your destination. Keep in mind sleeping bags come not only in varying warmths and thicknesses but also in different sizes. Another thing to add to your list of things to take if you’re camping outside is a good ground or sleeping pad to help make a softer “bed” in the great outdoors. Everyone will be happier with a good night’s sleep, so this is a worthwhile investment!
Camping Organization
If you’ve traveled in an RV before, you know that one of the most important camping needs is to stay organized. You’re dealing with an extremely limited amount of space — even a 40-foot diesel pusher isn’t anywhere near as large as the average American home!
Making sure everything in your RV has a home — and that it stays there — is key. A travel trailer or motorhome is not the place to leave laundry, shoes, books, and other stuff simply lying around!
If everyone in the group contributes to picking things up and putting them back where they found them, it’s easy to keep your camper in ship shape throughout the entire trip. You’ll thank yourself when you come home after long hours of exploring and enjoying your destination to have a cozy, well-organized place to sit back and relax as the day winds down.

Camping Storage Ideas
Keeping everything in its place is a whole lot easier if you’ve come up with some creative camping storage solutions. Even the largest rigs sometimes simply don’t have the amount of storage we need to keep up with all the stuff our families want to bring with them!
Fortunately, we’ve written about a ton of unique, out-of-the-box storage techniques here on the blog, many of which are very affordable to purchase or totally DIY. From figuring out how to keep everyone’s toothbrush handy and clean to simply cramming enough food to feed your family into your tiny RV kitchen, chances are, we’ve talked about it here!
If your camper is feeling a little crowded, check out the following posts to help make a little bit of extra space where you thought you couldn’t.
Tearing Things Down
Finally, when it’s time for your trip to come to a close, you will need to tear down your campsite. Honestly, this is just the reverse of what you did before, but we will go over things step-by-step in order to make the process as easy to follow as possible.
Pack Up
Obviously, the first thing you’ll need to do is pack everything back up, put outside items into storage bays and clean the interior of the RV. This can be done the night before if you feel like you might be in a hurry the next morning.
Get Hitched Up
If you’re pulling a trailer, you will need to go through the hitch-up process before you can pull out. Likewise, if you’re driving a motorhome with a tow car, you’ll need to get hitched up. Obviously, trailers will need to be hitched up in on-site, but many who pull a tow car choose to hitch up in a parking lot after leaving the site in order to have more space and a more level surface.
For instructions on hitching a bumper-pull trailer, check out this video. Those looking to pull a fifth wheel can find instructions on hitching up here. Meanwhile, if you have a tow car, you should consult the manufacturer’s instructions to ensure you do everything correctly.
Consult the Checklist
We recommend creating a packing-up checklist before you leave home. This will ensure you remember everything before leaving home and before pulling out of your site. Your list should include all of the following steps, although you can tailor it to your own circumstances:
- Close Cabinets and Drawers
- Clear the Counters and Tables
- Lock the Fridge
- Pull Down the Antenna
- Close the Awning
- Pull in the Slides
- Pull Jacks Up
- Pull in Stairs
- Remove Wheel Chocks
Do all of these things, checking them off the list as you go, and finish the process with a walk-around to ensure each step was done properly.

Pull Up Directions
Before you start driving, be sure you know where you’re going. While still sitting in your campsite, pull up directions on your GPS and download them in case of poor service. You might also use this opportunity to ensure you have a current road atlas on hand for emergency situations.
Leave Slowly and with Care
Just as there is no rush to back into a site, there’s also no rush to pull out of it. Far too many people make the mistake of leaving a campsite in a rush, only to run the side of their RV into a pole or tree. This is not a good way to end a camping trip.
Avoid this mistake by taking it slow and steady, checking for obstacles before getting into the rig, using your mirrors to check continuously, and if you can, sending someone outside to be your spotter.
Double Check
After you pull out of your site, ask your spotter to do a quick double-check and make sure you got everything out of the site. Sometimes things roll under the RV and no one will notice until the next trip when you discover them missing.
This is also a good opportunity for this person to walk around the rig one more time to ensure everything is as it should be before you hit the road.
As you can see, how to set up your RV and tear it down afterward does not have to be a stressful or overwhelming process. Just take things slow and steady, going step by step. After doing this a few times, you’ll be a campsite setup and teardown pro, able to do the whole thing efficiently and without any stress.
This post contains affiliate links. RVshare may receive compensation if you make a purchase after clicking on a product link.
