Your RV is your home away from home — your hotel room on wheels, containing everything you need to be comfortable. When you pull into a campground with lots of amenities, you can certainly use their showers if you don’t mind the communal experience, but why should you have to? You’ve got your own! And even if you’re dry camping with no hookups, all you have to do to shower off is fill up your reserve tank, fire up your water heater, and wait about an hour for hot water.
If you’re new to the RV game, though, the whole concept of showering in an RV may make you a bit apprehensive. It’s small, for starters and with all of the modern conveniences in our homes, we maybe have an exaggerated notion of what a shower should be like. We linger long, we use lots of hot water, and we have lots of space when we’re in a normal home shower. The set up in an RV is not quite like that, though. Here’s what you need to know about your RV shower.
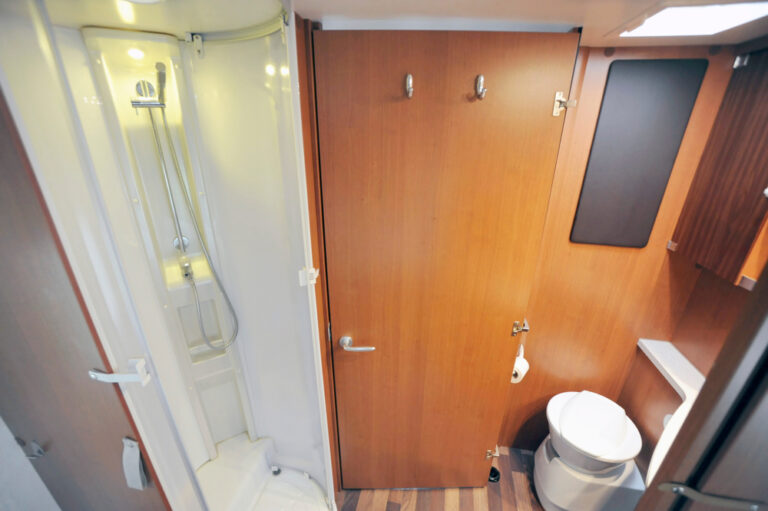
Washing Up: The RV Shower Experience
You still get wet, and you still get clean, but taking a shower in an RV is not the same as taking one at home or in a hotel room. A shower for RV is typically small; in some more compact RVs, it’s essentially a closet with plumbing. Also, unless you’re showering in an RV with a tankless, on demand water heater, your hot water will be extremely limited, so you’ve got to conserve it. The average RV water tank is six to ten gallons. Compare that with a minimum of 40-50 gallons in a small home tank!
So, you’ve gotta move fast when you’re taking a shower in an RV! A common way to clean up without suffering through a cold rinse is to wet down your body and your hair, then switch off the water. Lather up, soap up, and scrub up, then turn the water back on to quickly rinse off. It’s not exactly luxurious or relaxing, but it will certainly get you clean and allow you to use some hot water while you do it.
A Good Shower Head
An RV shower head is quite similar to the shower heads you’d find in home bathrooms. They are typically to use less water than conventional shower heads, and many are pressurized to give you that same clean feeling without using so much water. Some popular models include Oxygenics and Ecocamel Jetstorm, both of which are high pressure yet low flow shower heads.
A common feature of RV shower heads is that they have a shut off valve, which also goes a long way toward conserving your resources. Hitting a valve is typically simpler and more convenient than turning the water on and off completely. Many RV shower heads are also wands rather than fixed so that it’s easier to reach and rinse all the parts of your body quickly.
Replacing your RV shower head is a snap, since they just unscrew. If yours is leaking, if it’s old and gunked up, or if you just want to upgrade to one with better pressure or lower flow, they’re definitely easy enough to swap out. A new one will run you anywhere from $10 to $75 and even more, depending on how high end you want to go. This Nebia shower head and wand combo comes at a higher ticket price but it is for a good reason,as it’s the most water efficient shower out there saving up to 50% more than any other and very popular among the RV community. Plus, it’s modern design and waterfall feature is sure to upgrade your shower experience!
The Floor Beneath Your (Wet) Feet
The RV shower pan is just the floor of your shower. It’s typically pretty small, since RV showers a usually just stalls, though some larger motorhomes actually have an RV shower tub base. However, these are typically much smaller than bathtubs you’d find in a regular home. A regular RV shower pan has a lip on it so that water doesn’t go sloshing out, though it’s definitely not designed to hold a lot of water.
RV shower pans are usually non-skid and made of fiberglass or acrylic. They’ll usually last you quite a while, though if yours has cracks or holes, it’s important to fix or replace them to keep the floor structure under the shower intact. They’re not too difficult to fix; you can purchase a repair kit containing epoxy resin. Just follow the kit directions carefully, being sure to give everything enough time to dry before you go for a shower.
Replacing the entire RV shower pan, however, is a bit tricker, as the pan is attached to both the shower floor and walls. It’s easy to damage the walls in the process of removing the old one, which will give you even more work to do. In fact, you’ll probably need to do some work to the bottom of the shower’s walls to fix them once you’re done no matter how careful you are. If you’re experienced in this kind of home repair work, then you’ll probably feel confident enough to replace your own RV shower pan. Otherwise, this is a deceptively involved job that may be best left to professionals.
Hoses and Fixtures
If your shower head is a wand, you’ve got a hose connecting it to your water supply. An RV shower hose is typically plastic or stainless steel. While the former is usually less expensive upfront, the latter is sturdier, longer lasting, and just as flexible.
As for RV shower fixtures, your two main concerns are functionality and aesthetics. You need to be able to turn the hot and cold water on and off, and you want it to suit your personal tastes. In some cases, home fixtures can be used in RVs, provided they are not too big or too heavy.
The RV Shower Skylight
Some RVs have a shower skylight. This helps not only to illuminate the stall, but on sunny days, can provide lots of warmth to an otherwise cold clean up. They’re made of plastic, though, which means that eventually, they’ll crack, cloud up, or otherwise become compromised and need to be replaced. Fortunately, this is an easy enough job to do yourself, as long as you’re comfortable with power tools and working on your RV’s roof.
Before you buy a replacement, be sure to measure the size of your old one. The good news is that there are just a few standard sizes of RV shower skylights, which makes your job easier. Once you’ve got the new one, you’re ready to make the swap.
The first step is to check the inside of your RV to see if there are any interior screws. If there are, remove them before climbing up on top of your RV to do the bulk of the job. Once you’re on top of your RV, gently scrape away the sealant on the old skylight using a putty knife. When it’s all off, use an electric screwdriver (or a manual one plus some elbow grease) to remove the screws. Remove the old skylight, then clean up the opening using denatured alcohol or mineral spirits.
Before you put on the new skylight, line the edge of the opening with butyl tape. Then, put the new skylight in position and screw it in place. If the screw holes on the new skylight don’t match up with those of the old one, use self drilling screws to make your job a lot easier. Also, don’t over tighten your screws, or you run the risk of cracking your new skylight. Remember, it’s just plastic.
Once it’s screwed down, cover the screws with sealant, then run a thick border around the edge of your new skylight to prevent leaks. Then, if necessary, go inside your RV and put in any interior screws.

RV Shower Door Options
Shower doors come in all shapes and sizes for RVs. Depending on how yours is working, you might want to consider a new type.
Pleated shower curtains are the standard option and come in most basic units. These curtains are usually made of heavy plastic and slide open and closed from one side of the shower opening to the other. Made of vinyl and polyester, these are the cheapest options and usually come in a range of standard sizes and neutral colors. The downside is they aren’t very attractive but they do offer complete privacy.
A better-looking option is the standard sliding door. These doors are smooth, so they don’t have the folded appearance of the pleated curtains. They’re also retractable, so you don’t have them bunched up at the side like a pleated door when not in use.
The nicest RVs and motorhomes have glass shower doors. These doors are either fixed or swing open in a small bathroom space and are reminiscent of what you likely have at home. They offer a sophisticated look and are easy to keep clean.
You can always opt for a standard shower curtain as well. Most RV bathrooms are made to be water resistant from top to bottom, so any errant water that escapes the curtain shouldn’t cause too much damage. If you’re worried, try investing in a splash guard.
Fixing your RV Shower Door
The most common complaint with RV shower doors is leaking. Of course, springing a leak doesn’t mean you need a new door. Caulking the edges of the shower and the base can help to prevent leaks at the seams.
When replacing your RV shower door, you’ll likely have to install a full kit for the door, meaning a new sliding track at the top and bottom of the shower frame for whatever kind of door you’ve chosen. Replacing a shower door yourself is doable. We recommend reading directions and watching tutorials online to ensure a smooth fix.
Maintaining Your Shower Door
You’ll want to stay vigilant about mold and mildew in the bathroom and especially on your RV’s shower door as it comes in contact with water constantly. You can buy sprays to prevent the build up or clean the shower regularly. There are also types of doors that claim to be resistant to mold and mildew in the first place. Some self-cleaning options have a built-in feature that wipes the door clean when it’s opened or closed. Like this one which is RV specific and a fan favorite. Of course, regular cleaning will keep this all at bay.
RV Shower Replacement
You can replace the individual components of your RV shower, but if the walls themselves are old, damaged, or just not up to your standards, you can replace the whole unit. When you choose a new one, make sure you measure first to ensure that the new unit will fit in easily — unless you’re truly interested in doing a more complicated renovation!
Before you remove your old shower, you’ll first want to turn off your water supply and disconnect the water pump. Then, find your RV’s shower access panel and disconnect all of the pipes. Once these things are done, you can get to work in removing your old shower. You’ll need to see how it’s held in place and then work from there; it could be trim, it could be adhesive, it could be brackets. Whatever it is, go slowly and carefully to avoid damaging the structure beneath it. When you’re replacing your shower walls, this is actually a good time to replace your shower pan as well.
To put in your new RV shower, follow the manufacturer’s instructions for installation, then secure as directed and caulk as needed. Reconnect everything in the shower access panel, turn the water and pump back on, and then test everything before closing up. You want to make sure that the water is running properly, that nothing is leaking, and that everything is working as it should.
Replacing your entire RV shower is definitely a big job. You’ll want to make sure you’re confident in your ability to do home improvements before embarking on a task like this (or enlist the help of a trusted friend who knows how to do this sort of thing). Making your RV shower replacement a DIY job can definitely save you a tidy sum.
Keeping it Clean
To prevent mold and mildew buildup, as well as soap scum and general grime, it’s a smart idea to quickly clean your shower after each use. Use a small squeegee to push excess beaded water toward the RV shower drain. You might even dry the walls, floor, head, and fixtures with an old towel set aside specifically for this purpose. This is especially important in integrated RV showers where the commode and the shower are all in one room together without any separation, both for cleanliness and for safety.
For a more thorough cleaning, you don’t want to use abrasive cleaners or steel wool, as these can scratch and damage surfaces. Instead, gentle cleaners and cloths or sponges should be used. And, many Pinterest-using RVers swear by using dryer sheets to clean an RV shower! When slightly wet, the fibers of these little sheets do a great job of removing any scum or build up on your shower walls, floor, and hardware without inflicting any damage.
A Few Quick Tips
There are lots of RV shower accessories to help keep your bottles and toiletries organized and secure. To keep bottles from rolling around, use a pocket organizer that’s fabric or washable plastic; this way, you can toss it into a washing machine to clean it up. Also consider using a liquid soap and shampoo dispenser rather than a bar of soap and bottles of shampoo and conditioner. It’s faster to get your products, you won’t have to fumble with containers, it saves space, and you don’t have to worry about bottles getting knocked around when you’re rolling down the road. Just don’t forget to refill them from time to time, and you’ll be all set
A shower in your RV is one of the things that can make you feel the most self-sufficient when you’re camping. Knowing how to use it, how to fix it, and how to make it most convenient can add to your enjoyment and help to limit your frustrations. No, an RV shower isn’t the same as a home shower, but with a bit of knowledge and moderate amount of patience, you’ll be able to clean up without having to set foot in a communal campsite shower or resort to cleaning off in a frigid natural body of water.
Looking for a few more ideas?
Check out:
4 Things You Need to Know About an RV Shower Toilet Combo
How to Upgrade Your RV Shower
RV Sink & RV Shower Faucets – Read This Before Buying
The Ultimate RV Toilet Guide
This post contains affiliate links. RVshare may receive compensation if you make a purchase after clicking on a product link.
