
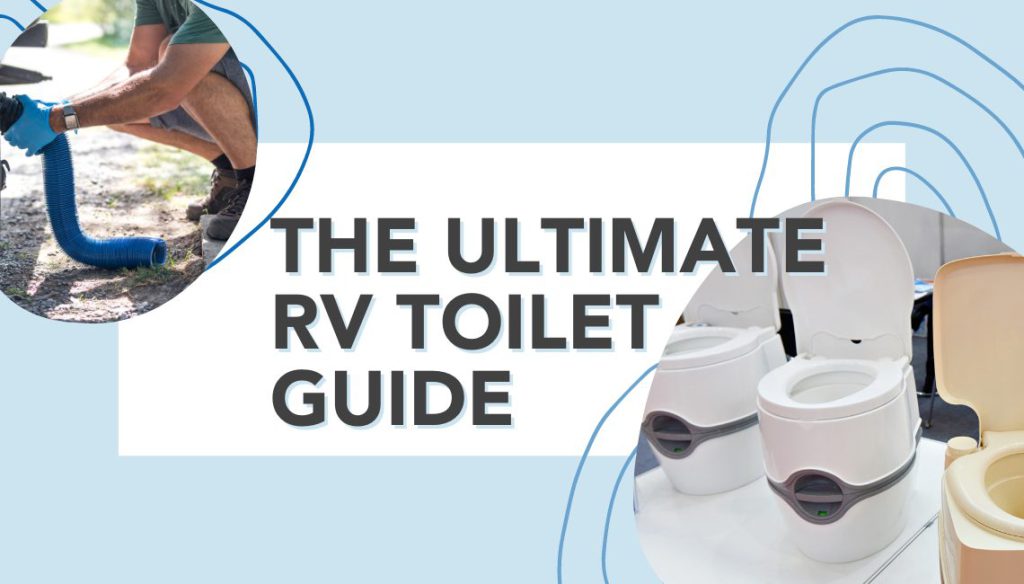
Table of Contents:
- The Different Types of RV Toilets
- Purchasing an RV Toilet
- Installing an RV Toilet
- How to use an RV Toilet
- RV Toilet Parts & Replacement
- How do I go About Fixing my RV Toilet?
- RV Toilet Smells When Flushed
- How to Keep Your RV Toilet from Smelling- 6 Easy Steps
- Cleaning Your RV Toilet
- 5 Steps to Using and Understanding RV Toilet Chemicals
- Is Your RV Toilet Leaking?
If you ask RVers why they opt for a trailer instead of a tent, they’ll mostly state that it’s for the added comfort and convenience that an RV offers. Just one of the biggest things we appreciate about our RVs is the fact that they have toilets, allowing the vehicle to meet our every need. Not having to use campground, truck stop or just public toilets in general, is pretty great.
Whether you’ve decided to finally install a toilet in your RV or are simply looking to replace your existing RV toilet, this ultimate guide will have you covered. We’re going to discuss the various types of RV toilets, where you can purchase RV toilets at a great deal, tips for keeping your RV from smelling, and more. Let’s get started!
The Different Types of RV Toilets
Some RV toilets are anti-microbial, some are low water, and a few are even composting. If you have a 3-inch (or larger) waste hole, you will have a variety of choices.
Generally, the higher the toilet and the larger the bowl, the more it feels like a residential unit. Inexpensive plastic RV toilets can be used for an RV toilet replacement, but while affordable they will seldom feel like home.
Did you know that there are 5 main types of RV toilet? These include:
1.) The Gravity Flush RV Toilet:
The original and perhaps most common RV toilet of the lot. The bowl contents simply drop into a large holding tank below. The gravity-flush toilet must be installed directly over the waste holding tank, providing ease of installation and use.
2.) The Macerating Flush Toilet for RV:
This involves motor-powered blades which macerate waste, turning them into something less solid and depositing them directly into a large holding tank. Due to the macerating flush, it allows the toilet and waste holding tank to be positioned separately.
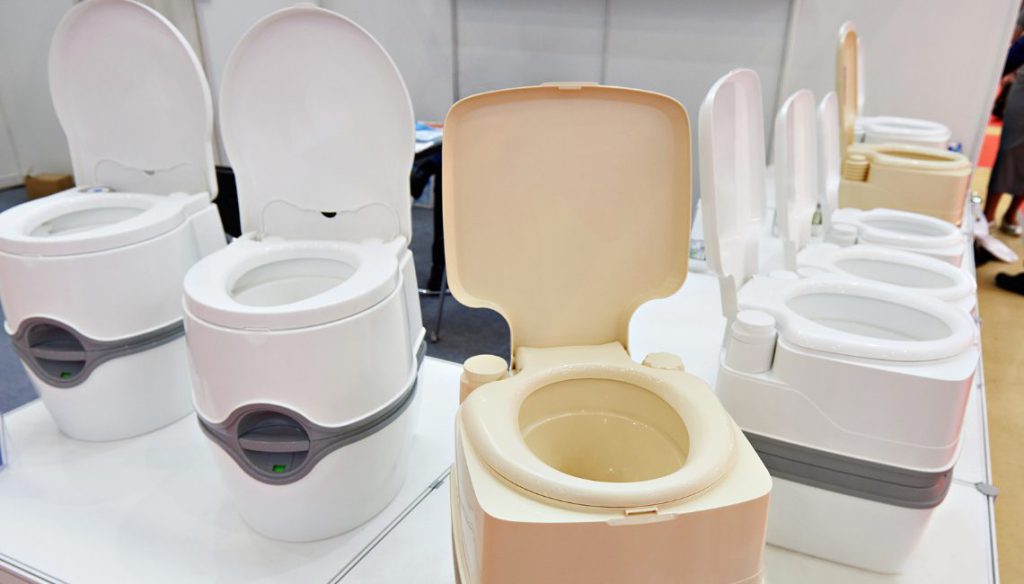
3.) The RV Cassette Toilet:
Another popular type of RV toilet, the cassette style toilet provides a compact bowl which is permanently installed over a small, removable “cassette-style” waste tank (hence the name). The waste is dropped directly into this waste tank and once it’s full, can be removed through a service door and emptied into a standard toilet or other waste disposal station. The removable waste tank is then placed back into its original position.
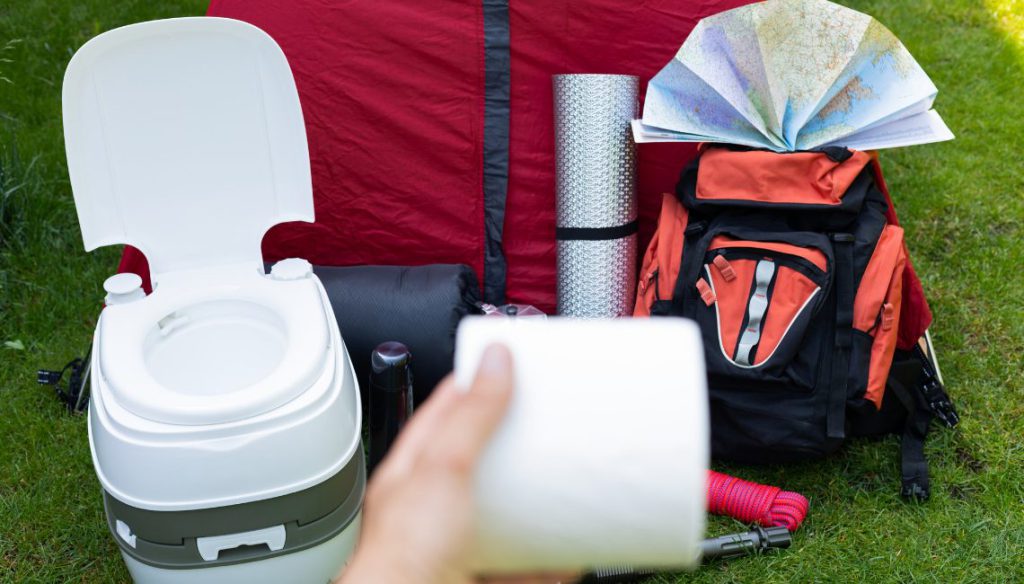
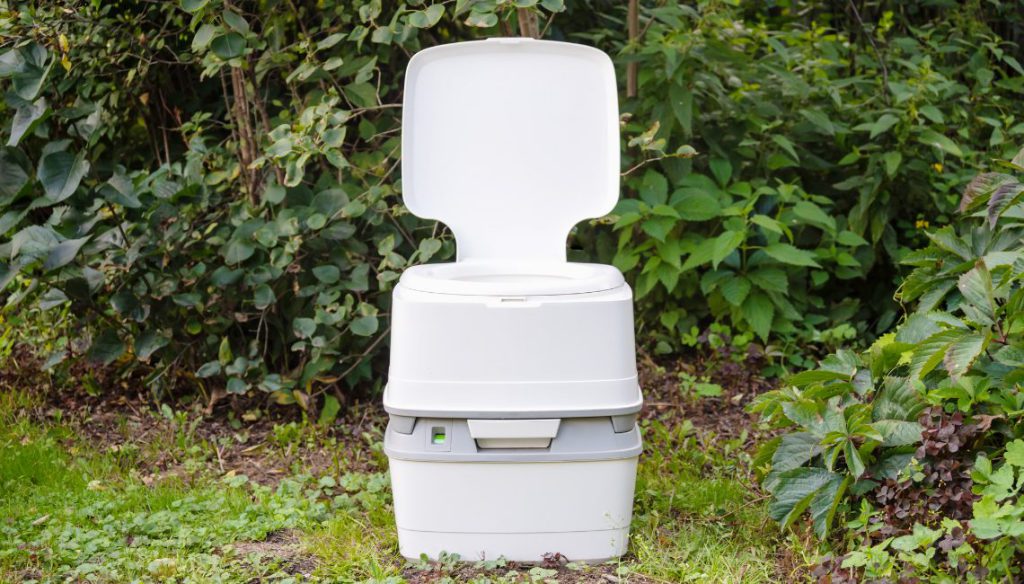
4.) The Portable RV Toilet:
This style of RV toilet can be used in both campervans and tents, due to their portable nature. They’re made of a lightweight plastic toilet bowl and small waste tank, which just like the cassette toilet, can be manually emptied then put back in place.
While some models of RV toilet are only available in plastic (such as the portable version), some also come as a porcelain RV toilet. Additionally, many models may come in either a high profile or low profile RV toilet. What you choose will depend on the available height of your space, however.
5.) The Composting Toilet:
Let’s get the most important thing out of the way: no more black tank! As the name suggests, this type of RV toilet works by composting human waste, rather than flushing it away using water and plumbing.
That’s right, no more random awful smells in your rig, no more worrying about toilet clogs, no more backflushing while dumping, and if you want, you can combine your old black tank with the existing gray one and get double the use out of your sink(s) and/or bathtub, or replace it altogether with a second fresh tank.
RV composting toilets are also more environmentally friendly than their flushing counterparts. They don’t require water for flushing, meaning easier boondocking, and the resulting compost makes a great plant fertilizer so you can give back to the earth.
How a Compost Toilet for RV Works
The first thing to understand is that a composting toilet cleverly separates the liquids and solids into their own little bins. Composting toilets range in price from $800-$2,000, however, most do not require any form of water or power, now or in the future. (Which makes up for the initial cost.) Nature’s Head is the most popular brand of composting toilet, and can be found in marine stores, as well as Amazon.
The main complaint many people have about composting toilets for RVs is that they are plastic, and rarely look residential. They also require special installation and fittings. Composting toilets, if cared for correctly, do not smell. They do, however, have to be dumped every few days for liquids, and once every couple of weeks for solids.
On the solids side, all that’s required is that you fill the solids bin with a natural (and slightly dampened) composting medium—like peat moss or coconut coir—which your poo then mixes into with the turn of a “churning” handle on the side of the toilet. The solids are broken down naturally into an earthy, nutrient-rich, topsoil-like substance, which you can use in a number of ways, or you may simply dispose of it in a dumpster using a composting bag.
Side note: Given enough time—likely much longer than you’ll ever have it in your toilet—the compost will continue breaking down into something called humus. As for the liquid side, that bin can simply be poured into a public toilet and flushed or disposed of at a dump station if it’s convenient. Be warned that this is really the only stinky part about owning an RV compost toilet. At least your RV won’t stink!
Replacing an RV toilet with a Marine toilet:
For some coaches, marine toilets are a better fit than traditional RV toilets. This includes many bus conversions, Prevosts and Newell coaches. If you have a smaller than average waste hole to your tank, a marine toilet may be your only option. Boat toilets come with a hand pump flush or a gravity/water flush. Marine toilets come in a variety of shapes and sizes, from the very small to the very large. Installation of a marine toilet can be similar to an RV toilet, however check with your distributor. A marine toilet may need you to drill new mount holes, as they rarely line up with the previous RV toilet. If so, be sure to fill in the old holes with silicone when you are done.
You need to know the following to find the right toilet for your rig:
1. Does your current RV toilet use air to flush?
2. Does your current RV toilet use power to flush?
3. Is your current RV toilet made of plastic or porcelain?
4. How big is the waste hole?
5. Do you want a residential or camping style toilet?
Other questions to consider:
Do you want a bidet or spray unit attached to your toilet? Do you want a macerator that will grind the waste and provide more space in your black tank? Do you want to use gravity, electricity, or air to power your flushing system?
Each of these questions will help you determine the right toilet for your rig. Some RV’s have toilets that are easy to replace. (Usually trailers and campers) Class A Motorhomes can be more tricky. Bus conversions can be a lot more complex. (Think Marine toilet)
Purchasing an RV Toilet
If you’ve decided that a new RV toilet is needed, then there are plenty of places from which you can buy the perfect model for your specific RV. Try shopping around in your local area to find retailers selling and installing RV toilets. Alternatively, if you like to grab a great deal online, then we recommend you check out websites such as Amazon, Camping World, Thetford, and more.
We always advise that readers check Amazon first, particularly as they tend to have the lowest prices for popular models (like this Camco Travel Toilet).
Before making your purchase:
Take Measurements: You’ll first want to look at how the RV toilet is mounted and make notes of the dimensions and sizes. This is best done at a point in the RV toilet installation when the old toilet has been removed. Take notes of all the information about the mounting – did the toilet utilize a floor flange? It’s also important to take dimension information about the toilet hole, and write down exact measurements. Typically, standard RV holes are around 3”, but they can be much smaller.
Consider Features: Next, make sure to look at all the features of each RV toilet. There are a wide variety of options, so it’s important to think about what makes sense for your lifestyle and how you use your RV. You may also just want to save the guesswork and go with exactly the toilet style and model that you currently have, and that’s just fine, too!
Some of the other, potentially less important questions to answer include:
- Color – The most popular color is white, with bone coming in (a distant) second. Most companies make both colors, but you may have to order and wait for the color bone.
- Shape and size – Tall and narrow? Short and squat?
- Materials – RV toilets come in plastic, china, and a hybrid mix of the two. Your budget or decorative desires will set the tone for your choice. Are you looking for an “at home feel?” If so, you will want to choose a china pedestal. Would you prefer to “feel like you are camping!” If so, save money and buy a plastic toilet, which is perfect for many campers and travel trailers.
- Brand – Thetford and Dometic are the most popular companies for RV and marine toilets. You can buy units online, at Camping World, and at many boating stores.
- Flush – Do you want a foot pedal? A slide handle? A hand-held handle, or an electric push-button flush? RV toilet replacements come in a variety of styles, and most allow you to pick the type of flush you desire.
*Keep in mind that you may have to order the toilet you’ve selected, which can take up to a few weeks. There are only a handful of toilets carried in stock at RV shops, and they are usually identical. If you need a toilet quick, you may have to compromise your earlier decisions and get what they have on hand.
Whatever you decide, make sure that both the mount, and the measurements, will work in your current restroom space. Once you’ve selected your new RV toilet and have received it, it’s time for the install!
Installing an RV Toilet
Before we begin, let’s make sure you need a new toilet. Just because your RV toilet is leaking does not mean you need a full replacement. You may instead need to replace your water valve. This is a common problem, and checking it might help you avoid additional expense. (Details of how to check your water valve are below.) However, if you are planning an RV toilet replacement, we will assume you have already ruled out other problems.
Depending on whether your RV toilet needs to be connected to a waste holding tank or not, the installation process may differ. RV toilet installation doesn’t have to mean spending a lot of money on a costly professional for repairs or installation. If you know how to install an RV toilet, you can complete the task in a few hours with just some simple tools!
We recommend that you follow the manufacturer’s instructions carefully or outsource the job to a professional, if in doubt. You can also find many video tutorials online (particularly on YouTube) which can steer you in the right direction.

Items Needed for RV Toilet Replacement:
- New RV Toilet including installation kit
- Screw driver
- Wrench
- Rags
- Old Towels & Newspaper
Here are the 6 steps to install an RV toilet:
1.) Make sure your water is off
Clean around your toilet and remove stuff that’s in the way. This will make the job easier, since as we know space is at a premium in an RV. Then, turn off the water pump and flush the toilet to remove all the pressure and water in your water lines and toilet bowl. Use some rags to dry out the bowl.
2.) Remove your old toilet
Once that is complete, you’re ready to remove the old toilet. Look for a plastic cover on the bottom of the toilet. It could be on either side of the toilet, or even be wrapped around the bottom of it. Pull it up. If it seems stuck, pull it towards you. You should now see nuts and bolts that are holding the toilet down. Go ahead and unscrew each of the nuts and bolts holding it down.
Next, lean over the toilet and look at the back of it, you should see a hose connected to the toilet. Unscrew any nuts and bolts that are there. You want to disconnect the hose. Get those old towels or newspapers ready. Lift the toilet straight up to remove it, rocking if it is hard to pull.
You should find a place to put the toilet once you remove it from its mounting – either right where you’re going to dispose of it, or on top of old newspapers, rags, or towels.
3.) Drain your tank
Drain your RV waste tank completely, as you don’t want to remove any old plumbing connections with the waste tank full. You’ll want to wear rubber gloves for your safety during this step, and make sure not to touch your eyes or mouth. Once you remove the gloves, make sure to wash your hands thoroughly.
4.) Remove the old gasket & install a new one
Next, remove the rubber, cone-shaped gasket that seals the RV toilet to the floor. If it’s stubborn, you may need to pry it off with a screwdriver. Once it’s removed, you can clean up any gunk still left on the floor, and then install the new gasket (which should have come with your new RV toilet).
5.) Install your new toilet
Now is the time for the actual RV toilet install! Carefully place the new RV toilet on top of the gasket ring, making sure to line up the mounting holes so that the new bolts fit into the old holes. Once it’s placed, use the wrench and tighten the nuts over the bolts, taking care not to overtighten. Then check to make sure the toilet is snug by sitting on it and making sure it doesn’t wobble.
6.) Reattach your hose
Next, it’s time to attach the hose behind the toilet, again making sure not to overtighten it. Once that is attached, it’s time to check your work and find out if you really know how to install an RV toilet! Turn the RV water pump on and flush a few times, checking thoroughly for leaks. If you spot a leak, go back through the steps and check your work again, tightening bolts and the hose without going too tight.
How to Use an RV Toilet
Most toilets are either foot flush or hand flush. Flushing with the lever on the side will fill the toilet bowl with water, then flush it all away through the hole as it opens. The foot flush has two levels. When you push the flush down partially, the bowl fills with water. When you push the pedal to the floor, the toilet opens up and flushes the waste away into the tank. RV toilets are equipped with RV toilet valves which seal off the black tank so odors are locked away.
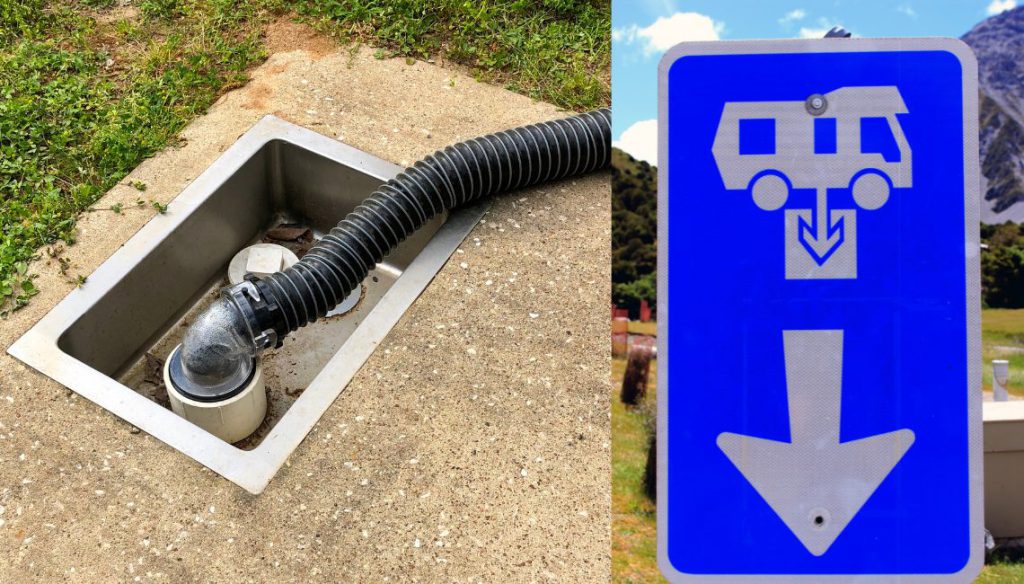
The waste is held in what folks call a black tank. These tanks must be emptied regularly and there are approved sites and locations to do this. They’re typically found at campsites, but certain rest stops will have stations for waste dumping as well.
RV Toilet Parts and Replacements
If you are a newcomer to the marvelous world of RVing, there’s no doubt that you’ll want to educate yourself on this fascinating subject!
Let’s face reality, no one wants to be enclosed in an RV with people who do not know how to flush the toilet…That is undoubtedly a recipe for disaster. If you happen to be inexperienced in this field, you have come to the right place! Here are some brief descriptions pertaining to the primary RV toilet parts:
Seat & Cover:
This RV toilet part is perhaps the most simple to understand. Keep in mind that it’s extremely important to maintain the cleanliness of this specific component, as this will prove effective in fighting bacterias that can lead to illness. All things considered, it may be in your best interest to keep the cover in a downward position when the toilet is not in use. This action alone will help avoid any unpleasant scents.
Seal & Valve:
The main purpose of the toilet seal and valve is to serve as a barrier. The seal prevents any stenches that are built up in the sewage holding tank from entering the main cabin of the RV. If at any point in time the seal and valve fail to hold water (which occurs when the seal dries out), this part may need to be replaced.
One of the most common repairs your RV toilet will require is a new RV toilet seal. Common wear and tear will necessitate this repair, but it’s one of those tasks you can easily accomplish yourself without having to pay a professional.
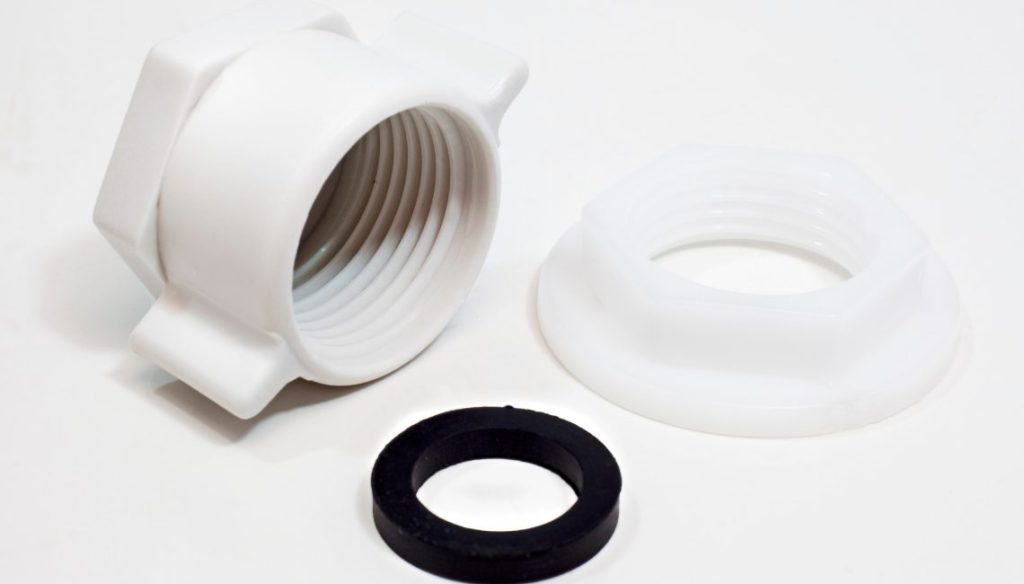
Replacing a Seal
Step #1 Purchase a replacement seal. These are commonly available online and most are universal fits. Seals can be replaced once the toilet has been removed and separated as described above. Seal kits are usually just $15 to $20 online.
Step #2 Once the water is off and disconnected, just unbolt your toilet from the floor and move the whole unit aside; it will probably be easier if you have someone to help you lift and move it. Remove the old seal; if it’s really old or damaged, it should lift right up and off. However, if it doesn’t, you can use a flathead screwdriver to gently pry it off. Take your time with this so you don’t damage the RV toilet flange.
Step 3: After you get the old seal off, clean the flange, put in the new seal and use some pipe sealant to make sure it’s seated properly. Let the sealant set a bit. Check the product label for setting times, but it should not take too long, as pipe sealant never really dries out completely. Finally, re-bolt the toilet to the floor, reconnect the water, turn it back on and you should be ready to go.
Foot Pedal Flush:
In contrast to your toilet at home, most RV toilets have a foot pedal flush as opposed to the conventional handle flush. It’s important to understand that the functionalities of these foot pedals can differ for each toilet. Some foot pedal flush toilets require the user to step on the pedal to flush the liquids, and then lift up the pedal to fill the bowl with water. On the other hand, other foot pedal flush toilers require the user to step halfway down to fill it with water, and fully step down in order to flush. Regardless of how the foot pedal operates, it may require some trial and error when determining how each one behaves.
Hand Flush:
The only major difference between the hand flush and the foot pedal flush is the appearance and location on the toilet. Furthermore, this hand flush device operates similarly to the foot pedal device. If the user wishes to fill the toilet bowl with water, they must press the device halfway. Alternatively, if they wish to flush, they must press the device fully. All in all, this device replicates the same functionalities as the foot pedal flush.
Water Module:
The sole purpose of this mechanism is to connect the toilet to the water supply. Without this device, there would be no water available for the toilet to use. Out of all the existent RV toilet parts, the water module has proven to be a primary cause for leaks. Fortunately, RV toilet manufacturers assist their customers with RV toilet repair parts. Overall, they are fairly simple to replace and there is no shortage of these prepackaged repair parts.
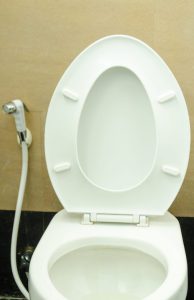
Hand Spray Kit:
In some cases, the water pressure that results from the flush of the toilet may not be enough to fully cleanse the dirty remains. This is where the hand spray kit proves to be handy. When the lever behind the nozzle is pressed down, water is sprayed at the essential pressure to help remove any additional particles that were left behind after the flush.
Toilet Riser:
RV toilets are usually lower to the ground than toilets found in the home. This is an easy way to save space. But RV toilet risers are available to add a few inches to the tank so that taller individuals are able to sit comfortably. Seat risers are available online and can be added to the seat itself or to the base of the toilet. You can make this improvement on your own rather easily.
How do I go about fixing my RV toilet?
Simply put, when it comes to fixing your RV toilet, the first step entails targeting the issue. Once the issue has been identified, it is imperative to identify the toilet part that is causing this issue.
Overall, the manufacturers of RV toilets distribute RV toilet repair parts for the numerous components of their toilets. In general, it is safe to assume that these manufacturers (ie. Thetford) offer all the parts that were previously described above in prepackaged toilet repair kits. In short, once you tackle the cause of a deficiency in your toilet, you can easily order replacement parts.
Unfortunately, there is one common concern that arises in many RV toilets that cannot be fixed by simply ordering a replacement part. This issue is commonly known as “toilet clogging”. It’s important to understand that there are a variety of simple approaches to this problem, including toilet plungers, augers, and septic-safe chemicals. Many suggest that if these three approaches fail to serve their purpose, you should move on to executing the “power wash” method. In brief, this method requires you to use a hose to power wash all of the septic materials out of the sewage holding tank. Keep in mind that the hose you use for this method, will not be available for further use.
Luckily, there is a highly-acclaimed method that is inexpensive and works effectively. This process is as follows:
The Hot Water Method
Step 1… Turn off the water connection! This is a very important step as it will avoid any unnecessary damage or mess.
Step 2… Fill up a pot with water and heat until rapidly boiling.
Step 3… Pour the boiling water into the toilet bowl.
You may be asking yourself, “is it really that simple?” The answer is YES! Generally speaking, you do not need to purchase any supplies in order to restore this issue. All you need is a pot of boiling water and you are good to go!
RV Toilet Repair Kits
It’s helpful to know that just about every manufacturer of RV toilets makes repair kits for almost any issue you might encounter. You can contact the manufacturer to order them, and each kit should contain all of the parts you need to resolve your issue: screws, replacement parts, gaskets and so on.
All you need to provide are a few basic tools. It may not be a bad idea to have one or two of these kits stored away in your RV so you’re prepared in case something does go wrong.
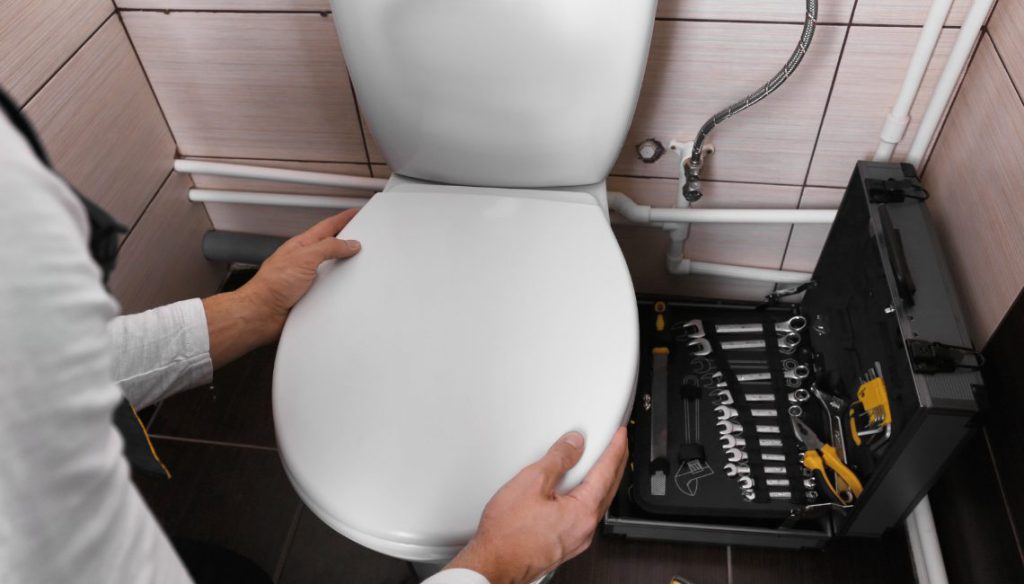
When to Replace Your RV Toilet Seat
While a worn out seat on your RV toilet may be a less pressing concern than a leaking seal, it’s still an important part of the whole operation. If your seat is in need of replacement, or if the one you currently have is just not very comfortable, it’s not a bad idea to swap it out. This is a relatively simple fix, and it’s an affordable one at that.
As with any other component of your RV toilet though, before you make your purchase, you will want to make sure that the seat you’re buying is compatible with your commode. Keep in mind that most standard toilet seats (like the ones you put on a toilet in your home) are not compatible with RV toilets.
RV Toilet Smells When Flushed
Don’t get us wrong, we think RVing is a wonderful way to travel… but it isn’t perfect. Part of the reality of living in such a small space is dealing with odors. And, let’s be completely frank: in an RV, you’re literally toting your own waste along with you for the ride. Add in a little bit of heat and time, and it’s no wonder you could be dealing with a smelly situation! RVs aren’t very big spaces. For this reason, when a stinky smell is present, it makes itself known all throughout the tiny home in no time at all.
Unfortunately, there are several different things that can cause a stink in a motorhome or travel trailer. Full trash cans, dirty dishes, and even a full gray tank can all create unpleasant odors that waft through the rooms of your home-on-wheels. Perhaps the most offensive of all, however, is when your camper smells like sewage—a smell that almost always comes from the RV toilet.
RV toilet odor can have a few different causes. Fortunately, the majority of these issues are relatively easy to deal with, meaning you can get rid of the smell fairly quickly and without much headache.
Reasons Why Your RV Toilet Smells
The first thing you’ll need to know is the reason why your camper toilet smells bad. After all, you can’t very well fix a problem without knowing exactly what the cause is. Below are the 5 most common reasons an RV toilet smells when flushed.
Dirty Toilet
The first problem is also the easiest to fix. Sometimes, RV toilets—especially those of the plastic variety—will hold onto smells. The longer you wait to clean the toilet, the more stink it’ll hold onto, until eventually the smell fills the entire RV.
Fortunately, this is super easy to fix. A simple cleaning with your favorite household bathroom cleaner should get rid of the smell in no time. Just be sure you get every nook and cranny.
Clogged Black Tank
A clogged black tank is another common problem, and this one is not quite so easy to deal with. If you have a clogged tank, it won’t dump completely—or at all, sometimes—meaning you’re left with old sewage hanging out in your tank for days, weeks, or even months on end. Obviously, this isn’t going to start smelling any better anytime soon. Therefore, you’re going to have to address the clog.
Usually, a clog is caused by too much toilet paper and not enough water. Sometimes this means you aren’t flushing long enough; other times it’s because the dump valve was left open, allowing all liquids to leave the tank and leaving just the solids behind. A leaky black tank can also cause this same issue. Of course, it could also be caused by something being flushed that should not have been.
In any case, there are a number of methods for getting rid of such clogs:
- Some people will dump a bag of ice down the toilet and drive the RV around, allowing the ice to break up the clog.
- Others use special black tank chemicals to attempt to break up the clog.
- We’ve even heard of people using boiling water.
Our favorite method, however, is to backflush the tank using a gadget such as this. Just make sure your tank isn’t full already, as spraying more water into a full tank may cause it to back up into the toilet and your RV bathroom.

Clogged Vent Pipe
It’s important to check your RV toilet vent from time to time. Sometimes the problem isn’t a clog in your tank, but rather a clog in the vent pipe. Indicators to look out for include gurgling noises, slow drainage, and bad odors.
You see, every RV has a pipe from the black tank to the roof, allowing methane gases to escape. If this vent becomes clogged, those gases can’t escape through the roof, and will instead come up out of the toilet when you flush. As you might imagine, this does not smell good.
Here’s what to do:
Step #1 Get on the roof and inspect the vent. If the vent has a cap on it, remove it immediately. Caps are sometimes placed on a vent during the winterization process.
Step #2 To check a vent pipe for clogs and get rid of anything that could be obstructing the airflow, simply use a garden hose or power washer to run some water through it and dislodge any blockages.
Step #4 If the previous step doesn’t work, grab a drill and connect a toilet cable snake (available on Amazon.com) to the bit. Push the snake down the vent, and turn the drill on. Move the snake up and down, in order to remove any blockage from the pipe.
Step #5 If everything looks good, but the smell continues, consider purchasing a ventilation assistant. A ventilation assistant connects to the vent pipe and blocks the wind, which will sometimes blow gases back down into the rig. (Instead of up and out!)
Tank Buildup
Occasionally an RV toilet stinks because of buildup in the black tank. This might be a large buildup of solids on the bottom of the tank, or just buildup along the walls of the tank from regular use.
As with clogs, solid buildups tend to be caused by too many solids and not enough liquid in the tank. This can be avoided by keeping your dump valve closed, ensuring your tank doesn’t leak, and using plenty of water when flushing.
A solid buildup can be gotten rid of using the same methods you might use to get rid of a clog. Once again, we highly recommend backflushing.
Unfortunately, general buildup on the walls and bottom of the tank cannot be avoided. Instead, walls must be cleaned regularly in order to avoid a stink. You can clean these walls by flushing the tank and using tank cleaning agents such as Aqua-Kem.
Bad Toilet Flange or Bowl Seal
The last possibility is that your toilet needs a new flange or bowl seal. Both of these seals have a tendency to become worn over time, something that can cause bad camper toilet smells.
If you notice that your toilet bowl won’t hold water, it’s likely that you have a bad seal that is also allowing stinky black tanks smells into the RV. Meanwhile, a leak around the bottom of the toilet would indicate a worn gasket that could be letting smells in.
How to Keep Your RV Toilet from Smelling- 6 Easy Steps
Clearly, you won’t want those smells to return once you get rid of them. Fortunately, it’s easy enough to avoid RV toilet smells. If you’re wondering how to keep your RV toilet from smelling, make sure to follow these 6 easy steps to ensure you are keeping up with routine maintenance.
- Keep the black tank closed.
- Use plenty of water when flushing.
- Add chemicals to your tank after every dump.
- Flush out the black tank after every dump.
- Keep your toilet clean.
- Check the vent pipe regularly.
RV Air Freshener
First of all, there are a few simple steps you can follow in the bathroom that can really help eliminate RV toilet odor.
For instance, pay attention to your camper roof vents. Although they’re great at eliminating odors in general, it’s a good idea to close the rooftop vent when you’re actually flushing the toilet. Think about it: you’re opening up the valve and exposing the tank below, and the vent will pull all those fumes straight up and into your RV’s atmosphere like a vacuum!
Also, be sure to use an appropriate amount of water when you’re flushing your RV’s toilet, as water helps activate any odor eliminator chemicals and also naturally helps to block waste odors on its own.
Another thing that can really help minimize RV toilet tank odors is simply keeping the tanks as clean as possible between dumps. This can also help regulate your RV’s holding tank sensors, so you’ll be able to tell for sure how full your tanks are.
But when it comes to the heavy lifting of RV odor elimination, you’re going to have to add some extra items to the tank itself.

Best Odor Eliminator for RV
With so many RV holding tank treatments to choose from, which is the best? When staring down all the options in the store aisle, it can be difficult to know which RV odor eliminator kit will take care of the job most efficiently.
Commercial RV odor eliminators come in lots of different styles and types, from gels and liquids to powders. No matter which kind or brand you choose, the idea behind why they work is similar: The chemicals, when combined with water, not only help combat unpleasant smells but also help to break down solid waste and toilet tissue, which makes flushing your rig’s tank much easier.
Happy Campers offers an all natural and organic cleaning and deodorizing product that is easy to use and just plain works. We like their product because it’s a natural formula that is Environmentally friendly, 100% Biodegradable, 100% Organic, and with no formaldehyde.
RV Odor Eliminator Ingredients
That’s right: you can make your own, homemade RV tank deodorizer. In fact, it’s pretty darn simple to do!
There are many different recipes available online for homemade RV odor eliminators. All of them are designed with the same purpose in mind: to combat odors and also to help break down solid waste to keep your RV’s holding tank and pipes in good, working order.
Many campers like making their own toilet tank odor eliminators because it’s more natural and they have complete control over the ingredients. (This is especially relevant if you have small children on board, who might think those brightly-colored commercial chemicals look good to drink — not good!)
For others, the decision to concoct their own odor eliminating potion is a simple one: It’s cheaper! But either way, you’ll have to experiment with different ingredients and recipes and figure out which one works best for you.
Here are a few DIY RV odor eliminator ideas from campers around the web:
- A Three-Ingredient RV Holding Tank Deodorizer written by Rene Agredano
- Make Your Own RV Holding Tank Deodorizer — a YouTube video by Vern Six
- An Easy and Inexpensive Recipe from the good folks at Hometalk
You’ll notice that all of these homemade concoctions generally call for the same basic components — some sort of mild soap, which cleans the tank and keeps down odor, and a water softener, which helps liquefy solids.
Play around with a few different versions, or maybe even come up with your own!
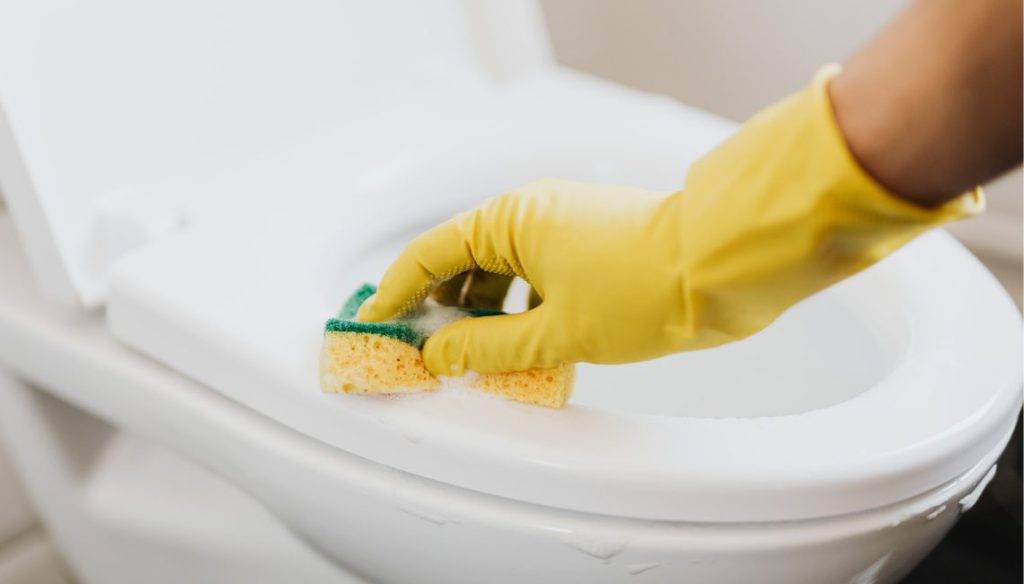
Cleaning your RV Toilet
Should you encounter an RV toilet smell, you might need to clean your black water valve. Some folks have found that an at-home remedy mixing Dawn soap and Calgon water softener will easily flush the smell right away. Commercial cleaners are also available.
You might also need to replace the RV toilet vent cap. Replace a vent cap with 360 siphons. This will pump the odors up out of the holding tanks and out of the RV before they can make your motorhome smell. This is another easy DIY method and parts can be found online.
Because RV toilets are weaker than average toilets, it may be difficult for the water to keep the bowl clean of solids and stains. RV toilet wands are used to spray pressurized water into the bowl for occasional cleaning. You can purchase these inexpensive upgrades online.
5 Steps to Using and Understanding RV Toilet Chemicals
1. What are RV Toilet Chemicals?
RV toilet chemicals are bacteria or enzyme compositions that are added to an RV black water tank to aid in breaking down waste and tissue. The break down of waste and tissue allows the black water tank to be emptied more easily and helps to prevent the clumping of materials in the tank, which can sometimes lead to blockage. An added bonus in this process of breaking down waste and tissue is that RV toilet chemicals also help to eliminate odors in the tank, and ultimately in the RV as a whole.
2. Why do I need RV toilet chemicals?
The toilet in your house uses a large volume of water to flush waste down a long pipe and into your home or municipal septic system. In doing so, it carries the waste far away from the toilet to be deposited. Carrying away the waste also carries away the odors from your bathroom.
In contrast, an RV toilet uses a relatively small amount of water to flush waste down to a black-water tank. In most cases, that RV black water tank is probably only a few feet away from where the waste is deposited, so it is easy for unpleasant odors to make their way back up into the bathroom area.
Additionally, because that RV black water tank is affixed to a moving RV, the contents of it get jostled around, which also adds to the perfect storm that can potentially cause a giant stink.
3. In what form are RV toilet chemicals available?
RV toilet chemicals are available in two basic forms: as a liquid, or in dissolving packets or tablets.
Liquid toilet chemicals are added directly to the black water tank by flushing it down the toilet. There are different types of liquid chemicals, so consult the packaging for specific instructions. In general, you will only need a couple of ounces of liquid RV toilet chemical for each application.
Dissolving tablets or packets generally contain a powder which then dissolves into the existing water in the black water tank. The result is the same as with the liquid chemicals, but many people find the packets to be more convenient, while also preventing the chance of spills.

Regardless of the form of toilet chemical you use, the best RV toilet chemicals will not stain your toilet, are biodegradable, and environmentally friendly. Typical brands of RV toilet chemicals you can look for are Camco TST RV Toilet Treatment, Cabin Obsession , Porta-Pak and Aqua-Kem RV toilet chemicals.
4. How should I use RV toilet chemicals?
For our purposes, let’s assume you are starting with a completely empty and clean RV black water tank.
The first thing you want to do before you add any RV toilet chemicals to the black water tank is to add a few gallons of water to the tank so that there’s a good base of water in the tank.
This is very important: Never use your RV toilet without a good base of water in the black water tank. Doing so could result in the clumping of waste in your tank which can lead to false meter readings or, worse, clogs.
Once you have a base of a couple of gallons of water in your black tank, simply press down on the flushing valve for your toilet and dump the liquid chemical down the toilet, or add the RV toilet tablets.
Your RV toilet is now ready to use.
5. Are there other kinds of RV Toilet Chemicals I should be aware of?
I’m glad you asked. There two other types of RV toilet chemicals that may come in handy.
The first is RV toilet bowl cleaner. RV toilets are generally made of plastic. They also have a rubber ring that seals the bowl when the valve is closed. Because of these materials, it’s important when cleaning an RV toiler to only use chemicals that are specially formulated for RV toilets. That way you won’t stain the toilet, and you can be sure they are safe for plastics and rubber seals.
The other RV toilet chemical that you may find a use for has more to do with cleaning your black water tank. If you’ve owned an RV for any amount of time, you know that the gauges that tell you how full or empty your tank is at any given time are pretty unreliable. The reason for this is that after several uses, pieces of waste, tissue, or even hairs, get caught on the sensors and send false readings to the gauges.
To help combat this, there are special cleaners that are concentrated to break down materials that could be causing false readings on your tank sensors. These cleaners are called RV level gauge cleaners or RV probe cleaners and can be found at your local RV supply store or on Amazon.
Is Your RV Toilet Leaking?
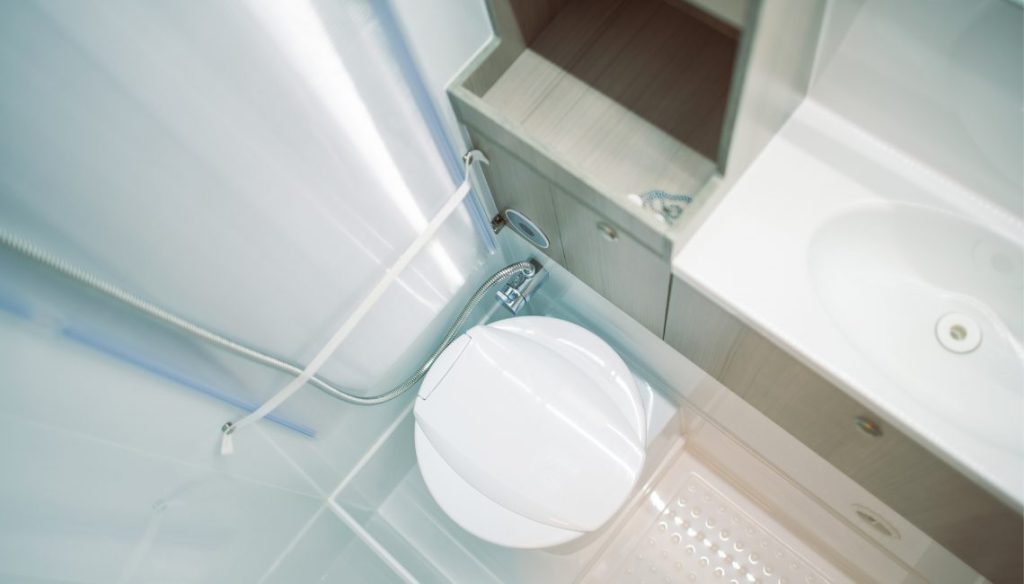
There are few problems that an RV owner dreads more than an RV toilet leaking. RV toilets need special care and are different than your regular sticks and brick unit. So why is your RV toilet leaking and what can you do about it?
First, look for any of these symptoms and determine exactly where the water is coming from: Is the water dripping from the upper part of the toilet during the flush cycle? Is the water leaking when the bowl is full? Is the water only around the base of the toilet?
Once you determine where the RV toilet is leaking you can decide what to do.
Let’s say your RV toilet leak is coming from the upper part of the toilet usually during the flush cycle. This could mean that your float seal in the vacuum breaker is not working right. If the seal breaks it will not hold water the right way and will cause a leak. Some toilets need you to buy a kit and replace the float seal. Other models must be taken apart and cleaned. Check with your manufacturer to see which is the best option for your RV toilet.
Sometimes a toilet seal will dry out over time and develop a slow, gradual leak. To prevent this you can coat the seal with vaseline using rubber gloves. You can also choose to use a substance called Plumber Grease. Keeping the seal moist may solve your problems or it may just be a good preventative measure.
Now let’s pretend that the RV toilet leaking only happens when the bowl is full of water. The first thing you want to do is inspect the unit for cracks. A crack above the normal usage area will cause a leak and it can often happen after winterization. This often happens with plastic toilets. If your toilet is porcelain it can still crack, but it doesn’t happen after winterizing.
The most common type of leak is the floor leak. Water will be coming from the base of the toilet usually after the flush is complete. Sometimes, it will leak without a flush cycle. If this is the case, you may need to replace the flange. The flange is the piece of wax or plastic that goes under the toilet and connects to the floor.
It is possible that a leak can be coming from the water connection at the back of the toilet. Check to make sure the connection of the water inlet valve is tight.
This post contains affiliate links. RVshare may receive compensation if you make a purchase after clicking on a product link.
For more tips, check out The Best 5 RV Toilet Paper Brands to buy
